Elden Ring is considered the most beginner-friendly among the notoriously difficult library of games created by FromSoftware. It is also the ultimate game for long-time fans of the Souls Franchise.
No wonder it broke all the sales records and was the most talked about game of 2022.
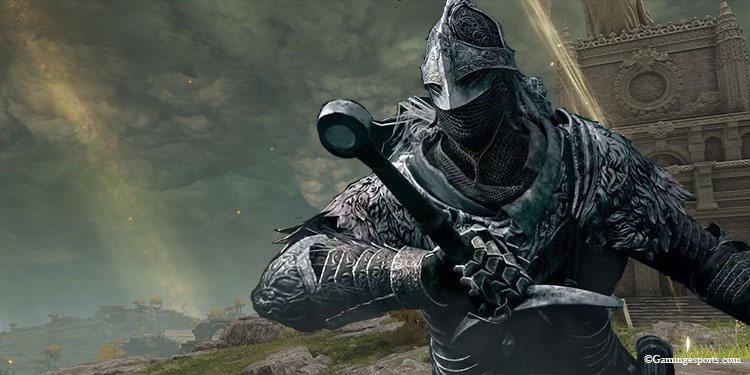
We’re here to guide you along the way in your journey through the Lands Between as a Tarnished who is seeking their path to greatness.
This comprehensive guide brings together all the essential information that first-timers need to know to experience the game in its full glory.
Table of Contents
Choose Starting Class and Keepsake
Similar to all other Souls games, the first thing you do is choose a starting class. As each class comes with its own set of equipment, it is absolutely necessary for you to choose a starting class that suits your specific playstyle.
Although you can always change and build your character differently later on, choosing a starting class and building it properly can always reduce the hassle.
As of now, there are ten starting classes you can pick. The Wretch starts lowest at level 1, whereas Confessor starts at level 10.
Regardless of the stat distribution in the beginning, all classes will have a total of 89 stat points when they are at level 10.
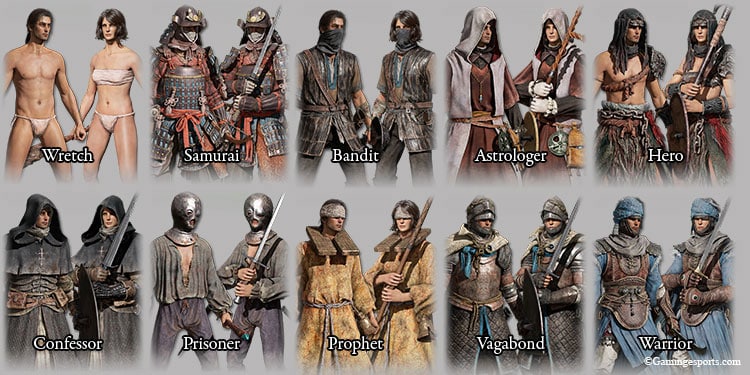
The best-starting Class to pick depends on how you want to build your character,
- Beginner’s Class – Vagabond is the best choice as it comes with decent armor and weapons, with stat allocation focus on survivability. This makes it ideal for beginners who have just entered the Elden Ring.
- Best for PvP – Wretch is the best class for experienced players who want to focus on the PvP portion of the game. If you are a beginner, do not pick the Wretch at first because they come with no equipment except for the wooden club weapon.
- Magic Builds– Astrologer or Prisoner class are the best if you are up for the sorcery build. Likewise, choose Confessor or Prophet for casting incantations.
- Dexterity Builds– If you want to wield agile weapons to rip apart foes quickly, Samurai or Warrior classes are recommended as they come with high dexterity.
- Strength builds– Hero Class comes with the highest STR stat. So, if you want to use Humongous weapons later in the game, start as hero class.
- Bleed or Poison Build– Bandit comes with the highest Arcane Stat, which is valuable if you are trying to play a class focused on status effects. Bandit also comes with one of the best parrying shields, i.e., the buckler, with a special buckler parry.
Just like classes, you can pick one of the nine keepsakes available. No need to pick any if you don’t want to, but we don’t recommend that at all.
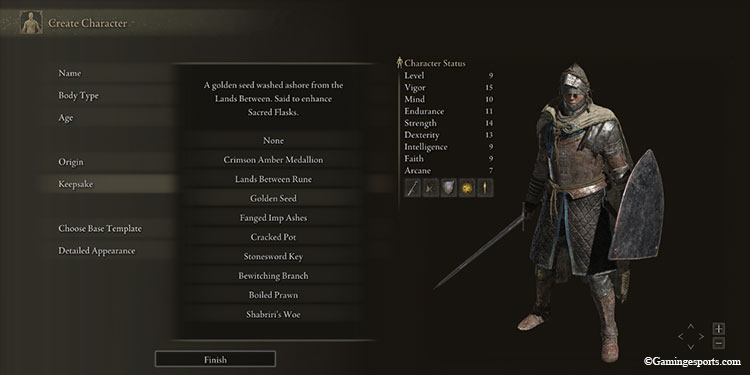
The best starting gifts or keepsakes are,
- Golden Seed– You can use it to increase the number of charges of your recovery flask. This is the most recommended keepsake to start the game with.
- Stonesword Key– These keys are used to unlock the sealed fog gates with a stone imp statue on the front, usually leading to items or dungeons.
- Lands Between Rune– This is a consumable that grants you 3000 Runes. You can use it to spend on level-ups or to purchase items from merchants.
Complete the Tutorial
Beginners can easily miss a tutorial area meant to introduce players to the mechanics of the game. Take a plunge into a deep hole to access this area.
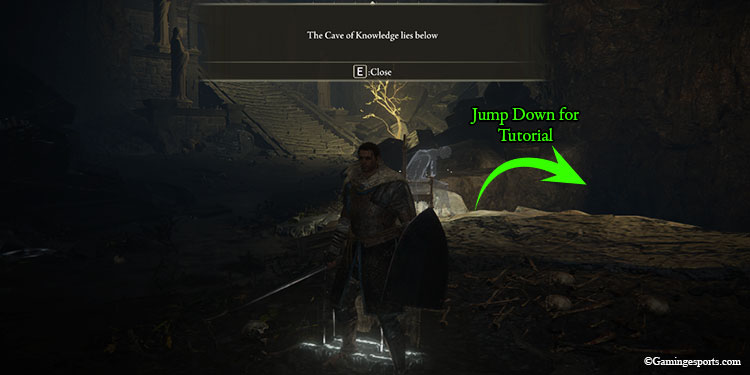
The tutorial area does not have much; it is meant to teach and remind us how to play the game. But if you complete it, you can meet an easy boss at its end and get some early Runes to start the game more comfortably.
Even if you have played a Souls game before, try to go to the tutorial area, as Elden Ring has introduced new mechanics like stealth, jumping, guard counters, etc.
Where to Go First?
Elden Ring is an open-world game, so you have the freedom to go anywhere you desire as soon as you set your foot on Limgrave. You will eventually reach any place that you see on the horizon. But the game does not leave you directionless.
Understand the Guiding Lights of Grace
The Sites of Grace are golden glowing checkpoints you will find all across the Lands Between. You rest at a Site of Grace in Elden Ring, just like how bonfires worked, if you have played any previous Dark Souls game.
Sites of Grace also guide you by projecting faint strands of glowing golden lights toward the direction the game intends you to go. Even if the game wants you to head in a particular direction, you can choose not to follow the guidance.
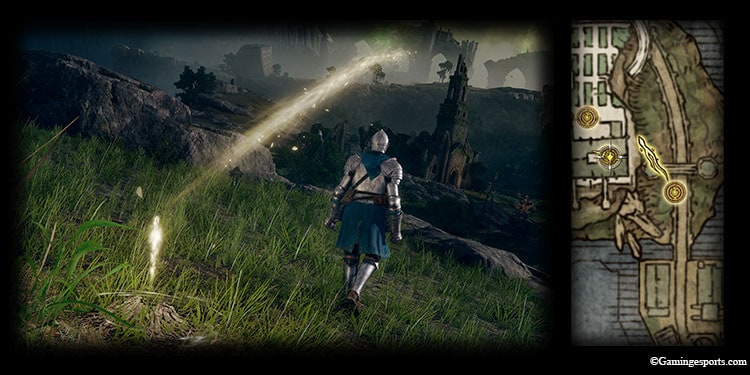
You can also check the map for guidance. This works even if you have not found the map fragment of the area yet. The game will still show you the Sites of Grace you have discovered, and it will also show the guiding lights of grace toward the direction you ought to head to.
Confused yet? Watch our complete video guide !
Get to the Church of Elleh
Now for a ideal situation, once you are past the tutorial area and outside at Limgrave, you should first head to the Church of Elleh. You will see a white-masked NPC when you head out into the Lands Between.
As in the souls game, do not attack a friendly NPC, as those NPCs will give you quests and rewards. This will be explained further on.
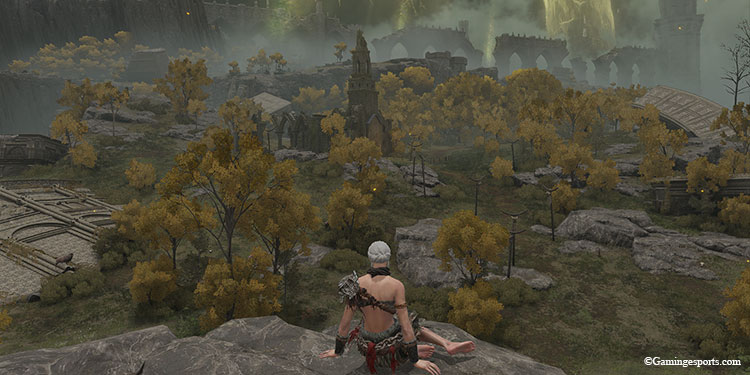
Head to the church building you see as soon as you leave the doorway. You will see a horseback Tree Sentinel on your way, and it’s best to avoid fighting him as he will kill a beginner quickly.
Once in the church, you will have two essential things. A smithing table and a merchant. The table also has a smithing stone that can be used to upgrade your weapon.
More importantly, talk to the merchant residing inside the Church of Elleh. You can buy some vital stuff like the Torch, the Crafting Kit, and the Cookbooks, and you can get Binoculars too if you are fond of sightseeing.
Remember to get the Cracked Pot as well if you are fond of crafting explosives.
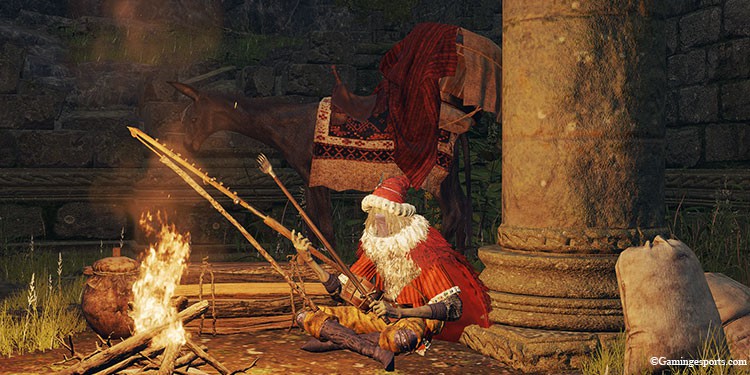
Meet Melina and Get Your Mount, Torrent
The next thing to do after you are done with the church of Elleh is to go north towards a military encampment in the Gatefront Ruins. There is a Site of Grace in front of the large stone gate, rest there to meet Melina.
Accept Melina’s proposal, and you can now level up. You will also get a whistle to call your mount the spectral Steed Torrent.
Level Up at a Site of Grace
After getting Torrent and forming an agreement with Melina, you can rest at any Sites of Grace and level up if you have the Runes to spend. Best to level up Vigor if you do not know where to allocate your points initially.
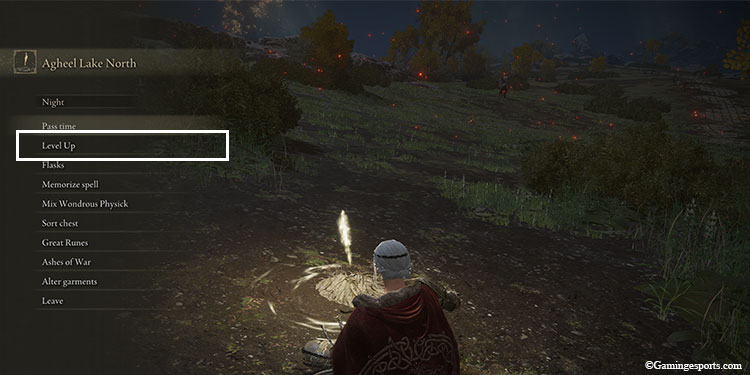
Once you find a weapon you like, you should start leveling up your stats to start using the weapon.
The next step with leveling up is by figuring out what build you like. Once you have a build in mind, level up your character towards that. We have a few build examples you might like.
Get the Spirit Calling Bell from Ranni
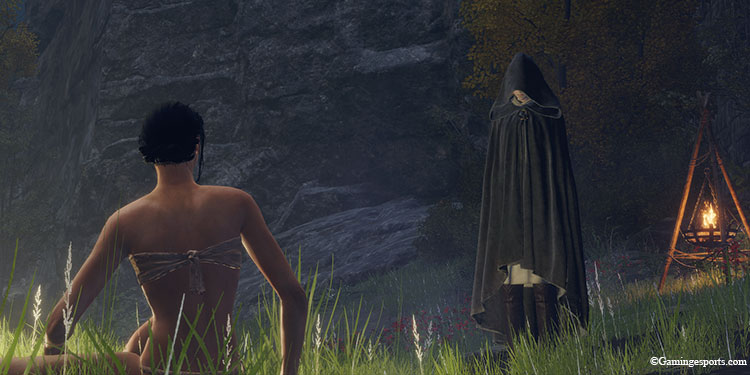
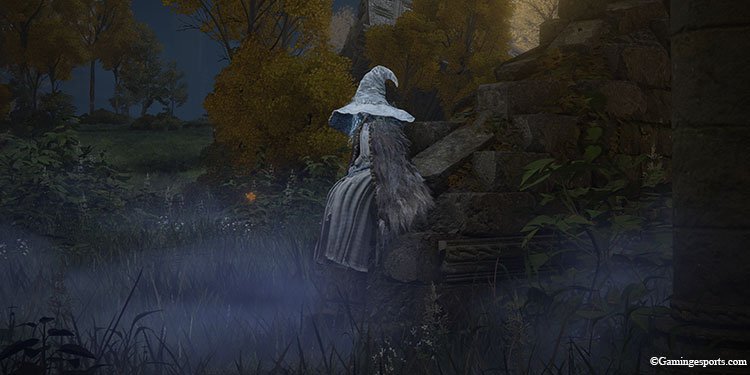
After you get Torrent, during the nighttime, you should head back to the Church of Elleh. There you will find the merchant fast asleep and a mysterious figure calling for you.
This person is Ranni, the witch. Talk to her to receive the Spirit calling bell, which summons Spirit Ashes and the Lone wolf Ashes.
Now you can equip the Lone Wolf Ashes in one of your item slots and summon three wolf companions to aid you in battle.
Get Map Fragments
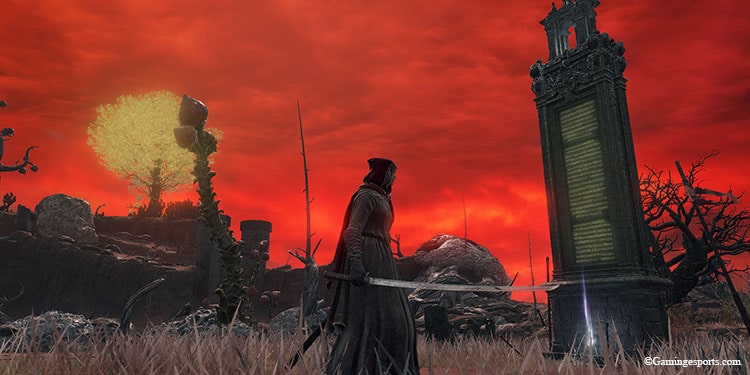
In the Gateway Ruins in the center, you can find a pedestal, from where you can obtain the map fragment of Limgrave. Before you take the Map Fragment item, go ahead and open your map, you will see the pedestal marked on the location.
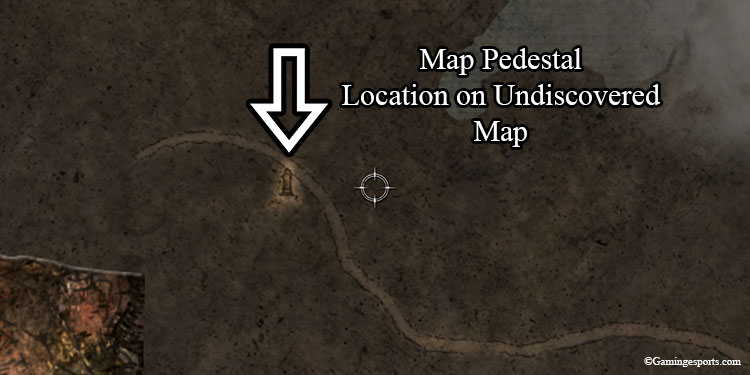
Remember, check your map when you are traveling through an uncharted area. It will usually mark the location from where you can obtain the map of the whole area if you reach close enough.
Get all the map fragments and unveil the whole map of Elden Ring.
Get Whetstone Knife
Now, let’s move on to more essentials you must grab from the initial area.
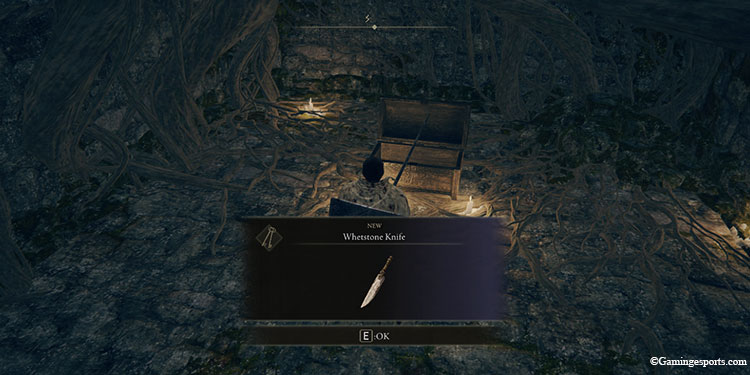
Underneath the Gateway Ruins, there is a tiny chamber. You can access it using a staircase leading underground.
There in the chamber is a treasure chest containing Whetstone Knife. This key item enables you to change the affinity of a weapon and give it a new ability called Ash of War when using it at a Site of Grace.
Find the Flask Of Wondrous Physick
Flask of Wondrous Physick allows you to make a potion that can produce various custom strengthening effects. To make the potion, you must combine two different Crystal Tears with different effects.
This Potion only has one charge, which can be refilled when you rest at a Site of Grace.
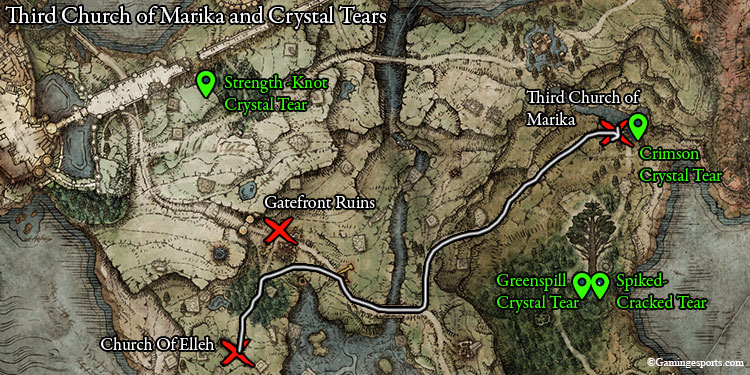
To obtain the Flask of Wondrous Physick, head to the Third Church of Marika. Follow the route marked on the Map to get to the Church and pick up this helpful item.
We will also mark the locations of some useful crystals you can combine to make your first potion.
Go to The Roundtable Hold
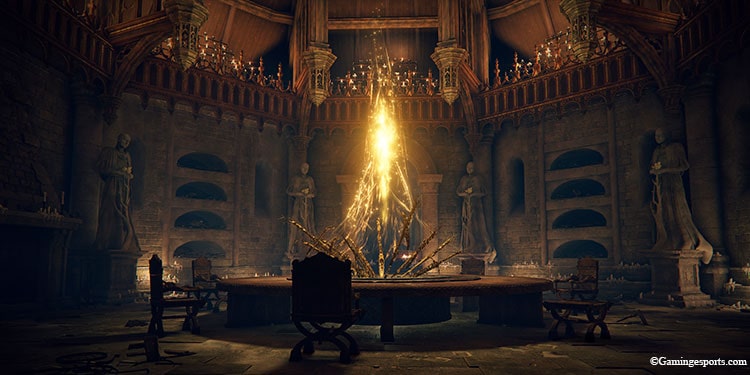
You can get to the central hub area of Elden Ring called the Roundtable Hold or the Table of Lost Grace once Melina invites you after some basic conditions are met. This is just like the Firelink Shrine in Dark Souls.
At the Roundtable hold, you will meet multiple NPC characters whose quests you can take on. You can find helpful merchants, a spirit tuner, and a blacksmith.
Additionally, you will even get invaded by NPCs in the Roundtable hold.
You can only fast-travel to reach the Roundtable Hold, so make sure you open your Map and scroll to the bottom left corner of the map to travel to the Roundtable Hold.
Find your First Powerful Weapon
Souls Games are no fun without cool weapons. You can find a few excellent weapons very early in the game. We will direct you towards them using a marked map.
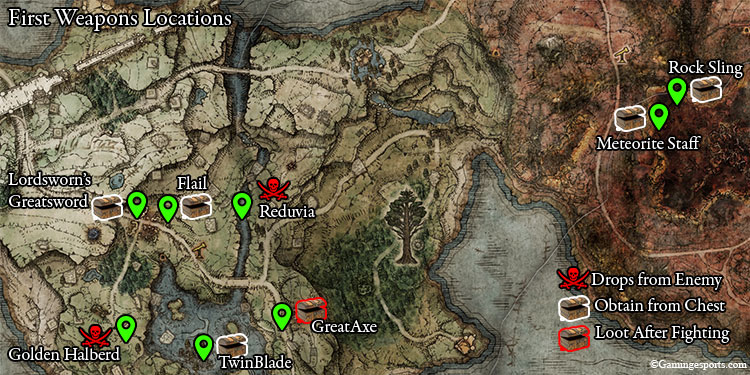
- LordSworn’s Greatsword – This is a nice greatsword you can find from a chest in a carriage located in front of the Large Gate in Gatefront Ruins, Limgrave. You can put a custom Ash of War in this weapon and infuse it to make it a lot better. If you are not a fan of the Greatsword, you can farm the Soldiers in the Gatefront Ruins to get LordSworn’s Straight Sword.
- Flail – At the eastern end of Gatefront Ruins, loot a chest inside a carriage to obtain Flail. This is a devastating blunt weapon. If your swords don’t damage an enemy, like the stone miners in caves, use this.
- Reduvia – This is a swift dagger that can shoot projectiles that damages and causes bleed. It is used by an Invader called Nerijus at Murkwater. Kill Nerijus, and he will drop this dagger.
- Meteorite Staff and Rock Sling – A lethal combo of an incredible staff and a potent magic spell. You can find both of these close by at the Swamp of Aeonia. We have a video guide at the end to direct you towards it. These two make a robust set for any sorcerer build.
- GreatAxe – You see a caravan of enemies led by two Giant trolls along the main road of Limgrave, which goes around the north of Lake Agheel. Stop this caravan, and loot the chest to obtain the GreatAxe. This is a very strong colossal weapon for anyone going for the Strength build.
- Golden Halberd – Slay the Horseback Tree Sentinel at the very beginning of Limgrave to obtain the Golden Halberd. You can wield it two-handed if you put some stats in Strength.
- TwinBlade – Get this swift weapon from an underground chamber in Dragon Burnt Ruins. Don’t mistake it for another underground chamber that contains the Transporter Trap Chest.
Find Your First Spirit Summons
There are a few strong Spirit Summons you can get pretty early, these can make a boss fight really easy if you know how to use them. We will guide you toward a few of them.
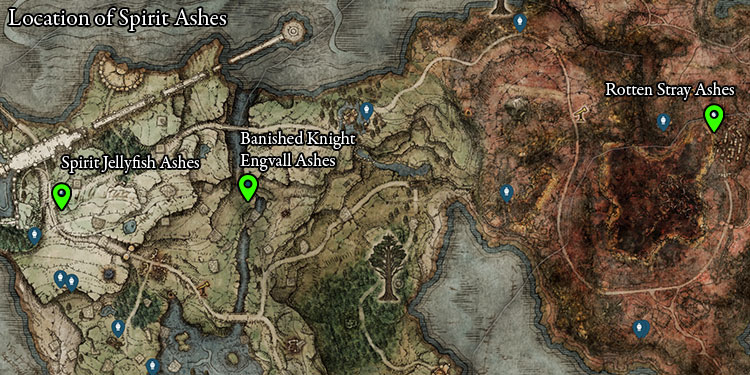
- Rotten Stray Ashes– This is my favorite early game spirit Ashes. Take the transporter trap to Caeild, escape the Sellia Crystal Tunnels, and go to Sellia Understairs Site of Grace to find Rotten Stray Ashes. This Rotten dog inflicts Scarlet Rot on your foes. Once you Rot them, sit back, dodge their attacks, and watch them die.
- JellyFish Ashes– Talk to Roderica(Red-hooded girl) in the StormHill Shack, and she will give you Jellyfish Ashes after the third conversation. Jellies function as an excellent tank to draw enemy aggro while you recuperate and defeat them.
- Banished Knight Engvall Ashes– Head deeper along the Ravine from Murkwater Cave. You will have to get past some Jellyfishes and Slimes to find the entrance to Murkwater Catacombs. Clear this catacomb to Obtain Banished Knight Engvall Ashes. Engvall is a strong solo Knight who can stand his ground for quite a while. Be aware, though he costs a hefty 100 FP, so you might not be able to use him right away.
Go to Limgrave Tunnels and Find Smithing Stones
Tunnels are vital locations to get the Upgrade Materials to strengthen your weapons.
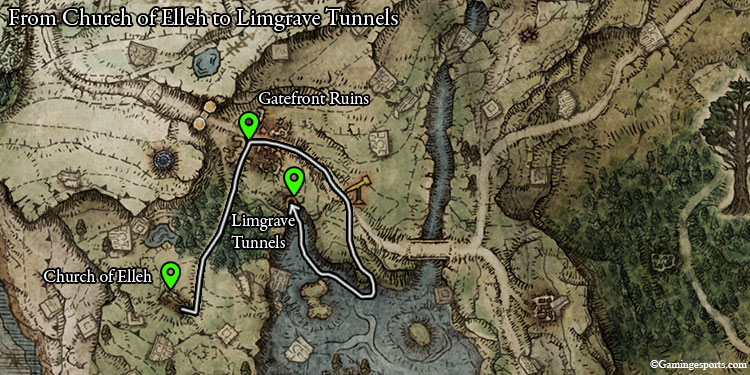
The first tunnel with mines is located on the northwest coast of Lake Agheel. Go there to gather Smithing Stones to upgrade your weapons. We have marked the location of Limgrave tunnels on the map.
Fight your First Boss
Once you have everything gathered and upgraded, you are prepared to fight the bosses. There are a few bosses you can take down now.

- Tree Sentinel: He is the horseback Golden Knight you meet as soon as you get out into Limgrave. If you are prepared, finish him.
- Margit the Fell Omen: He will be guarding the entrance of Stormveil Castle. Use everything at your disposal to get rid of him.
- Dungeon Bosses: Beastman of Farum Azula inside the Groveside Cave and Stonedigger Troll inside the Limgrave Tunnels can be killed early on. They are weaker than the above-mentioned bosses, so killing them should be easy work for you.
