Many people play video games for entertainment and recreation, while others make a living from it. However, games can be frustrating at times due to in-game errors and lags. Although game lag is not a new phenomenon. This can be difficult for professional gamers.
Professional gamers require a high-end system to ensure that their games run smoothly. But, not everyone can afford one.
Warzone stuttering can be caused by low-end hardware, older PCs, or a variety of other factors. We’ve compiled everything we need to know about why Warzone may be stuttering, as well as their fixes.
Why is Call of Duty Warzone Stuttering?
Call of Duty is a very demanding game. So, PCs with low or old specifications cannot even run the game. Even if the PC runs the game, the game will lag or stutter, making the game unplayable. Likewise, Warzone Stuttering can also happen due to various other reasons.
- The graphics card driver you are using may be outdated.
- You may have set game graphics higher than your PC can handle.
- The Windows version you are using may be outdated.
- Other applications may be running in the background.
- The game cache files may be overloaded.
How to Fix Call of Duty Warzone Stuttering?
As discussed earlier, Call of Duty needs a powerful machine to run smoothly. Your PC must have more than the minimum requirement to ensure lag-free gaming.
If you are unaware of the requirements, this is the minimum requirement for Call of Duty Warzone:
- CPU: Intel Core i3-4340 or AMD FX-6300
- RAM: 8 GB
- OS: Windows 7 64-Bit or Windows 10 64-Bit or Windows 11 64-Bit
- VIDEO CARD: NVIDIA GeForce GTX 670/NVIDIA GeForce GTX 1650/AMD Radeon HD 7950
- PIXEL SHADER: 5.0
- VERTEX SHADER: 5.0
- Internet: Broadband Connection
In addition to this, the game needs a good internet connection where you can get a low ping for smooth gameplay. So, make sure you have a good internet plan to sustain your gaming and get zero lag.
Now, even after having all the required requirements on your PC, your game still lags; try the fixes we have mentioned below.
Restart Your PC
Sometimes the game lags after you use your PC for a long time and start the game. Especially if you are on a laptop, there is a high chance your machine is heating, and when your start the game, it lags. Also, using lots of software or applications for a long time accumulates many cache files, which can slow your system.
So, try restarting your PC and once you boot your system, open only the game and see if it works. In case of heating, shut down your system and wait for some minutes before booting it.
Close All the Background Processes
Restarting your PC will close many applications that you have started. It will also delete or reset some temporary cache files from your system. However, some applications run on startup and run in the background.
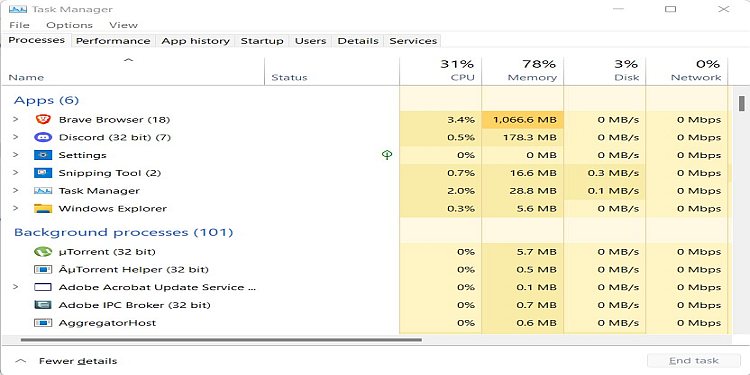
The applications take system memory and even graphic card power to run. Due to this, the game will not get the full power of your system and will lag. For this, you have to close all the background applications or processes manually. These are the steps to do so:
- Press “Ctrl + Shift + Esc” on your keyboard to open Task Manager.
- In the Task Manager, navigate to the “Processes” tab.
- Under Background Processes, right-click on applications you don’t need running in the background and click on “End Task.”
Update Windows
Many don’t realize that an updated Windows version is necessary to run the game smoothly. Call of Duty Warzone continuously gives updates, and some updates need an updated Windows version. Also, Windows gives some updates to increase performance.
Therefore, you must update your Windows for smooth gameplay. To update your Windows, follow these steps:
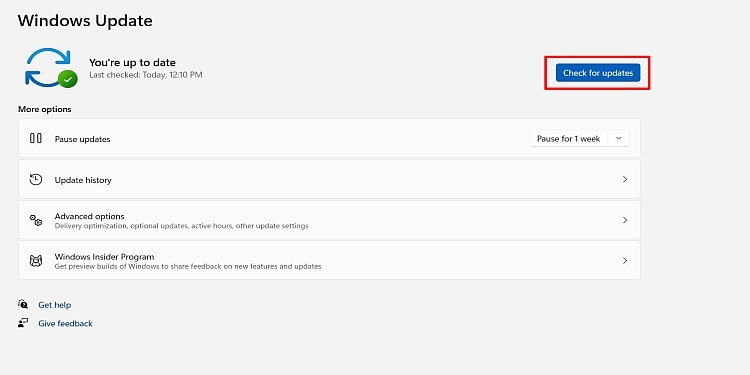
- Press the Windows Key on your keyboard.
- Now, search for “Windows Update Settings” and click on it.
- Click “Check for Updates” and download all the updates.
After updating windows, restart your system and start the game. If it does not solve the stuttering problem, go to the next fix.
Update Your Graphics Card Driver
After you update your Windows, it will update many system applications. Along with the system application, it also updates your integrated and discrete graphics driver. A discrete graphics card can be AMD or Nvidia, whereas the integrated graphics card comes with your AMD or Intel processor chip. No matter the manufacturer, Windows will update the graphics driver.
However, sometimes the updates from Windows updates are faulty or not up to date for the integrated graphics card. So, it is better to download the discrete graphics card(Nvidia and AMD) from their official site.
From the above links, you can download graphics driver software and then update your drivers easily. First install these apps and then follow the remaining process to Update your Nvidia Graphics Driver:
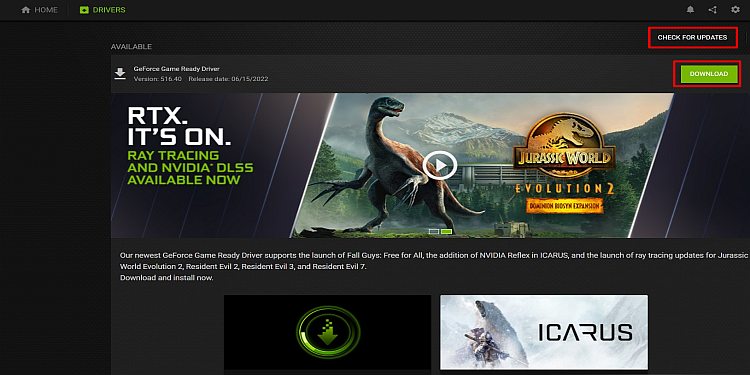
- First, start the Geforce Experience application.
- Navigate to the “Drivers” tab
.
- Click on “Check for Updates.”
- Now, it will search for new updates. If there is a new update, the download option will be visible. Click on “Download.”
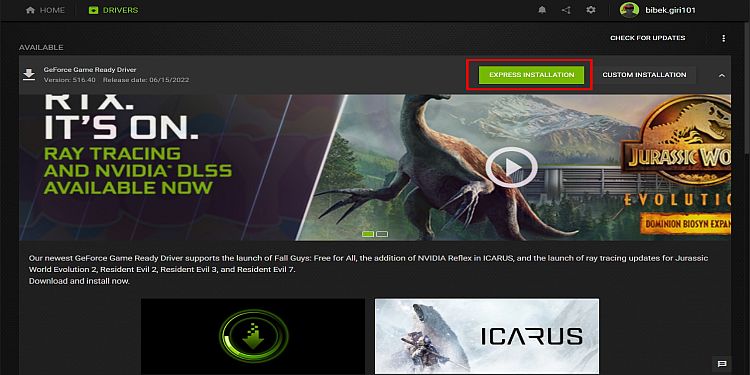
- After downloading the driver, click on “Express Installation.”
Apart from updating your graphics driver from Windows updates and applications, there is another way to update your graphics card driver from Device Manager
- Hold the Windows button and press R on your keyboard to open the Run command.
- Then, type “devmgmt.msc,” and press Enter.
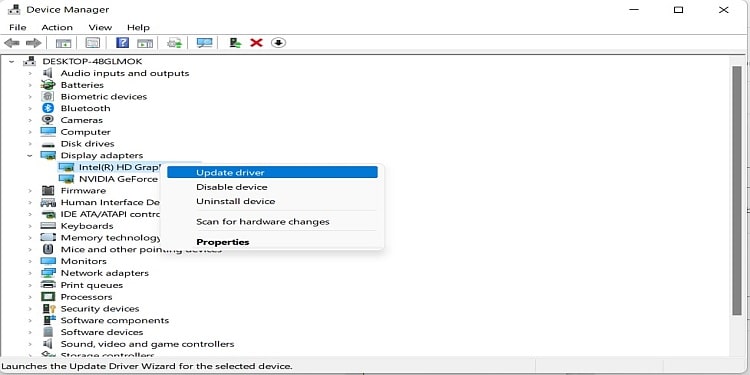
- Navigate to the “Display adapters” option and click on it.
- Right-click on all the graphics drivers available and click “Update driver.”
Use a Proper Power Plan for Your PC
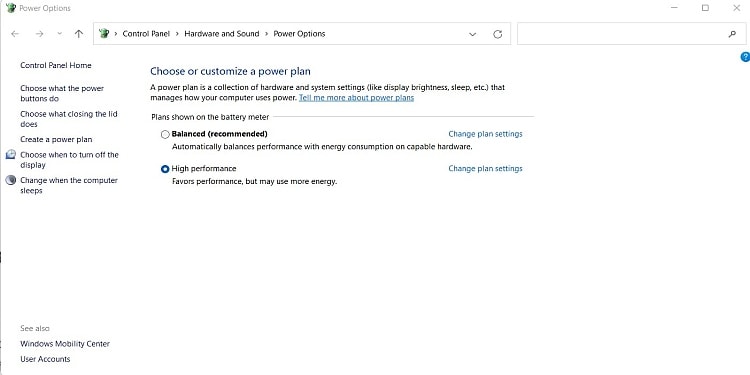
Your system is always on Balanced power mode to balance power-saving and performance. If you have a high-end PC, you don’t have to worry about the power plan of your system. But if your PC is not that good, you must change your power plan to high performance.
To change the power plan, follow these steps:
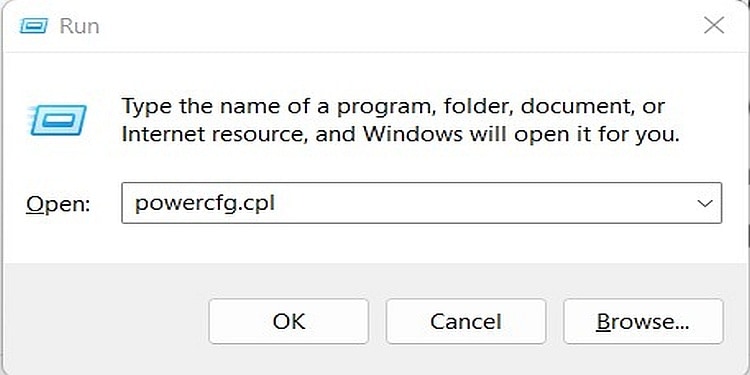
- Open the Run command on your PC and type “powercfg.cpl.”
- Then, power plan windows will open where you will see three power plan options, i.e., Power Saver, Balanced, and High Performance.
- Select “High Performance” and close the window.
Lower Your Game Graphics Settings
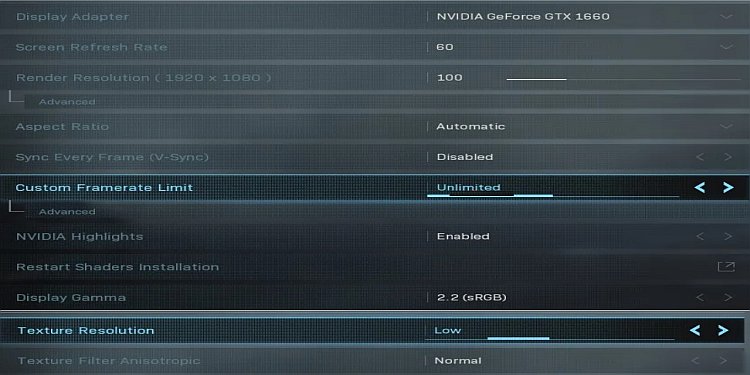
You cannot play Warzone in high graphic settings if you have a normal gaming PC. You must set the graphics mode so you can play the game without lag. Optimum graphics settings depend on your system, so there are no exact graphic settings for every PC.
Go to the Graphics Settings in the game and change the game to the lowest settings the game has. From there, tune your graphic settings and try the game. At last, choose the settings which do not lag your game.
Clear/Delete Cache Files
If you are playing Warzone and the game has been on your PC for a long time, there is a chance that the cache files of this game are piling up. Some cache files are temporary and automatically cleared after each PC booting. However, some cache files may overload the game, and the game can lag.
So, in this case, you must clear all the cache files manually, and here are the steps:
- Before clearing cache files, close all the applications related to Call of Duty Warzone from Task Manager.
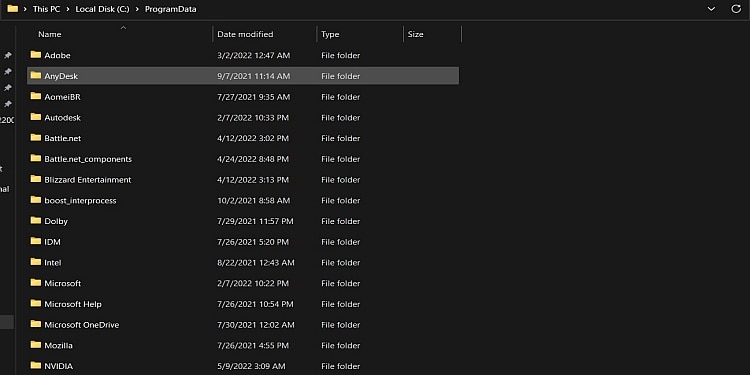
- Open the Run command and type “%ProgramData%.”
- A folder will open where you have to search for “Battle.net,”
“Battle.net_components”, and “Blizzard Entertainment” folders and delete them.
- Then, restart your PC and run the game.
Repair Call of Duty Warzone
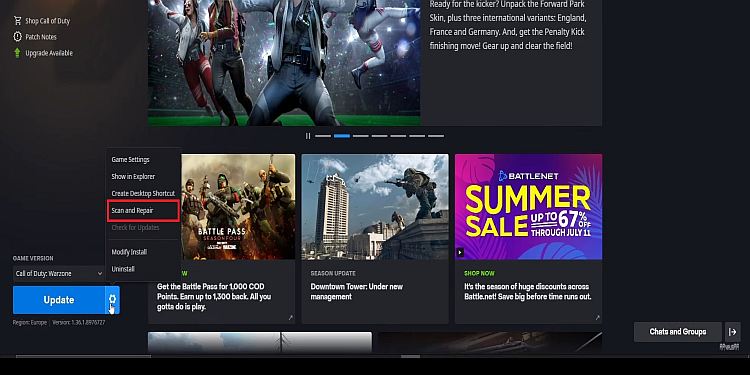
There is a repair option in Battle Net Launcher for Warzone in case any files are corrupted or not working properly. In some cases, with bad configuration or file corruption, the game can lag. Repairing the game can get you out of the game lag problem, and here’s how to do it:
- First, start the Battle Net Launcher.
- Navigate to Call of Duty Warzone and navigate to the Play button.
- Search for a gear icon and click on it.
- After that, click on “Scan and Repair.”
- Wait for the game to repair the game.
Reinstall Call of Duty Warzone
Try this fix at last if none of the fixes work. You have to first uninstall the game along with the Battle Net Launcher. Then, reinstall both the Battle Net Launcher and Call of Duty Warzone.
 .
.
 “Battle.net_components”, and “Blizzard Entertainment” folders and delete them.