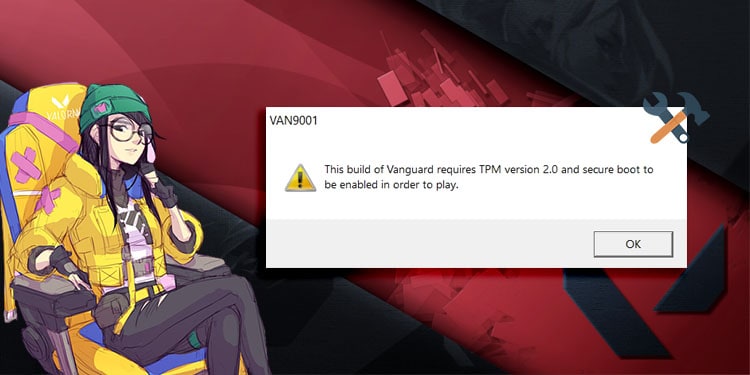
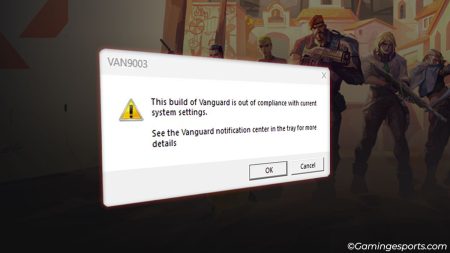
Windows 11 was tipped to be the best OS for gaming and security. Following in the footsteps of Windows 11, Riot Game’s security software Vanguard also made TPM 2.0 and Secure Boot mandatory in order to protect their players’ data. But, while playing Valorant in the new OS, a lot of players started getting TPM 2.0 Error.
This error generally shows up when you try to start the game in Windows 11. But don’t worry! This guide will discuss about all other possible causes of the error and help us fix them.
What Causes Valorant TPM 2.0 Error ?
Valorant TPM 2.0 error usually occurs when the TPM 2.0 and Secure Boot are not enabled on your PC. To understand, TPM 2.0 (Trusted Platform Module) is a physical chip present in your cpu or the motherboard for security purposes. Meanwhile, Secure Boot is a feature that enables users to boot only trusted software so that no third-party software can run and harm the system.
Additionally, developers of Riot Games have also updated Vanguard to work with TPM 2.0 for extra security. So, your PC must have TPM 2.0 and Secure Boot enabled to run Valorant in Windows 11. Without these two features, the TPM 2.0 error will persist.
How to Fix Valorant TPM 2.0 Error in Windows 11
Before getting to the fixes, remember if your PC does not have TPM 2.0 and Secure Boot, but you still managed to install Windows 11 and now you are getting a TPM 2.0 error in Valorant, you must revert to your previous Windows version. There is no fix for PCs that do not support TPM 2.0 and Secure Boot.
To check whether your PC has TPM 2.0 or not,
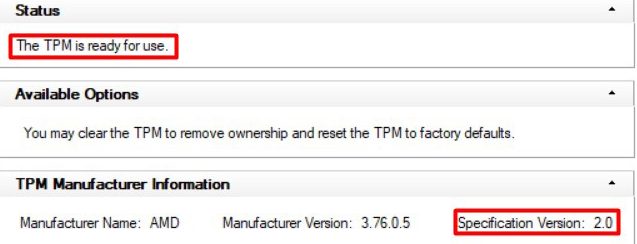
- Press “Windows Key + R” and type “tpm.msc.”
- Then check the “Status” and “Specification Version.”
If you see “The TPM is ready to use” message and the version is 2.0, your PC has TPM 2.0.
To check whether Secure Boot is enabled or not,
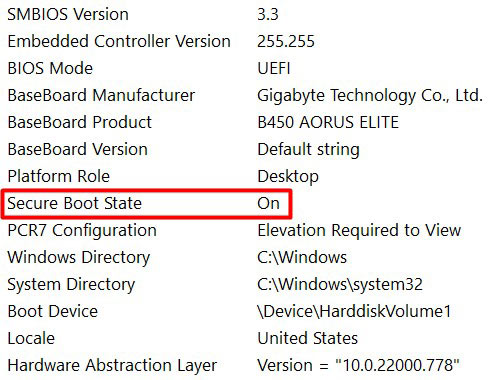
- Search for “System Information” on your search bar.
- Then in the System Information window, navigate to the “System Summary” and search for “Secure Boot State.”
If you see “on“, then Secure Boot is enabled on your system. If not then enable TPM 2.0 and Secure Boot first.
Enable TPM 2.0 and Secure Boot
You must access your system BIOS menu to enable TPM 2.0 and Secure Boot. There are two ways to access your BIOS menu.
The first method is to restart your computer and press the BIOS key as soon as your screen lights. For different manufacturers, the BIOS key is different. Most common being F2 and Delete.
Another way is to access BIOS from UEFI Firmware Settings. For this method, follow these steps:
- Open “Settings” from your start menu.
- Click on “Recovery.”
- Then, click on “Restart Now” beside the “Advanced Startup” option.
- Now, your system will restart. Select “Troubleshoot.”
- Navigate to “Advanced Options.”
- Select “UEFI Firmware Settings.”
So, using these methods, you can access your system BIOS menu. BIOS screens of different manufacturers are also different. So, you must first find, Secure Boot and enable it, which is generally under the “Boot” tab. Also, in the Boot tab, enable “UEFI.”
To enable TPM, search for TPP or TPM. TPM is generally in the “Security” tab. For Intel Processors, enable Intel Platform Trust Technology, and for AMD, enable fTPM Configuration.
After this, save your changes and restart your system.
If you are still facing the problem even after enabling TPM 2.0 and Secure Boot, try the fixes mentioned below.
Update Your Windows
As we are constantly connected to the internet, there is a chance of corruption or bug infiltration in our system. So, how to get rid of these? Most of the time, updating Windows will get you updated security, bug fixes, and new features.
So, you must always check for updates and install the updates to resolve your issue.
To check the Windows Updates:
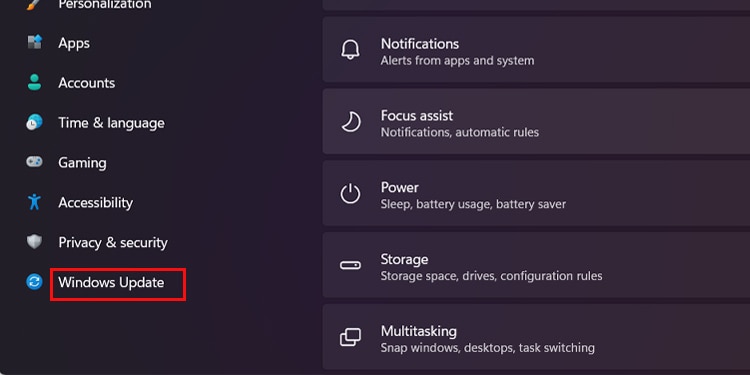
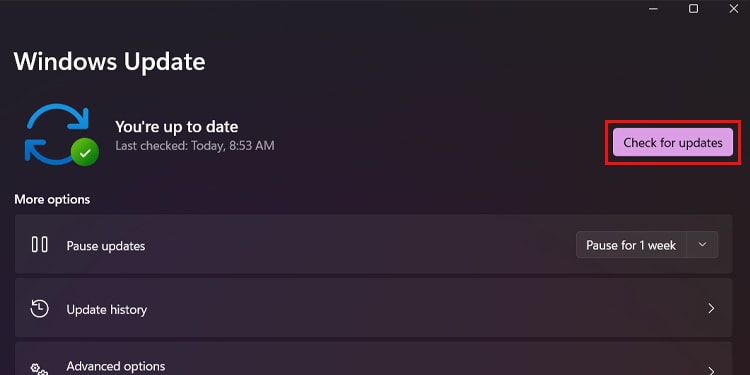
- Go to “Settings.”
- Select “Windows Update” on the bottom left.
- Then, click on “Check for Updates.”
If there are any updates, download them and install them.
Disable Automatic Discord Startup
Now just by looking at the topic, you may wonder what the relation between Discord and Valorant error is. There is no exact reason for the TPM 2.0 error related to Discord’s automatic startup. But disabling the Automatic Discord Startup has resolved this error for many players.
To disable Automatic Discord Startup, follow these steps:
- Open “Discord.exe” from your desktop or start menu.
- Go to “Settings,” denoted by the gear icon on the bottom.
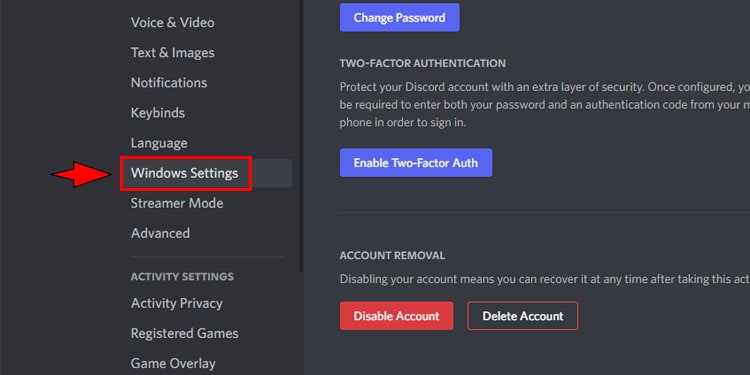
- Navigate to “Windows Settings” on the left.
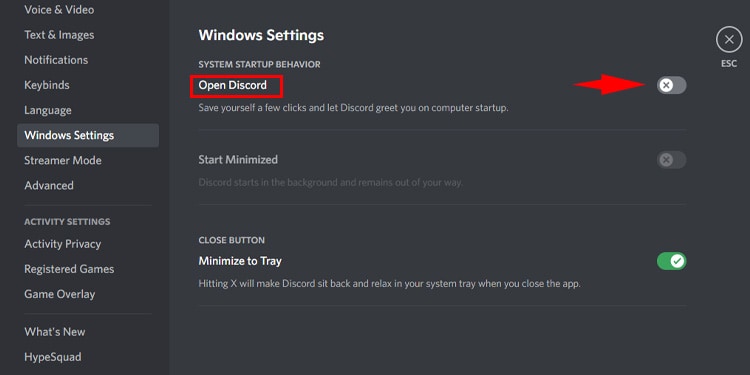
- Then, turn off the “Open Discord” option.
- At last, restart your system.
Bypass TPM 2.0 Check
This fix will bypass the TPM check for your system. There are two ways to bypass the TPM 2.0 check.
The first method is to make a command file and run it. Follow these steps for this method:
- Open Notepad and paste this code.
@(set “0=%~f0″^)#) & powershell -nop -c iex([io.file]::ReadAllText($env:0)) & exit/b #:: double-click to run or just copy-paste into powershell – it’s a standalone hybrid script #:: v2 of the toggle script comes to the aid of outliers for whom v1 did not work due to various reasons (broken/blocked/slow wmi) #:: uses IFEO instead to attach to the same Virtual Disk Service Loader process running during setup, then launches a cmd erase #:: of appraiserres.dll – but it must also do some ping-pong renaming of the exe in system32\11 – great implementation nonetheless #:: (for simplicity did not use powershell invoking CreateProcess and DebugActiveProcessStop to overcome IFEO constrains) #:: in v2 the cmd window will briefly flash while running diskmgmt – so it is not “better” per-se. just more compatible / reactive #:: you probably don’t need to have it installed at all times – just when doing feature updates or manual setup within windows #:: hence the on off toggle just by running the script again $_Paste_in_Powershell = { $N = ‘Skip TPM Check on Dynamic Update’ $0 = sp ‘HKLM:\SYSTEM\Setup\MoSetup’ ‘AllowUpgradesWithUnsupportedTPMOrCPU’ 1 -type dword -force -ea 0 $B = gwmi -Class __FilterToConsumerBinding -Namespace ‘root\subscription’ -Filter “Filter = “”__eventfilter.name=’$N'””” -ea 0 $C = gwmi -Class CommandLineEventConsumer -Namespace ‘root\subscription’ -Filter “Name=’$N'” -ea 0 $F = gwmi -Class __EventFilter -NameSpace ‘root\subscription’ -Filter “Name=’$N'” -ea 0 if ($B) { $B | rwmi } ; if ($C) { $C | rwmi } ; if ($F) { $F | rwmi } $C = “cmd /q $N (c) AveYo, 2021 /d/x/r>nul (erase /f/s/q %systemdrive%\`$windows.~bt\appraiserres.dll” $C+= ‘&md 11&cd 11&ren vd.exe vdsldr.exe&robocopy “../” “./” “vdsldr.exe”&ren vdsldr.exe vd.exe&start vd -Embedding)&rem;’ $K = ‘HKLM:\SOFTWARE\Microsoft\Windows NT\CurrentVersion\Image File Execution Options\vdsldr.exe’ if (test-path $K) {ri $K -force -ea 0; write-host -fore 0xf -back 0xd “`n $N [REMOVED] run again to install “; timeout /t 5} else {$0=ni $K; sp $K Debugger $C -force; write-host -fore 0xf -back 0x2 “`n $N [INSTALLED] run again to remove “;timeout /t 5} } ; start -verb runas powershell -args “-nop -c & {`n`n$($_Paste_in_Powershell-replace'”‘,’\”‘)}” $_Press_Enter #:: - Save this file and rename it with the “.cmd” extension.
- Then, open the file and click on “Yes.”
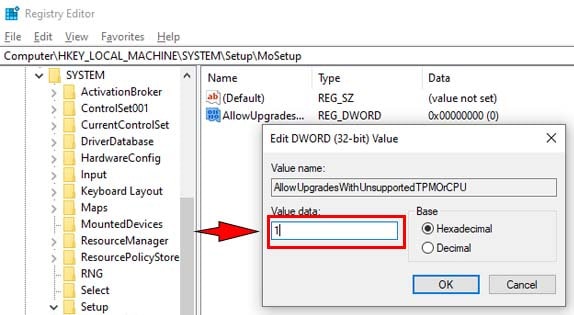
The second method is to bypass the TPM check from the registry. Follow these steps to do so:
- Open the Run command and type “regedit.”
- Navigate to “HKEY_LOCAL_MACHINE.”
- Then, select “System.”
- Go to “Setup.”
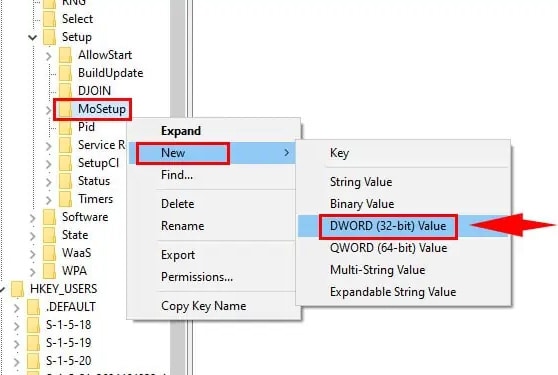
- After that, right-click on the MoSetup folder, select “New,” and click on “DWORD (32-bit) value.”
- For the file name, use “AllowUpgradesWithUnsupportedTPMOrCPU.”
- Right-click on the new file and click on “Modify.”
- Now, set the value to 1.
If none of the above fixes work, go to the support page of Valorant and generate a ticket there.
