Perhaps you want to join in the fun, but you find Minecraft overbearing and overwhelming. However, we can introduce you to its basic elements to help you understand what you need.
Minecraft’s developers keep adding features with each update. It can be hard to keep up with the growing catalog of mobs, blocks, recipes, materials, areas, biomes, and secrets, much less face it all as a complete newbie.
Our goal is to walk you through the game’s versions (Java and Bedrock), the main menu and its options, the basic elements, and the first items you need to craft to have a good time.
Minecraft Java Vs Minecraft Bedrock Editions
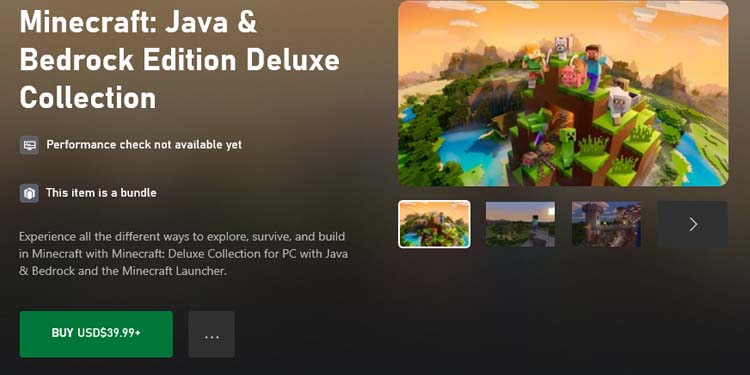
The first thing to understand is the two versions available: Java and Bedrock.
The Java Edition is available for Windows, macOS, and Linux, but not consoles or mobile devices. Meanwhile, the Bedrock Edition is available on PS3, PS4, Xbox 360, Xbox One, Xbox Series, Nintendo Wii, Nintendo Switch, Android, iOS, FireOS, and other mobile devices.
Naturally, the Bedrock Edition will allow you to crossplay with friends on consoles, mobile devices, or PC. However, the Java Edition limits you to play with people using Java on a PC. Additionally, the Minecraft community generally believes that Bedrock is the more stable edition.
Even so, the two versions are pretty similar, so the experience you’d have on each is the same. The key difference is the main menu, the console (where you type cheat codes), plus some minor differences in items, recipes, and mechanics.
If you have not bought the game yet, either version will suffice. You can go to Minecraft’s web page, select your platform, and easily get one of the game versions.
Notably, Windows PC players can get it through the Xbox app, where you can buy a bundle packing both Bedrock and Java. This would allow you to play the edition your friends have.
Navigating the Main Menu
The most notable difference between Java and Bedrock is how the main menu looks. However, both offer the same options.
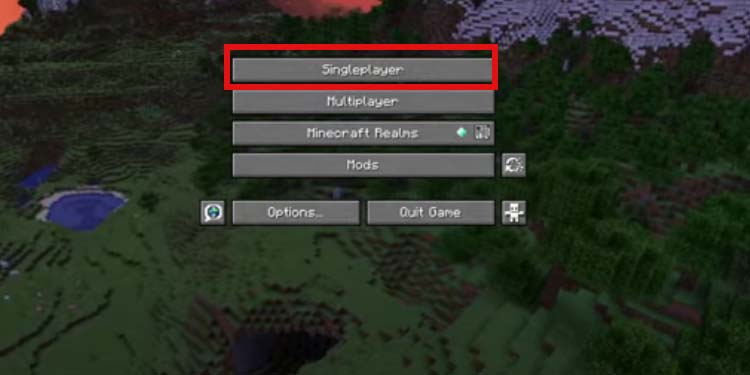
On Java, for example, you start with three basic options:
- Single Player: Create a solo world. Minecraft’s engine will randomize it and place you on it.
- Multiplayer: Create or join a multiplayer session from a list.
- Minecraft Realm: Create a private multiplayer server to share with your friends. Only the people you invite can join.
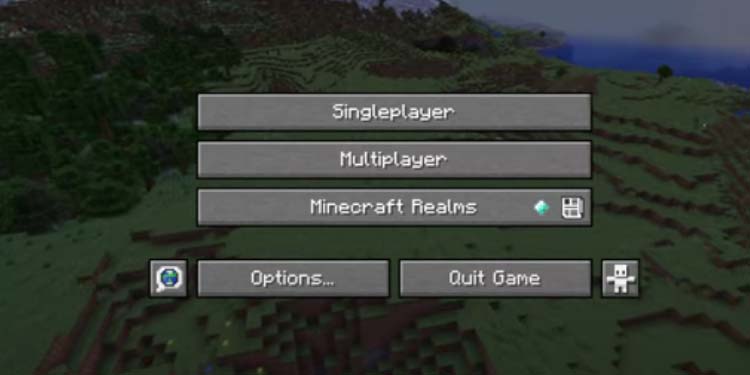
Choosing any of these options will give you additional easy-to-grasp options, such as enabling cheats, or choosing the game mode (more on that later).
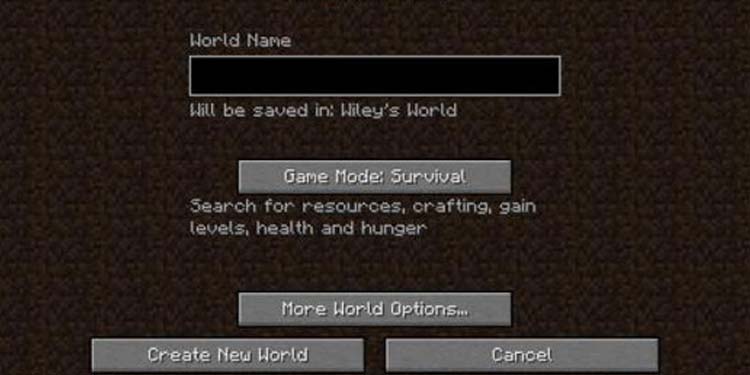
For example, to start a new game on Java:
- Click Single Player
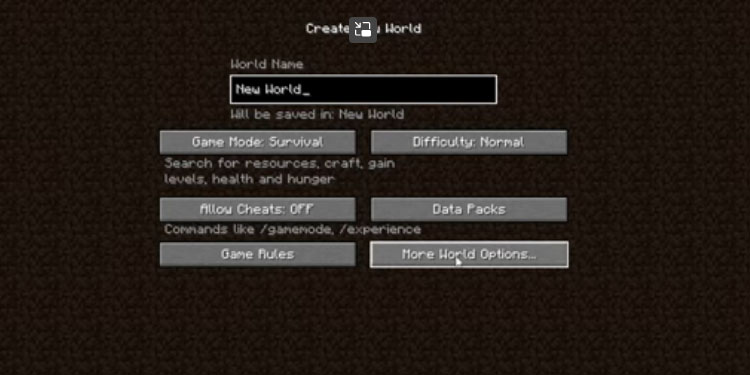
- Type a name for your world
- Hit the “Game Mode” box to select your game mode
- Hit Create World to finish.
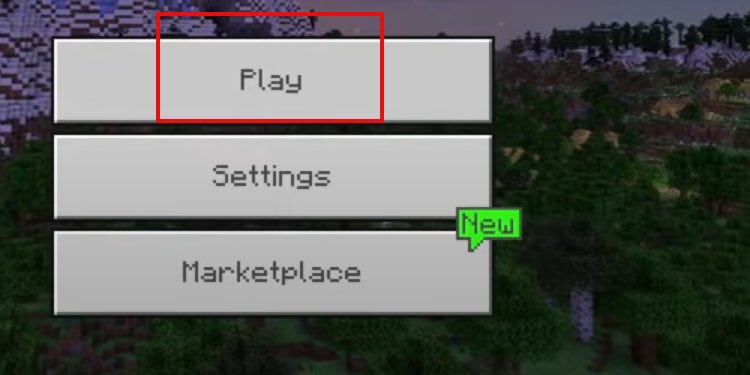
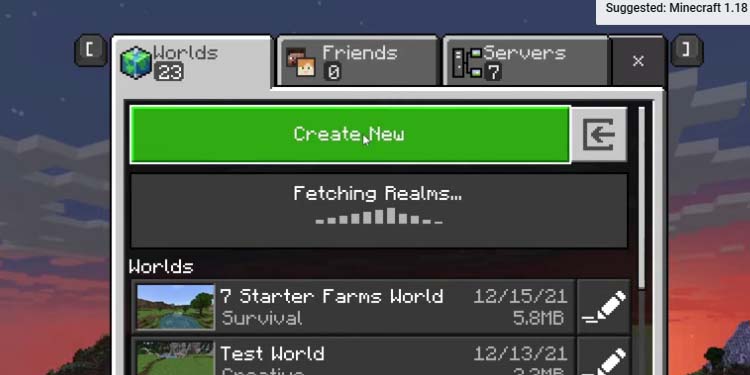
To start a new game on Bedrock:
- Select “Play”
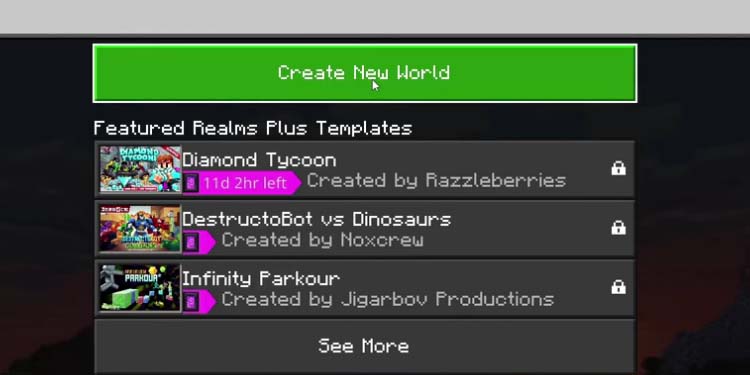
- Select “Create New World“
- Go to “Create new world”
- Customize the realm’s options
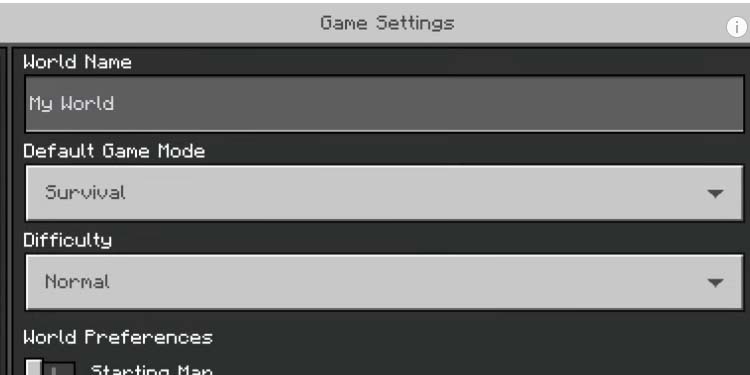
- Choose name, difficulty, and game mode
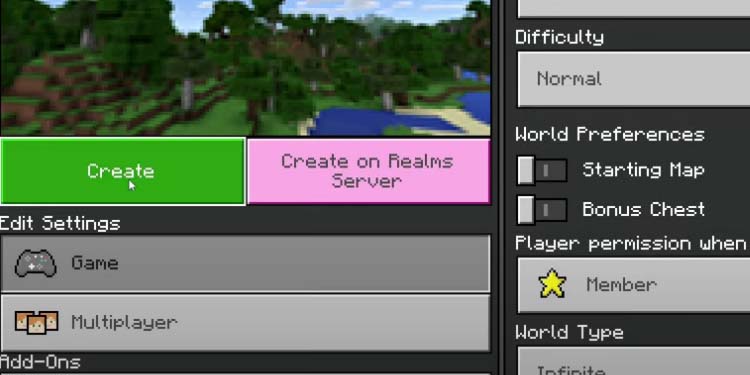
- Choose between Single Player or Multiplayer, and, finally, hit Create
Choosing the Game Mode
There’re three main game modes in Minecraft:
- Survival: You have to manage food, crafting, shelter, and survive nights full of mobs. You can receive damage on Survival from mobs, falling, cold, and suffocation. If you die, you return to the last bed where you slept, or to the starting location.
- Creative Mode: It takes away the survival aspects for a free-roam and free-building experience. There’s no damage, health, or hunger. Moreover, you can destroy every block instantly, but you have every building block available on the Creative inventory.
So, you can build whatever you imagine with endless resources without worrying about other aspects. You can also fly by hitting the hump button twice. - Adventure Mode: It functions as a platform where you can design your maps, games, and adventures. Alternatively, you can play the maps others have created, which may include missions.
Choosing a Seed
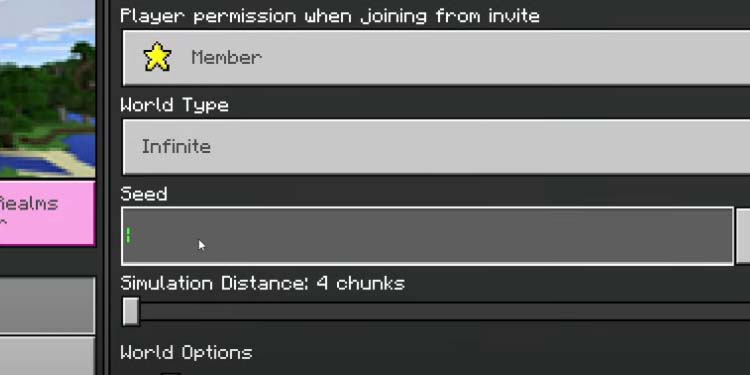
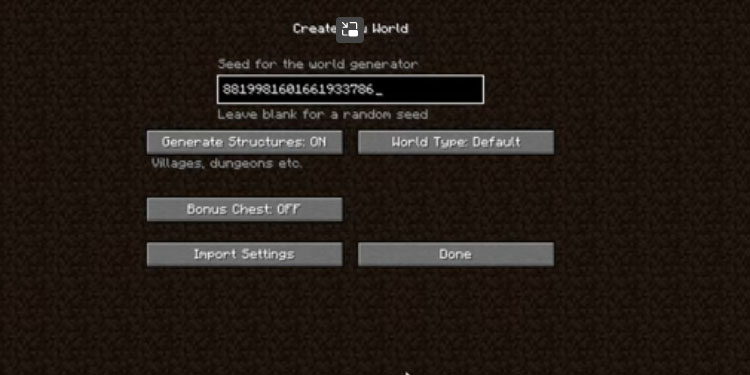
There’s an additional option to understand, which is “Seeds.” Each Minecraft world has a string code, which is like the name that identifies it.
You can type the “Seed” code to enter a specific Minecraft realm, which can make it easier if you’ve chosen the world through a guide like this one. The idea behind choosing a Seed is selecting a world that spawns you near interesting locations and easy-to-grab resources.
Lastly, there’re over 18 billion Minecraft worlds available, so finding a specific one is nearly impossible.
On Bedrock Edition
- Select “Play” in the main menu
- Go to “Create New World“
- Select “Create new world”
- Type the Seed code on the Seed box
- Customize the world’s options
- Type a name for your world, choose the difficulty, and choose a game mode
- Decide between Single Player (“Game”) or “Multiplayer” and hit Create
On Java Edition
- Go to Single Player
- Select “More World Options“
- Type the Seed code and customize the options. Finally, hit “Create New World” below.
Selecting a Seed allows you to check the world’s details on Chunkbase’s Seed Map. Just type the Seed on the finder, select your game edition, and select the Dimension (Overworld, the End, the Nether).
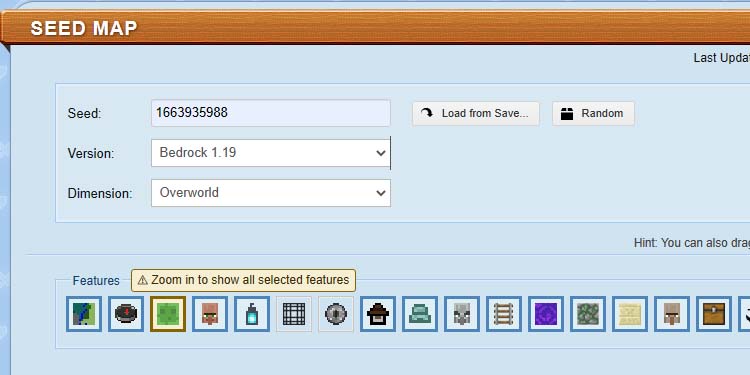
You can use the map’s tools to find key locations such as villages or Minecraft. You can also use the bottom slider to zoom in and zoom out.
The finder has an interactive map where you can find the coordinates of every key location, and use the slider to zoom in and zoom out.
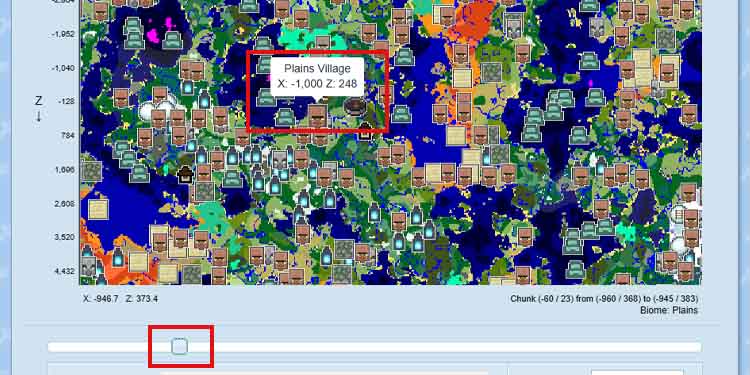
Lastly, you can travel to the coordinates by using the in-game coordinates. The compass system has an X, Y, Z design, whereas 0,0,0 is the starting location. It works like this:
- X refers to left or right. Moving to the East of the “0” location is a positive movement.
- Y marks moving up and down. Positive movement means moving upwards (higher than the starting location).
- Z refers to North and South. Positive movement means going North from the spawn location.
To find your coordinates on Bedrock:
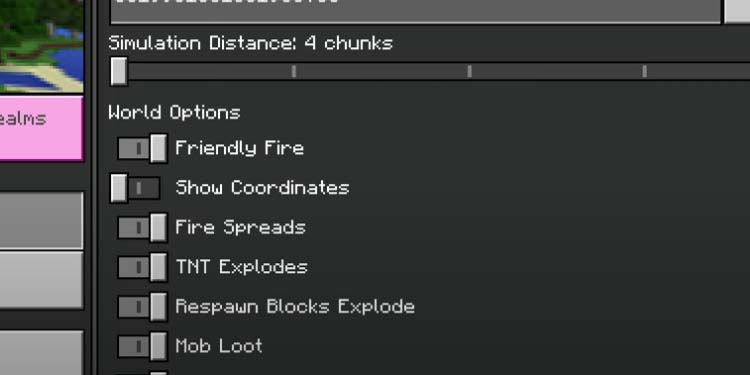
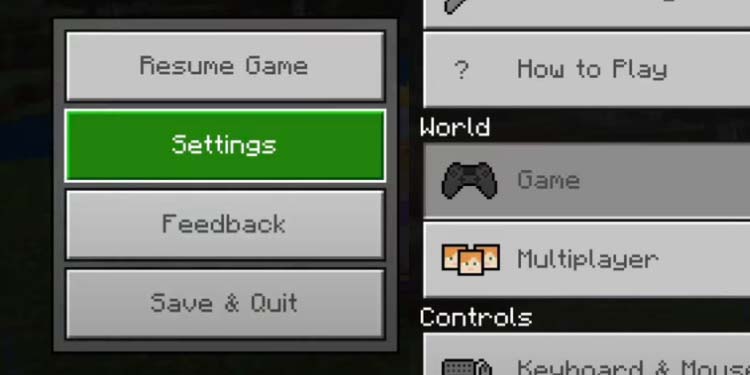
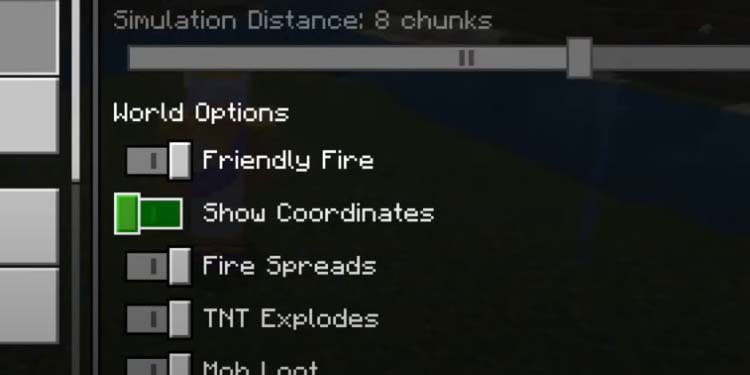
- Go to Settings
- Go to Game
- Enable “Show Coordinates.”
The X, Y, Z coordinates will be at the top left of your screen.
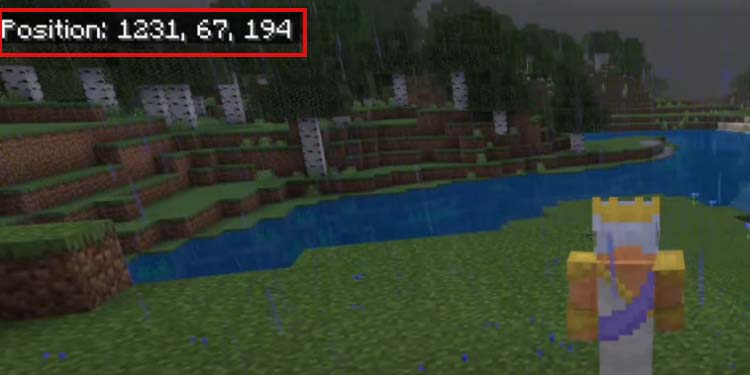
On Java, press FN + F3 on your keyboard. You’ll see the coordinates in the “XYZ” area.
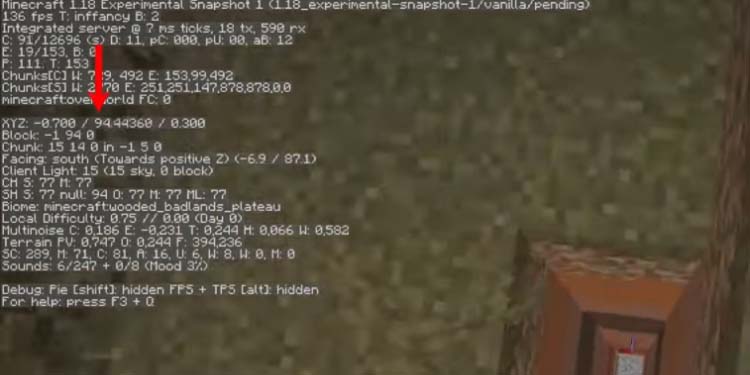
Using coordinates to travel the maps will help you tenfold.
Navigating the Minecraft Realm
The world you choose randomly or via typing a Seed will put you in a starting location, typically above grass or dirt and surrounded by trees and passive mobs.
Here’s how you interact with this world. You can move and jump as you do in any other game (WASD on PC).
Then, you can attack/mine with the left mouse (or relevant button on your console), press the middle mouse to pick up a block (or the alternative button), and the right mouse to use items and place blocks.
Additionally, you can press “Q” to drop an item, and select between 1 to 9 to select the items on your hot-bar. Also, you can press “E” to open the inventory, which would be, for example, the “X” on Xbox controllers.
Lastly, if you open your inventory, you can drag an item to your hot bar, which you can then later use or place.
If you’re not on PC, take note of these controllers:
- Attack/Mine
- Use/Place
- Pick block
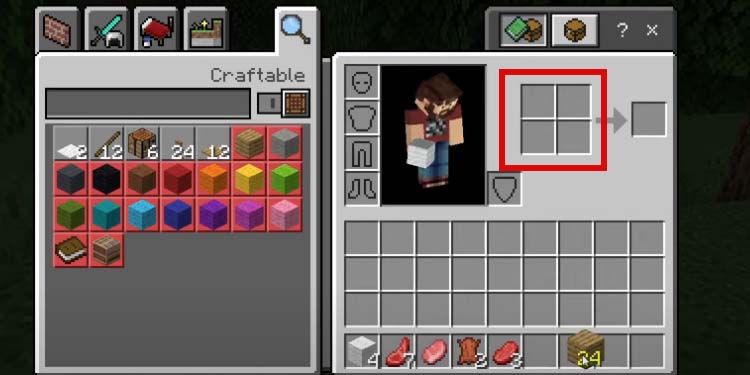
- Open the inventory (there’s a basic crafting grid on the inventory)
- Drop item
- Buttons to swap between your nine action bar slots (to use an item, place it on the action bar, select the slot, and press the Attack/Mine or Use/Place button).
The world around you is full of blocks, and you can mine every block. Some of these you can harvest with your hands, while others require building a tool (shears, pickaxe, shovel, or ax).
Pickaxes and axes come in various varieties, as well as armor pieces, swords, and shields. The varieties are wooden, stone, iron, gold, diamond, and netherite.
The material quality alters the damage these tools and weapons deal, the durability, and the types of blocks they can mine.
For gear, you’ve got:
- Helmets
- Shields
- Chest-plates
- Boots
- Swords
- Tridents (there’s a single quality of trident)
- Elytra (an end-game item you can equip as a chest-plate to fly)
- Bows (plus arrows)
- Crossbows (plus bolts and firework rockets)
- Shovel to dig
- Pickaxe to mine
- Ax to chop trees
- Shears for trimming grass, flowers, seaweed, and similar
- A hoe to harvest plants
- A shovel to dig
Lastly, you can equip a helmet, a shield, a chest-plate, and boots on the inventory. Your weapon needs to be on the action bar.
Understanding the Locations
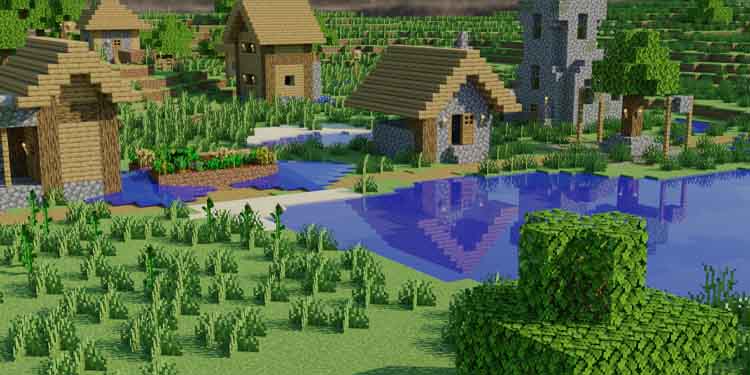
Lastly, you need to understand what a Minecraft world has. Mostly, you’d be exploring the Overworld, which is the surface. The Overworld has many biomes, which are natural environments such as plains, mountains, oceans, and similar.
The Overworld also has locations to explore like temples, monuments, and strongholds.
Lastly, you need to understand what a Minecraft world has. Mostly, you’d be exploring the Overworld, which is the surface. The Overworld has many biomes, which are natural environments such as plains, mountains, oceans, and similar.
The Overworld also has locations to explore like temples, monuments, and strongholds. These places have mobs and chests with loot, but they can be difficult to conquer.
There’re also villages, which have villagers, chests, animals, and plants to harvest. Notably, you can trade items with some of these villagers (librarian villagers).
The Overworld also has an underground, which is an interconnected system of caves. You can dig down to find mobs, chests, dungeons, and construction materials.
The next dimension is the Nether, a place full of strong enemies and high-quality loot. You can enter the Nether by repairing a Ruined Nether Portal in the Overworld.
Lastly, the last dimension is The End, where you can find the Ender Dragon and some of the rarest loot in the game, such as the Elytra wings. You can enter The End by activating special portals in The Nether.
How to Play Minecraft on Creative?
The Creative Mode allows you to build freely as if the world was made of Legos. It requires no additional tutorial, as opening the inventory gives you access to all crafting recipes and all building textiles.
How to Play Minecraft on Survival?
Survival is about surviving and slowly gearing up. In any case, here’s how your HUD looks at the start:
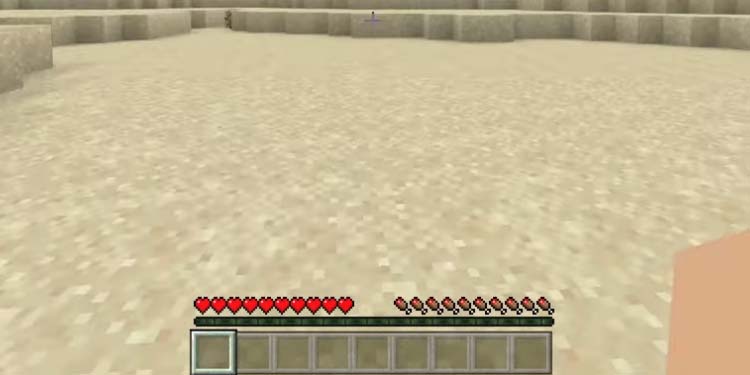
The boxes at the bottom are your action bar, the HP is on the left side, and your Hunger points are on the right side. To survive, you need to find materials to build shelter, and find food.
Step 1: Crafting Table, Tools, and Bed
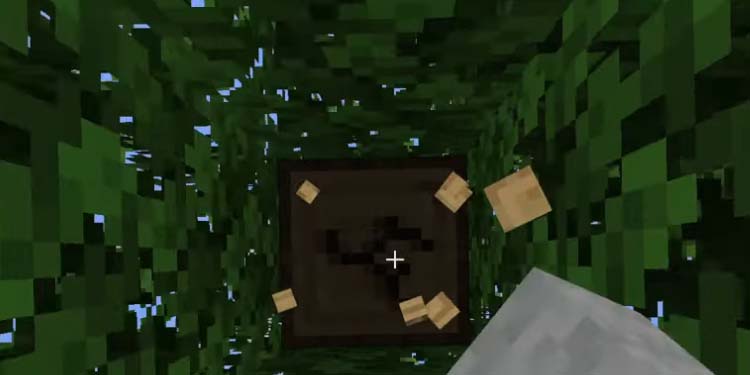
The first thing you need to do is explore around to find a tree. You can get logs with your bare hands, which you can use to build a shelter and basic tools. So, once you find a tree, just punch it with your hands to get logs.
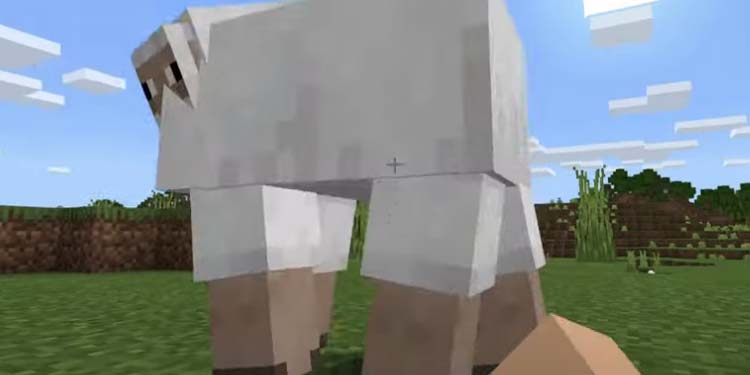
Additionally, you should find sheep in the world, as they provide wool. Wool is a key ingredient to craft beds. If you find a sheep, punch it with your hands to get wool and food. Punch any other animal you find to get the food—your character picks it up by walking on top of the loot.
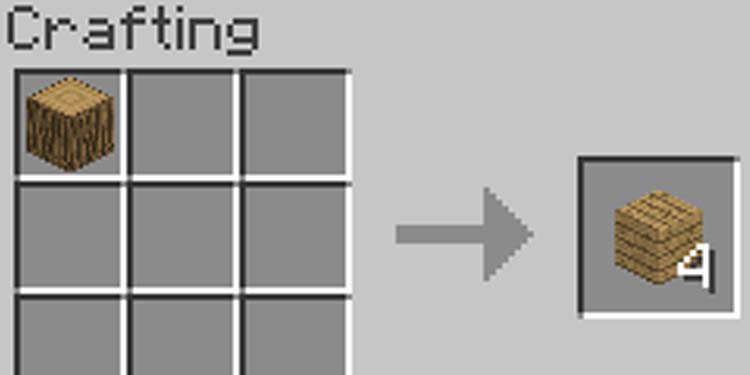
Now, you’ve got the materials to create your initial tools and buildings. For starters, create Planks by placing a single log on the Crafting Menu. You can access the menu on your inventory.
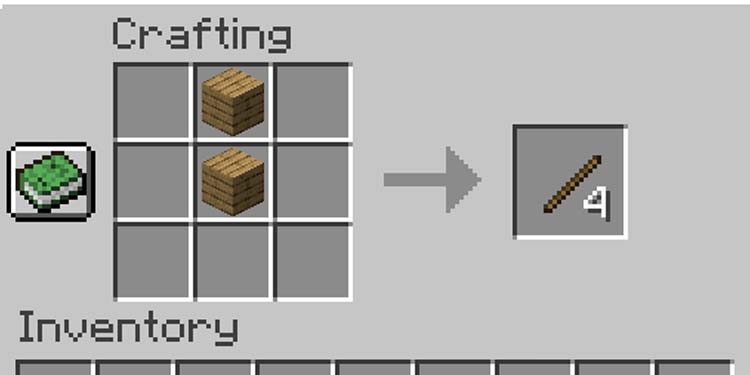
Similarly, craft Sticks by placing a single plank on the crafting grid.
Then, place four planks in the crafting grid to get a Crafting Table. This table offers a 3×3 grid for more advanced recipes. It’s perhaps the most important block in the game, and you can make and place as many of these as you want.
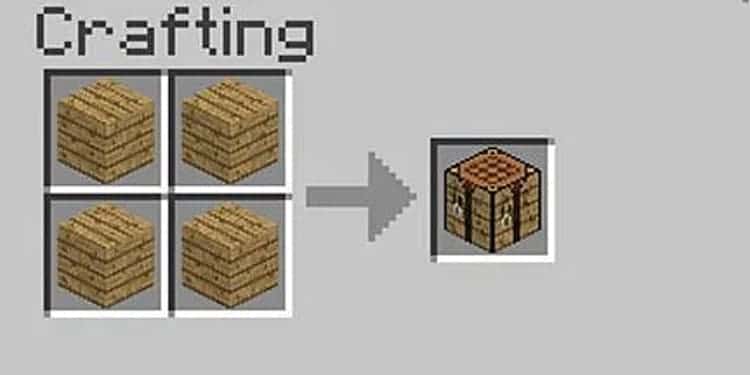
You can then put the Crafting Table on the action bar, select it, and place it anywhere in the world with the “Place” button.
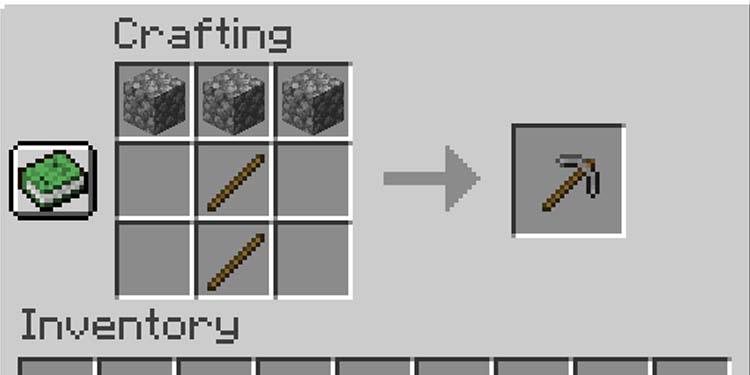
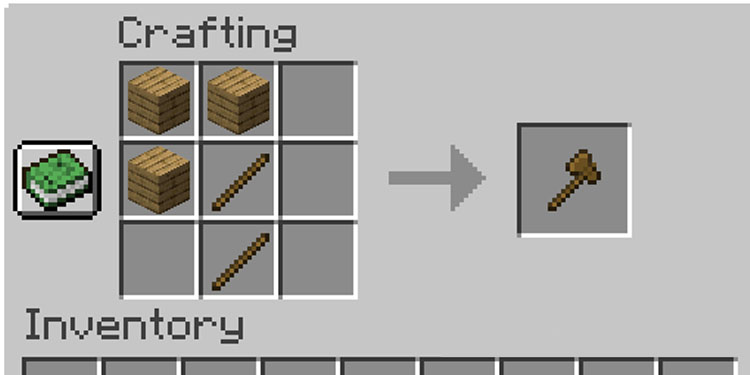
Using the Crafting Table opens up its crafting grid. To craft items on Minecraft, you have to place specific items in specific patterns (like the ones we’re sharing in the images).
For now, place the Crafting Table on the ground, use it, and place 3 planks and 2 sticks for a Wooden Ax. The Wooden Ax will chop trees faster than your hands. It will also allow you to hunt animals a bit faster.
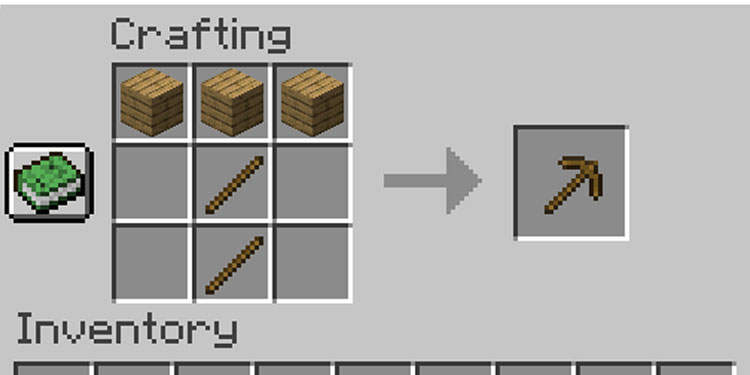
Similarly, put three planks and two sticks on the Crafting Table to create a Wooden Pickaxe. The Wooden Pickaxe will mine many blocks in the ground, and it will allow you to dig down to discover the underworld.
Finally, put three wood planks and three wool on the Crafting Table to craft a bed.
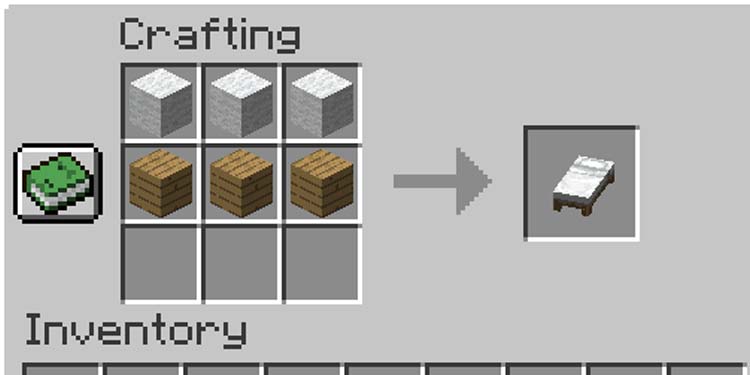
Wood is the blood of your gameplay. Chop it and gather it all of the time, and don’t be afraid of packing hundreds of logs and planks, as there’s no limit to how much you can carry on Minecraft.
Step 2: Mining Stone, Furnace, and Cooking
Now that you’ve got the pickaxe, it’s time to mine some rocks to build a Furnace. The Furnace will allow you to cook food, so it’s necessary for survival. You can eat food without cooking it, but it would be a waste, as it doesn’t refill your hunger bar as much.
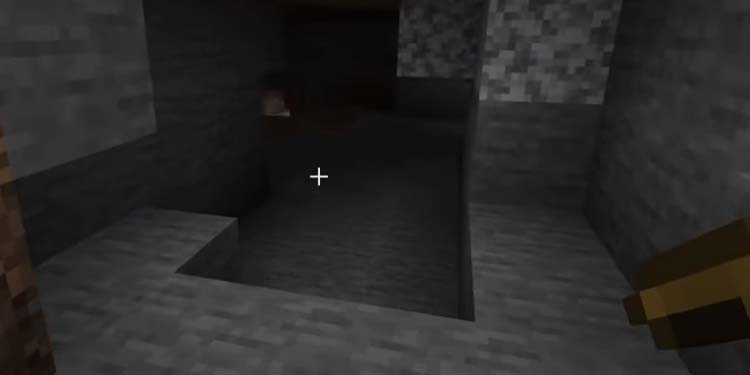
Anyhow, the new goal is to find a cave entrance on a mountain. Don’t explore it fully, though—just take a few steps in, and mine the gray rocks you find.
That will give you Cobblestone, a key ingredient for the Furnace and Stone tools.
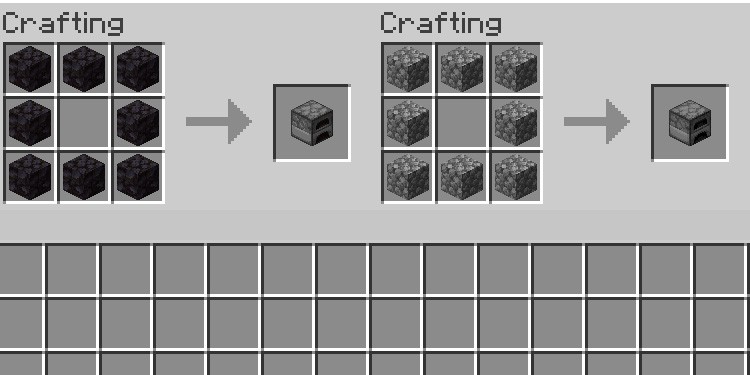
To make the Furnace, place 9 Cobblestones on the Crafting Table, or 9 Blackstones. You need to leave the middle spot empty.
You can put the Furnace on the action bar and place it anywhere in the world.
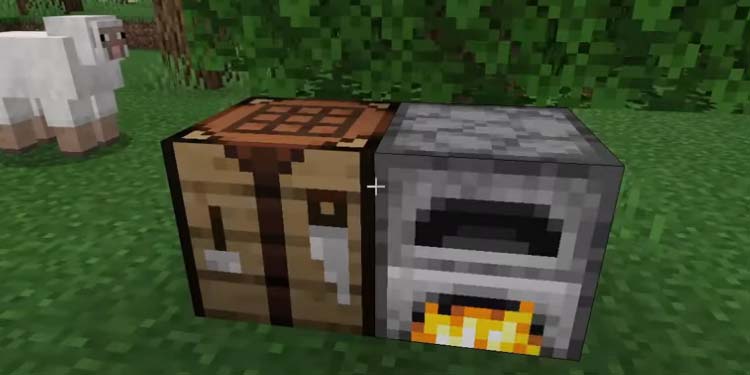
Opening the Furnace gives you a menu with three spots. The spot in the bottom is for a fuel source—you can use any log for the moment, and coal later on. The spot at the top is for the food you want to cook. Finally, the spot on the right is the result, but it takes about a minute for each.
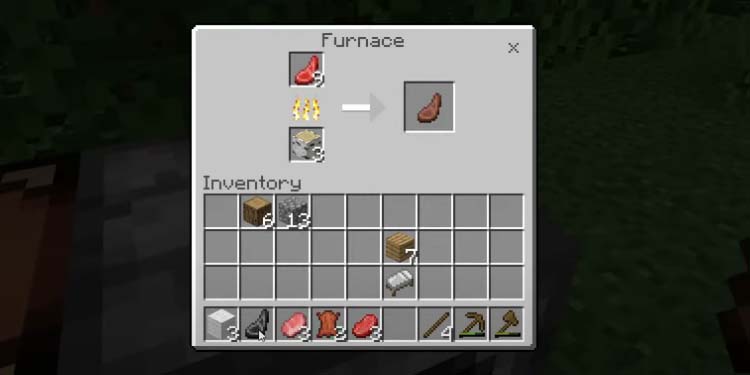
To eat your cooked food, put it on the action bar, equip it, and use it. It will refill your hunger points.
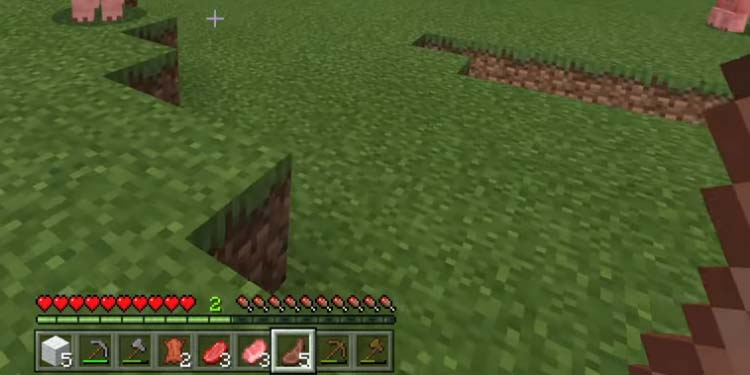
Finally, you can move on the tear on your tools:
- The Stone Pickaxe requires three cobblestones and one stick
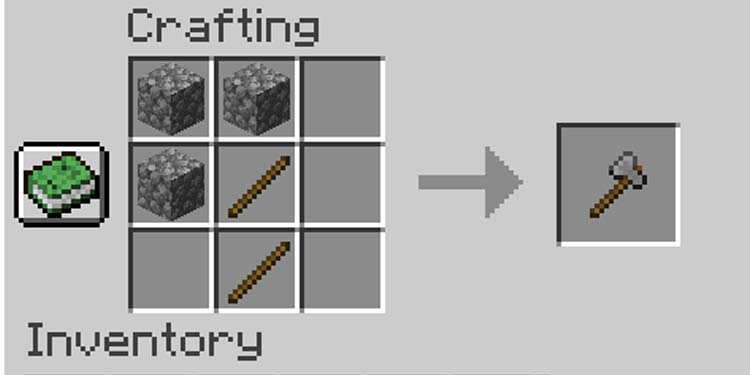
- The stone ax requires three cobblestones and one stick. However, the crafting pattern is different.
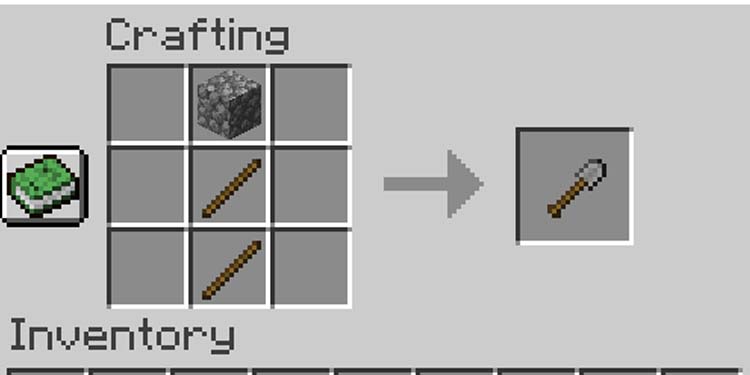
- Craft a stone shovel with one cobblestone and two sticks
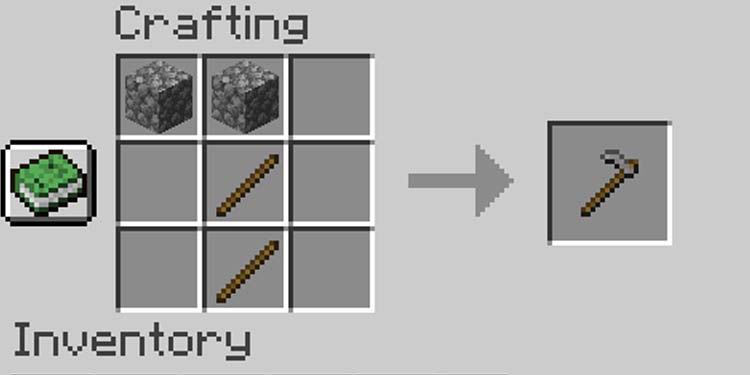
- Lastly, build a stone hoe as well. It requires two cobblestones and two sticks in the following pattern:
Step 3: Build Your First Shelter
Before the day turns dark, find a nice spot to build a shelter. It should be an open area with a mountain, a cave, and a water source nearby. That would be perfect.
You need the water to plant crops, the cave entrance to find building materials, and the mountain as a base for your shelter.
Once you find the area, throw your Furnace, your Crafting Table, and your bed, and build a whole structure around it with logs.
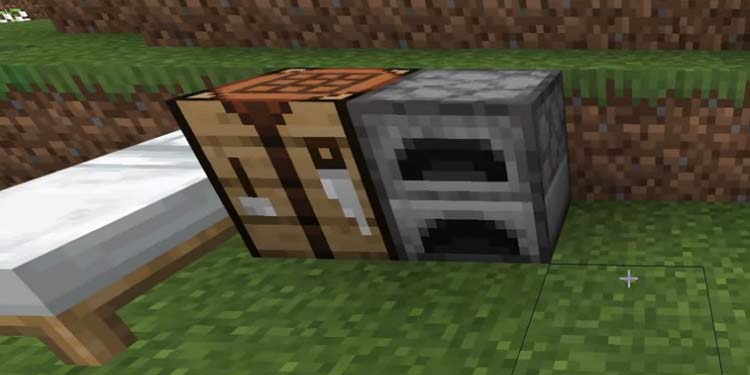
Finally, use the bed to sleep, and you will wake up when it’s daytime. If you sleep outside, though, a mob could attack you or the bed, and it’s not a good experience.
Alternatively, you can use your shovel to dig a hole, and then use any material to shut the way in. You’d have to wait about 7 minutes until coming back up.
Step 4: Find Renewable Food
On the next day and after your first night, you can start thinking about planting food. It can be difficult to keep hunting for food, so it would be best to find a renewable food source.
In Minecraft, you can farm fruits and vegetables. The easiest way to start doing it is punching grass, as this will yield seeds you can later plant. Another thing you can do is plant wheat, which allows you to feed and breed cows and other animals to get renewable meat.
Next, find a water source and start digging near it. Use your shovel to build an area around the water. The area has to be of the same height as the water.
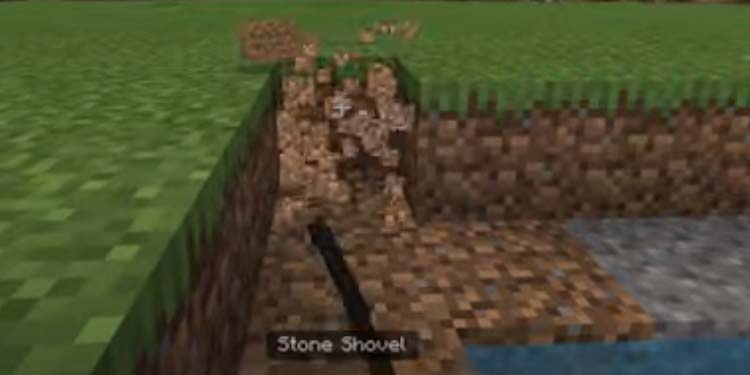
Then, separate the area with your hoe. Hit one lane, don’t hit the other, hit the next lane, and don’t hit the other. So on and so forth.
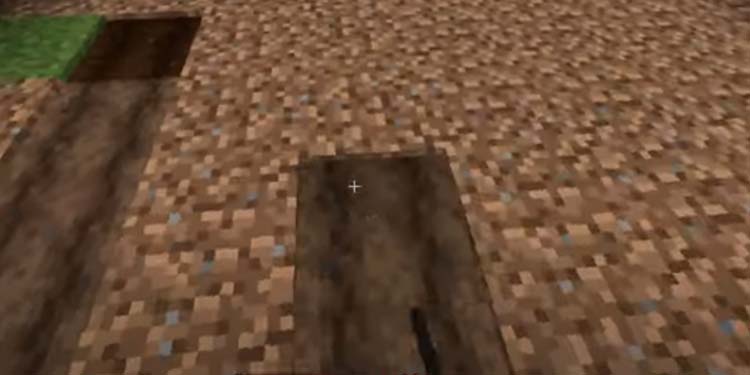
Then, equip the seeds and plant them in the areas where you used the hoe.
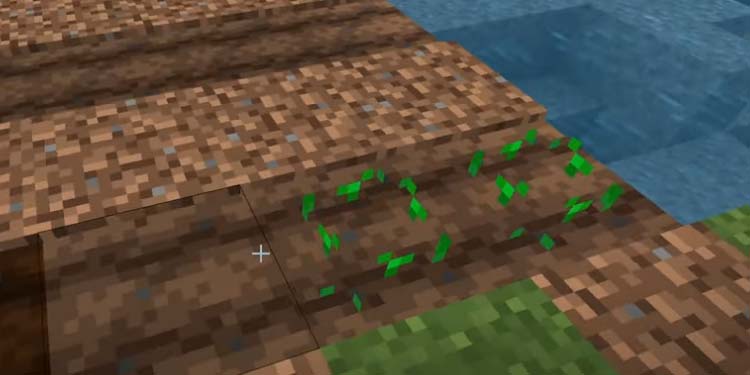
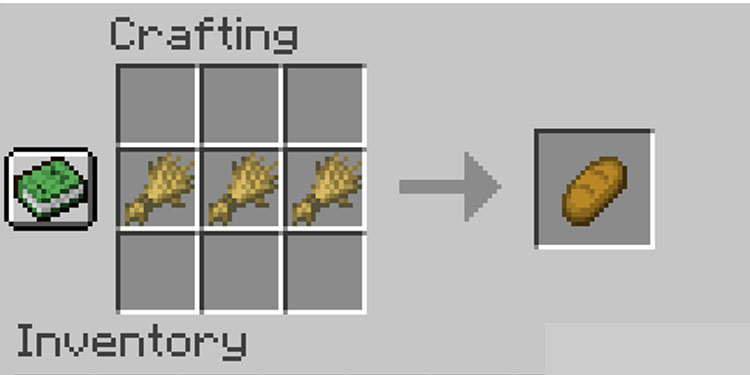
When these seeds grow, you can punch them to grab them, and then eat them. If it’s wheat, you can make bread by placing three wheat on the Crafting Table. You have to put the wheat in a row in the middle brackets.
Understanding the Recipe Book
When you first spawn in a Minecraft world, you won’t have any crafting recipes by this point, so you can’t make weapons, tools, armor, food, or anything else.
You unlock new recipes naturally as you play the game, and by meeting certain criteria. The criteria vary per craft, but it revolves around being near water, filling your inventory, gathering materials, fighting or finding mobs, and similar.
For example, gathering wood logs unlocks the crafting recipe for planks, or having planks in the inventory unlocks the recipe for sticks.
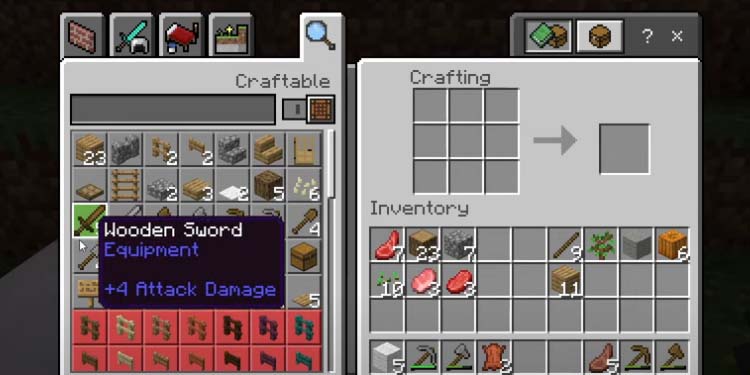
Recipes go to your recipe Book. You can access it by opening the inventory and checking the left side of the in-game menu.
On the left side, you’ll see a “craftable” section plus various tabs featuring various recipes. Clicking an item in this area will craft the item immediately if you already have the ingredients. However, if you’re not on a crafting block such as the Crafting Table or the Furnace, you’d be able to craft the basic 2×2 recipes only.
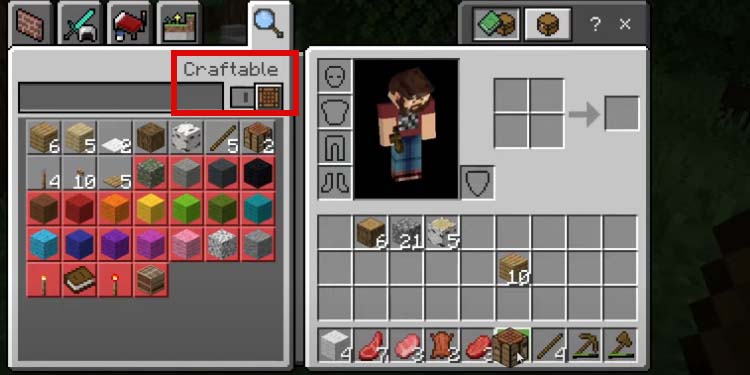
But if you open a crafting block, you’ll see an expanded Craftable menu with potentially several icons you can craft for immediate crafting.
That way, you’ll be able to keep exploring and unlocking recipes naturally. So, all that’s left is to keep exploring the surface (the Overworld), and the Overworld’s underbelly (caves, ravines, mineshafts, and similar). Have fun, and stick around for more specific guides!
