Minecraft is a game of blocks—it has squares, triangles, and more squares and more triangles. But you may want to break its rules, go beyond its physics and draw or build a circle.
Luckily for you, you don’t need a degree in engineering or architecture to do it, but you may need a guide. Believe me, it’s not an intuitive process, but it’s also not essential. It’s just for aesthetics, an extra tool you can have for your creative structures like your house.
It would help if you had no more than your trusty wood planks or any other construction material you can spare. Additionally, you need a large flat space, so dig the area if you must!
Basics of Circles in Minecraft
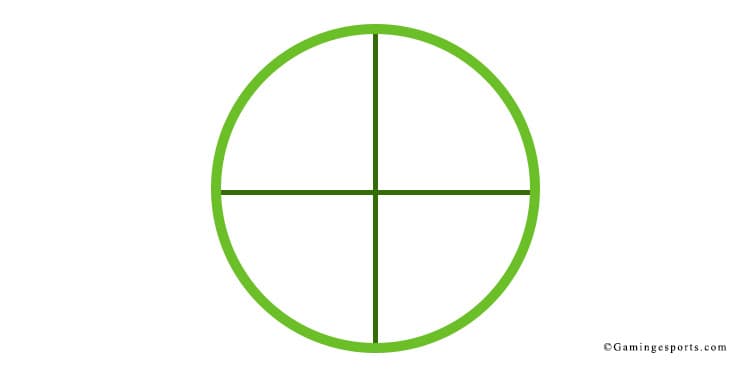
To build a circle in Minecraft, let’s discuss geometrics first. The diameter of a circle is the straight line that connects any two points of the circle while passing through the middle.
In Minecraft, the best way to ensure that your circle is a circle is by making a “diameter” first. You must select a center spot, and then draw a cross with equal blocks on either side. We’ll have more on this later.
Then, a circle in-game works the same as your computer or TV screen draws its shapes. If you zoom in on any image, you’ll realize that every color and shape is a square, and then thousands of very small squares draw shapes and colors.
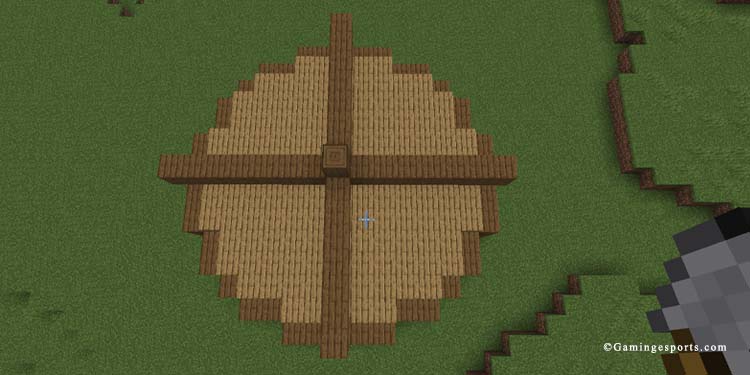
For example, here’s how the circle I showcased above looks if we zoom in:
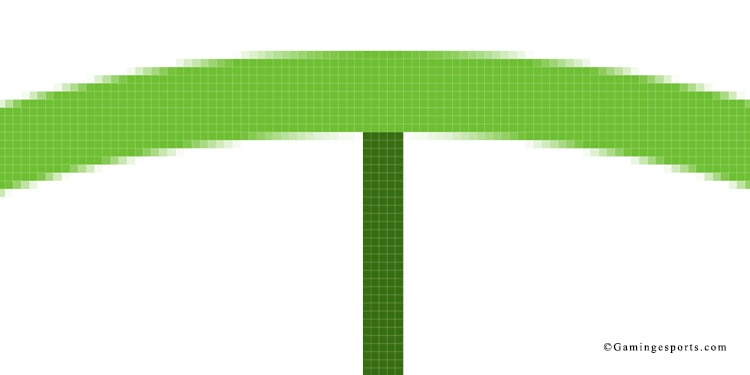
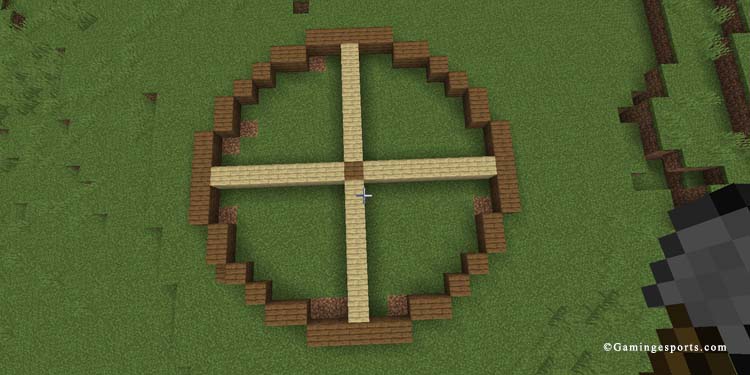
So, we’re making a diameter with blocks to ensure we’re making a proper circumference, and then we’re drawing a circular shape that connects the cross with blocks in the best way we can – exactly like in the image above.
It won’t be completely circular, but it won’t be a square either. But if you were to “zoom out” your shape, it would look like a circle. Either way, it’s up to your imagination, but, for now, let’s put the theory to the test.
How to Draw Circles in Minecraft?
We suggest you practice Minecraft’s Creative Mode first, so you don’t waste resources unnecessarily.
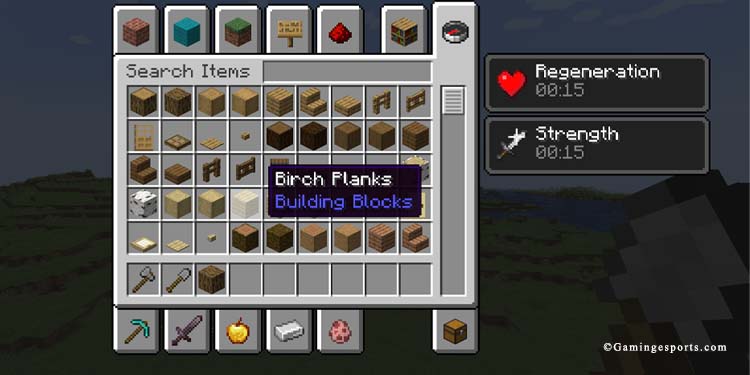
If you’re on Creative, open your inventory, and find any construction material you like. Put it on your action bar.
Then, find where you would like to practice and build your circular structures and bases. If you need to, use a shovel to dig and flatten the area.
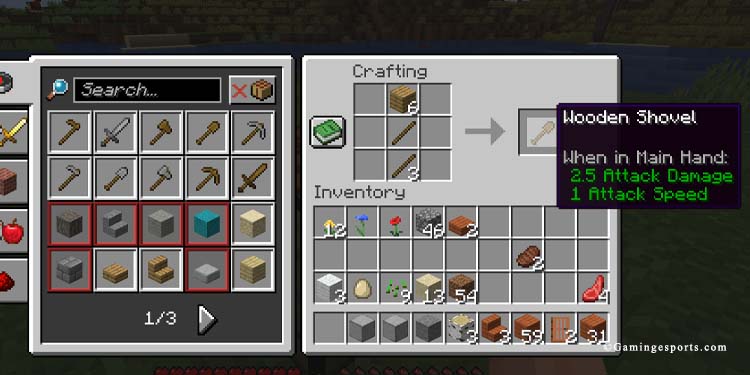
If you’re playing in Survival Mode, the recipe for a wooden shovel is two sticks and one wooden plank. Also, we recommend using wooden planks for this process, which is a beginner-friendly material.
Then, draw a cross with your blocks. I put a different block in the middle to mark the center. And, as you can see, there’s an equal amount of blocks going up, down, left, or right from the centerpiece.
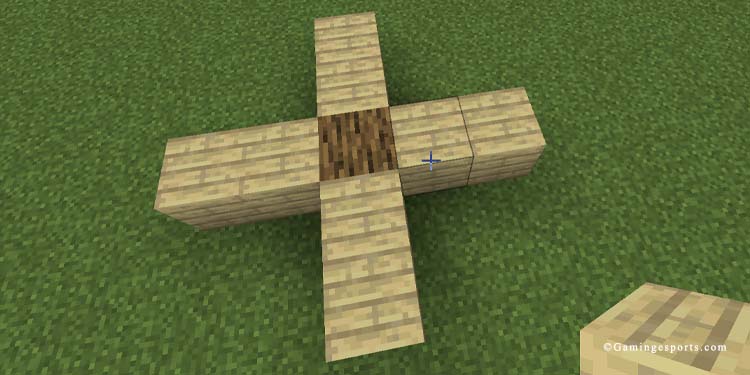
You can make a cross as big or as small as you’d like. Let’s use a 5-block diameter for your circle as an example.
Then, I added blocks on either side of the cross. In this case, it’s five blocks per side. The most important thing is to leave the corners empty, regardless of the size of the cross. Additionally, I used another plank color to make the process easier.
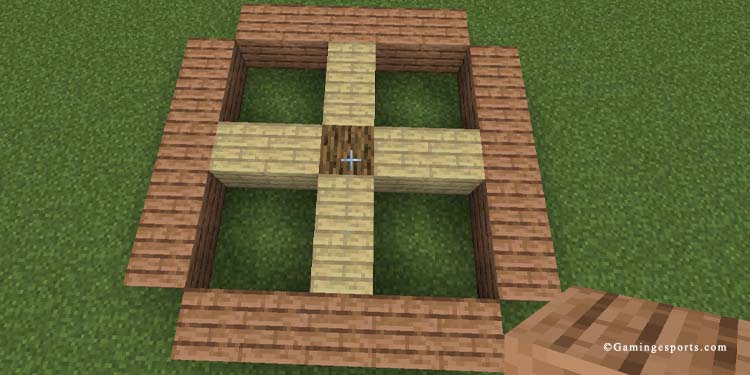
We can take this a step beyond. For example, add more blocks on top of each of the circle lines, but leave the line’s corners empty.
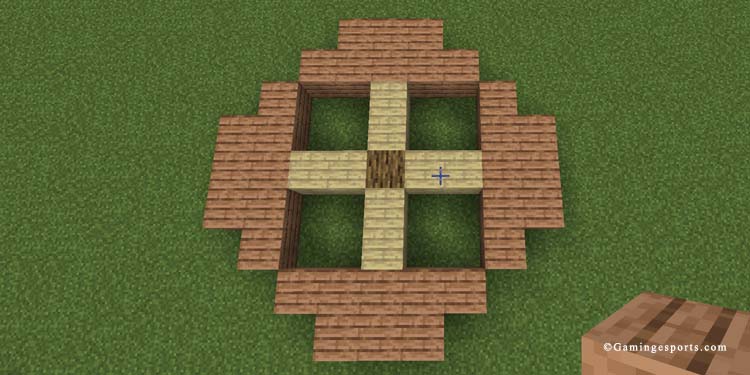
Does it look like a circle yet? Because we can do better. For example, we can destroy the cross, as we don’t need it anymore. It was just a guide.
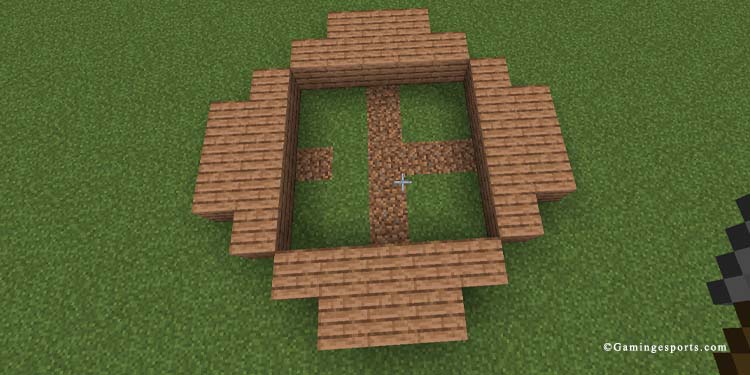
Finally, you can destroy the thick parts of each side, and viola! Repeat the process regardless of how many blocks you put on the initial cross!
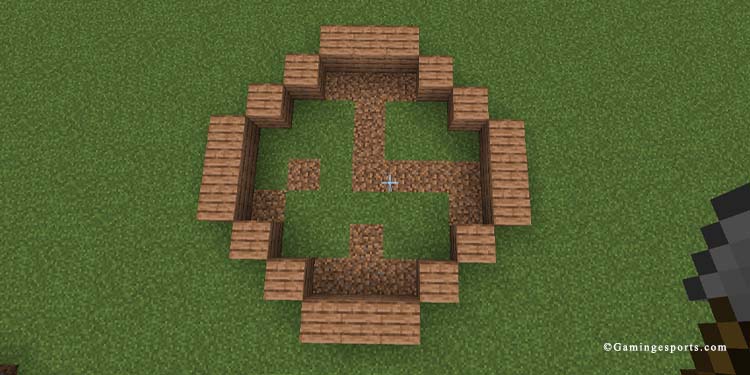
But we can still do better…
Minecraft Advanced Circle
Let’s talk about how to make an advanced circle in Minecraft, a bigger one. The process looks much more like the initial images I shared.
As always, start by making your diameter. For practice, first make a line with, say, 13 blocks. Remember to make the center block different, and as you can see, there’s an equal number of blocks going left or right of the center block. That’s why working with odd numbers works best for circles.
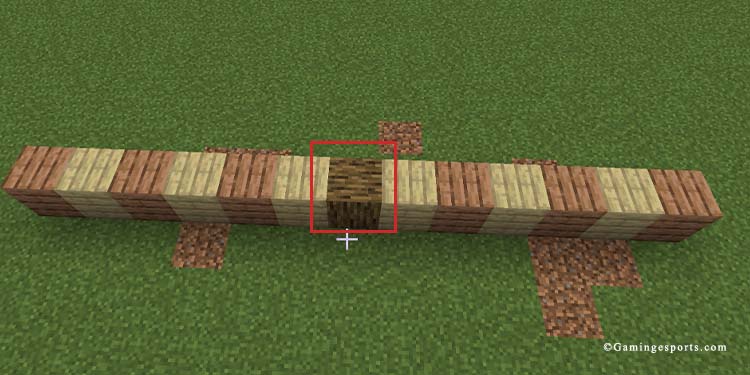
Next, complete the cross.
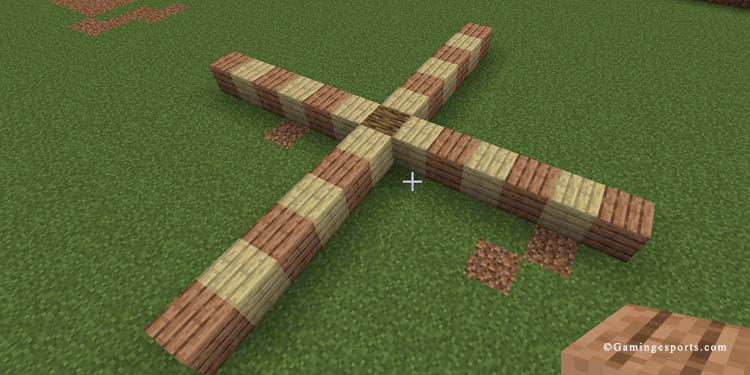
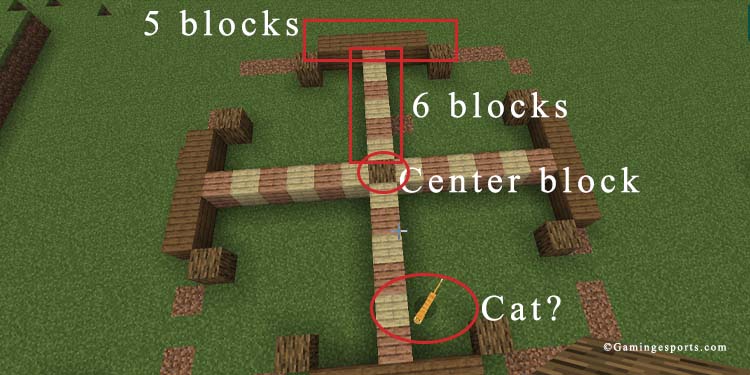
Then, draw a line on each side of the cross, but leave the corners empty (a cat came to play in my circle he likes it).
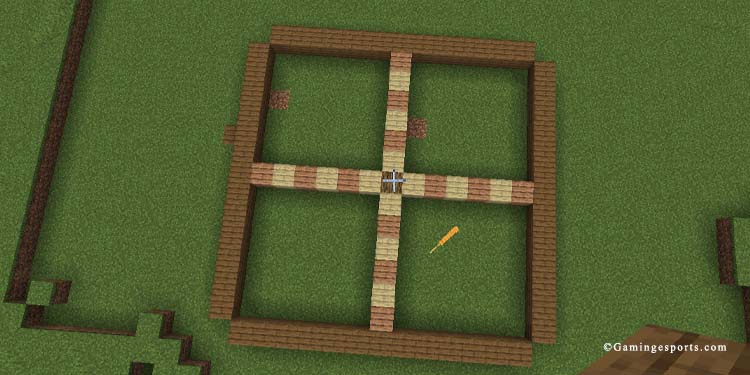
Let’s do some fixes to make this massive square look like a circle. First, break some blocks on each side, but do it symmetrically. In the case of this 13-block diameter circle, I left a 5-block line on either side of the cross and then broke a block on either side of the line.
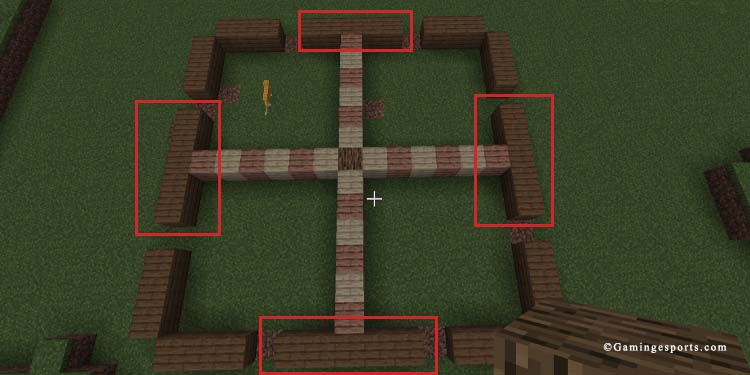
Particularly, the rule you can follow for separating the initial lines is:
- If the amount of blocks is not an odd number, then it should be the number minus one. For example, there’re 6 blocks here, so the initial line should be one of 5.
- If the amount of blocks is an odd number, it should be the number minus 2. For example, if the radius is 7 blocks, the initial line is 5.
Next, draw a corner coming out of each of the lines you just separated, and delete the remainder lines.
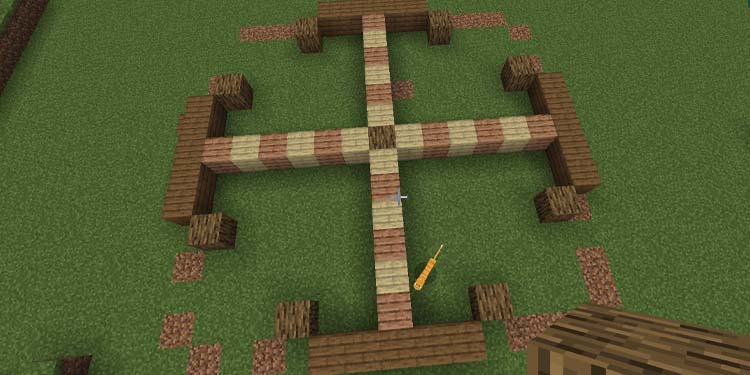
Then, connect the corners in a sensical manner. You’ll identify the most important pattern here: to make things appear round in Minecraft, you have to connect lines of “stairs” in a circular and symmetrical pattern.
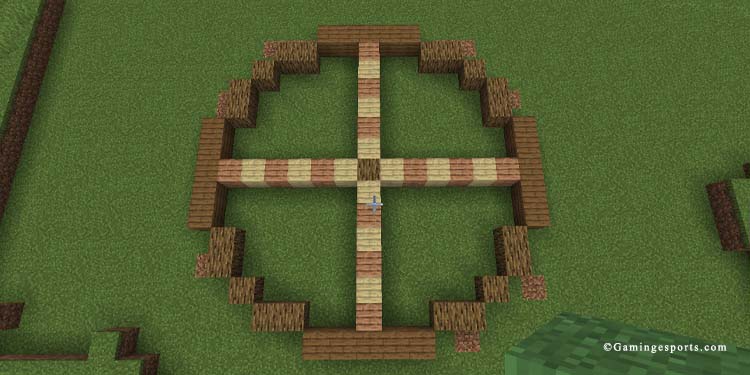
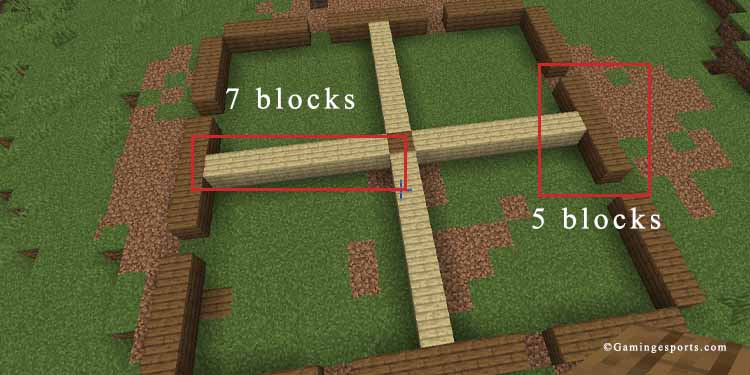
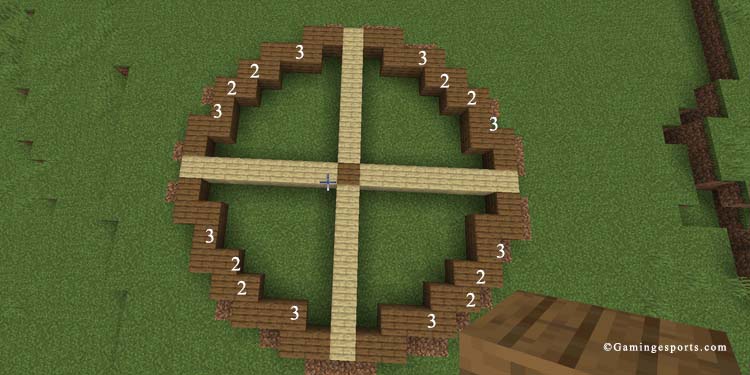
Now, check the numbers on the image:
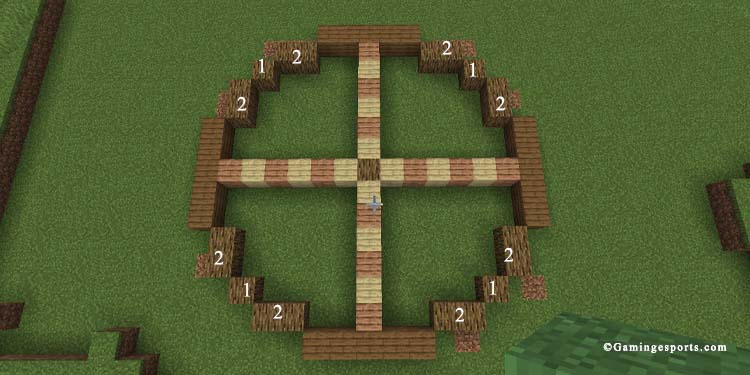
As you see, the number of blocks I used on either intersection equals or mirrors the opposite side. That is what it means to be symmetrical, and if you don’t follow that pattern, your circle will look odd.
Let’s make this look nicer, though. For example, I took out the cross, dug the base of the circle, and added bricks to make a floor.
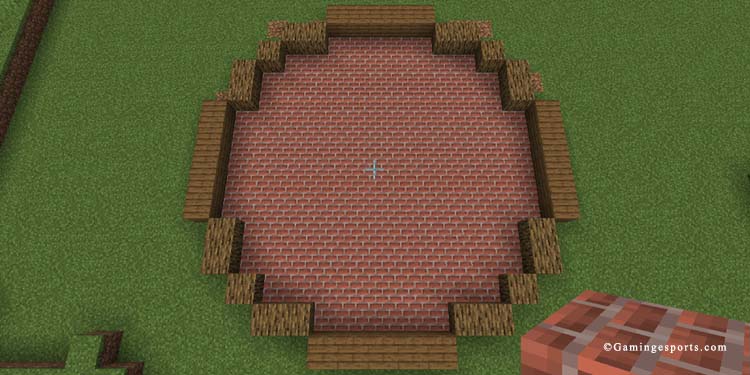
Next, let’s add a second floor and a third floor to the “walls” of the circle.
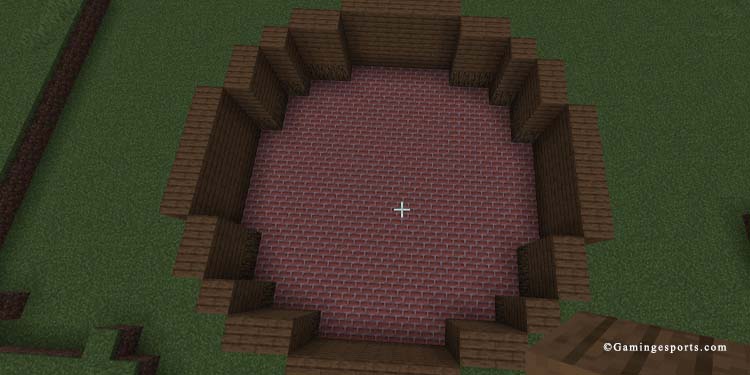
Finally, I added a roof and decided to turn this nice circle into a new base.
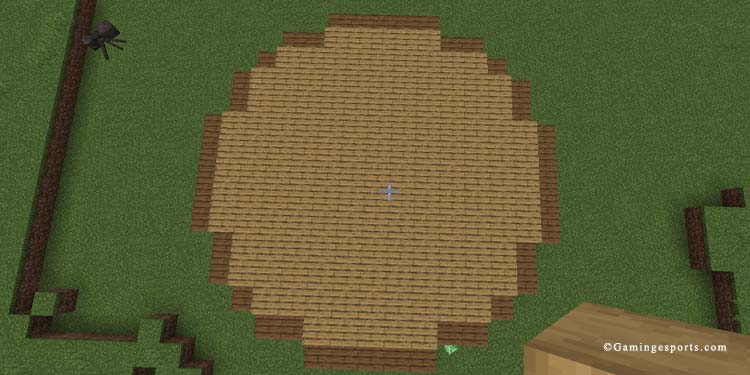
From now on, it’s up to you to experiment with circular shapes in Minecraft. It can be tough at first, and some of your circles may look like diamonds instead. But, with some practice (and by following our advice), you will get it quickly.
Here’s another example. I draw a 15-block diameter, and then I created a 5-block initial line on top of either side of the diameter.
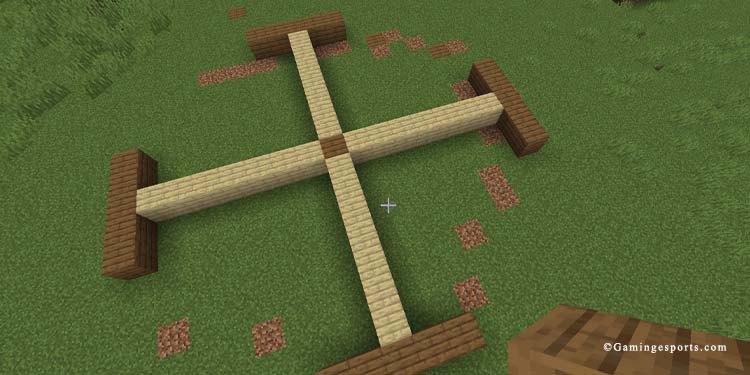
Then, connect each side as we did before. The idea is to find a way to connect the lines that are left symmetrically. That means putting the exact amounts of blocks on either side, as a pattern, as a rhyme.
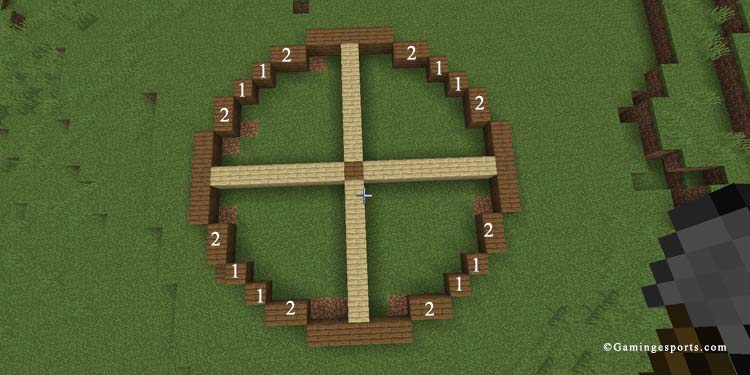
In the example above, I used a 3-block line connecting the left and right lines, and then lines of two blocks and one block to join the rest. It needs to be symmetrical, in other words, every side needs to be the same.
Alternatively, you may add further blocks on the individual blocks to create “L shapes.” It can give you a smoother look, and you can do it with any circle.
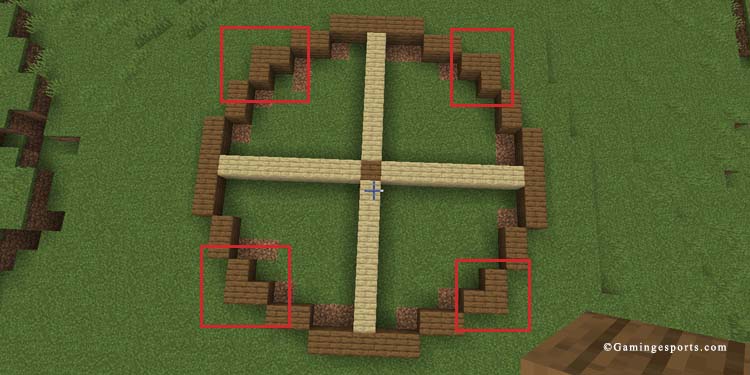
And as you see, it’s always a matter of “staircasing” your way through the edges of the circle. You can experiment further, though, as there can be many ways to create a circle.
As a reminder, though. On the last circle we’ve drawn, we had a 15-block diameter initially. Then, we added a line on top of each end of the diameter, which turned it into a 17-block diameter circle.
How to Make Circles in Minecraft With a Tool?
If you think that circles on Minecraft are a matter of mathematics, then you would be right. So, building the best circles possible requires some calculations, and there’s a tool that can do that for you.
You can go to Pixel Circle, where you can select the size of your circle, and the tool will give you a block structure to build it.
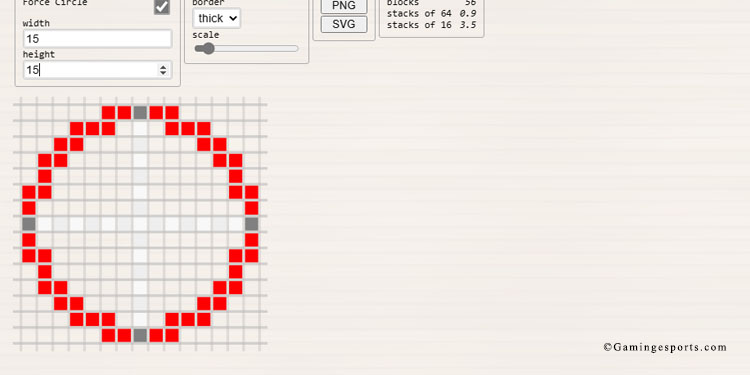
For example, if we were to repeat the circle above (with a diameter of 15 blocks), the first rule to follow is that you have to build the initial lines with the last block of the diameter, rather than on top of it.
For example, if we were to repeat the circle above (with a diameter of 15 blocks), the first rule to follow is that you have to build the initial lines with the last block of the diameter, rather than on top of it.
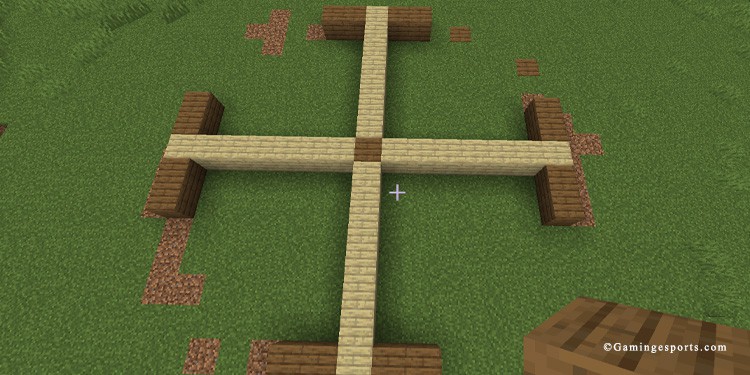
We explained it otherwise because it is easier to picture that way, and also easier to explain. However, it’s the same principle: either side of the circle needs to be identical, so you have to use “L” shapes to connect the dots in a matter that looks circular and symmetrical.
The tool also makes you build thicker circles, so it’s up to you on which formula to follow. Nevertheless, the tool’s formula becomes more complex and less intuitive as you increase the diameter’s size.
For example, if we were to build this circle (the 17-diameter circle I already created) with the tool…
It would look like this:
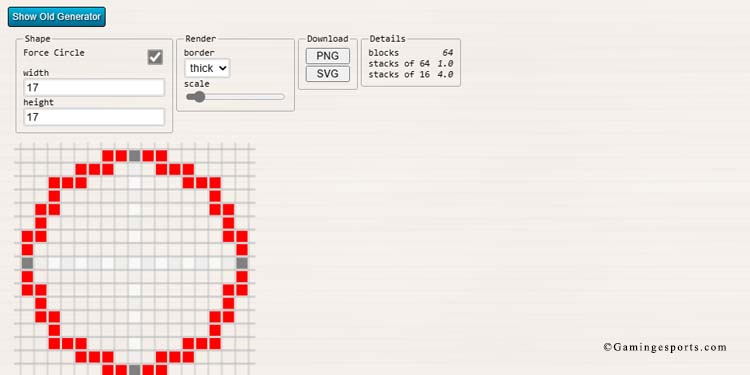
Or this:
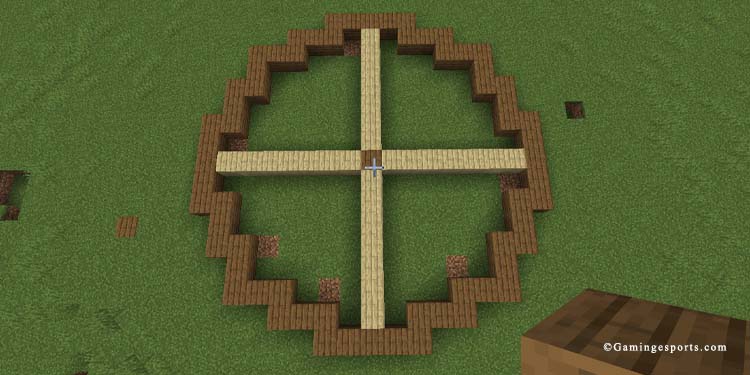
It looks similar to the above example, as it uses the same rules of symmetry. As I said, though, the tool makes the circles thicker, but you may break the blocks in the corners if you want a slimmer shape:
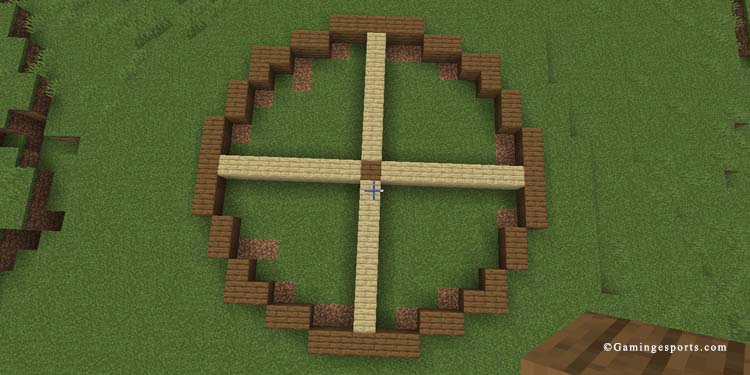
That is identical to the circle I drew before. Ultimately, it’s up to you, how do you like the circles? Slimm and smooth? Thick and evident? Similarly, would you like to use your logic and imagination to build it? Or would you like to use the tool?
