Steam has revolutionized how we purchase video games. No longer do we need to buy physical copies of video games, as now you can purchase them directly from the digital platform and add it to your account.
That being said, Steam isn’t far off when it comes to issues. There have been many problems regarding game detection, missing games library, broken store pages, and so on.
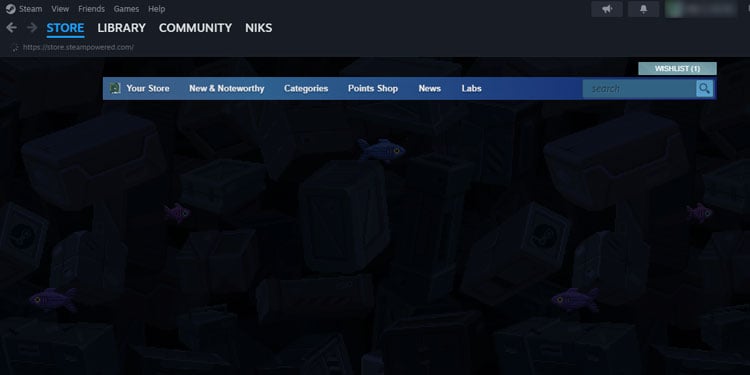
Today, we’ll be covering the issue of the broken Steam store page.
There are quite a bit of reasons why Steam fails to load the store page. Few of the most common reasons are,
- Glitched Steam’s background processes.
- Accumulation of faulty cache files.
- Outdated version of the application.
- Faulty Steam client application.
- Poor internet connection.
- Disrupted connection due to the Windows Defender Firewall.
- Faulty DNS servers.
Now, unto the fixes !
Table of Contents
Force Close Steamwebhelper.exe Task
Steam runs different processes in the background for smooth operation. The steamwebhelper process, in particular, loads the Steam store, the community tab, your profile, etc.
If this process doesn’t work properly or gets glitched out, then you’ll likely suffer from issues like your store not loading properly.
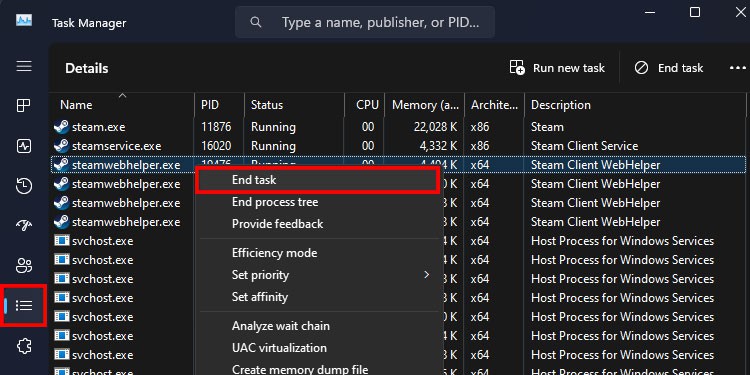
To fix this, you must manually terminate the Steamwebhelper.exe process in the Task Manager. After then, Steam will automatically start a new instance of the process.
- Press Windows + Shift + Esc shortcut keys to open the Task Manager.
- Switch to the Details tab.
- Scroll down and right-click on steamwebhelper.exe.
- Select End Task.
Clear Download Cache
Cache incompatibility is the most prevalent reason for breaking the majority of Steam’s features and functionality. This generally happens when your Steam application still uses the outdated cache stored locally on your system.
So, it’s best to clear out the download cache to avoid any issues.
- Launch the Steam application.
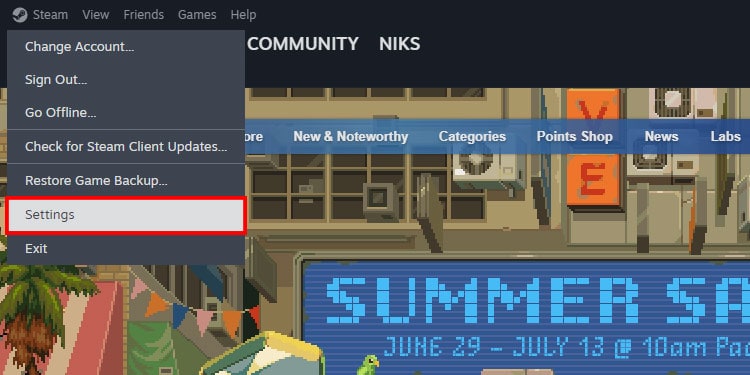
- Click Steam on the menu bar in the application’s top left corner.
- Open Settings.
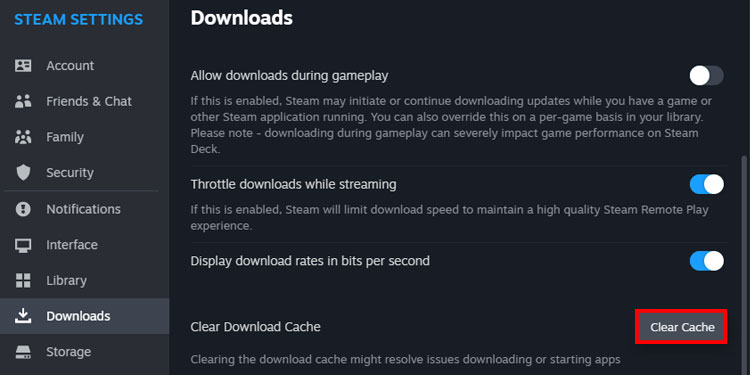
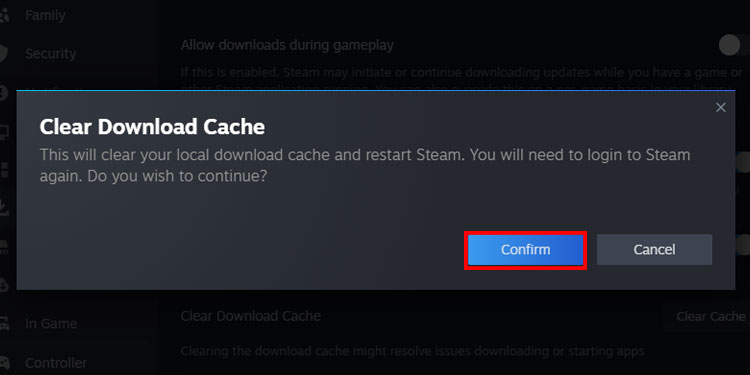
- On the Downloads tab, click the Clear Cache button.
- Hit the Confirm button to start deleting.
Clear Browser Cache
While we’re on the topic of clearing caches, it’s also a good idea to clear the browser caches. All the saved data, browsing history, and cookies that have been accumulated in the Steam client application are likely to create problems.
- Click on Steam on the menu bar and choose Settings.
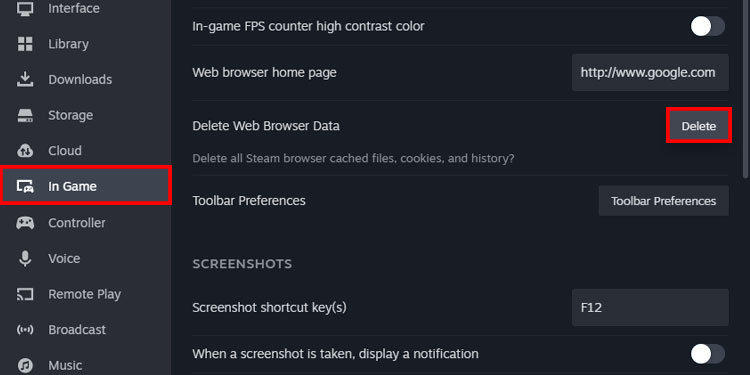
- Switch to the In-Game tab and click the Delete button.
- Click on Confirm to close the prompt.
Switch to Steam Client Beta
There have been several reports that users were able to resolve the Steam store page issue by simply switching their Steam version to the Beta version.
Although there hasn’t been a concrete reason for how making the switch solved this issue, nevertheless, it is still worth giving a shot.
- Launch Steam and click on Steam on the menu bar.
- Open Settings.
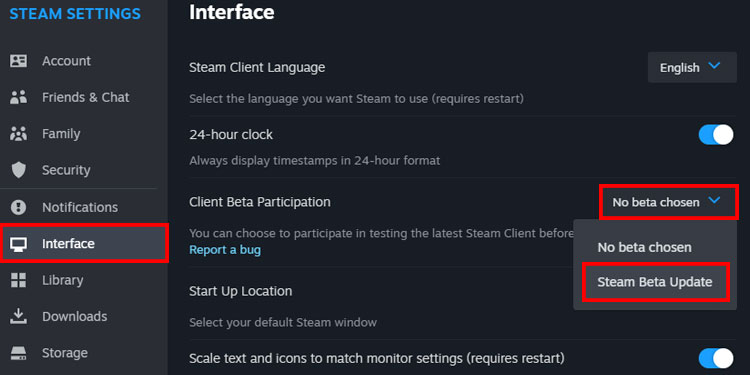
- Switch to the Interface tab.
- Click the dropdown menu beside Client Beta Participation and select Steam Beta Update.
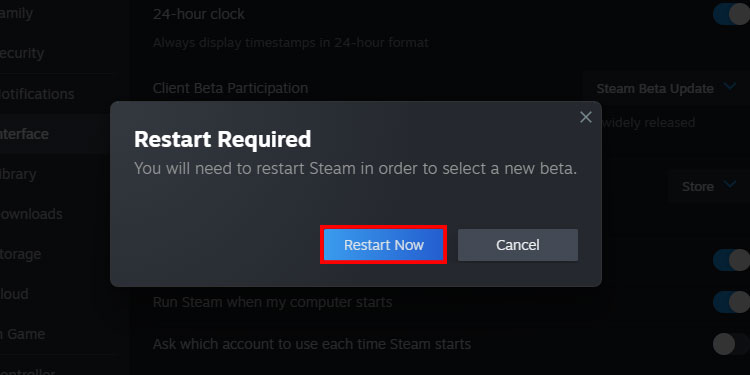
- Click on Restart Now to apply the changes.
Remove CEF Sandbox
Steam uses CEF sandbox, also known as Chromium Embedded Framework, for its integrated web browser.
The sandbox isolates itself from the rest of the system for carrying out different processes.
If there’s an issue within the sandbox, then Steam won’t be able to fetch information from their store page.
An easy fix for this case is to remove the Sandbox itself. We’ll be doing this by creating a Steam shortcut file and adding the flag on its Target field.
Usually, you’d have a shortcut file on your desktop whenever you install an application. But if there isn’t one, follow the steps below.
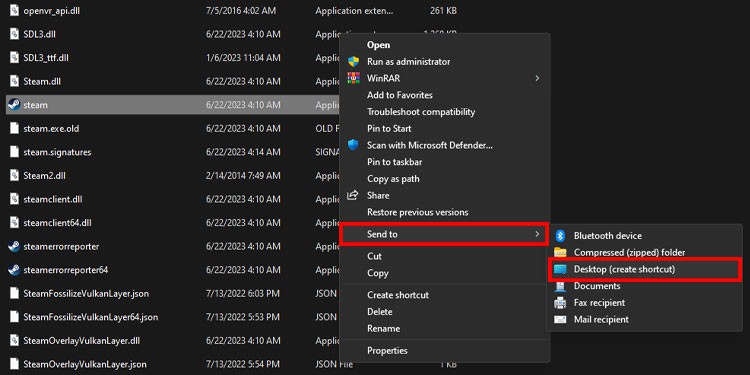
- Open Windows Explorer and navigate to the location where Steam is installed. If you’re unsure about the location, head to the Steam installation location “
C:\Program Files (x86)\Steam.” - Right-click on Steam and select Send to and then pick Desktop. This will create a shortcut file on your desktop. If you’re on Windows 11, you have to click on Show more options first.
After creating the shortcut file, we’ll proceed to add the flag.
- Switch to your desktop view and right-click on the shortcut file we’ve just created.
- Click on Properties.
- By default, the Target text field will be selected. Here, you’ll need to type
-no-cef-sandboxat the end of the Target location. So, in the end it should look like this.“C:\Program Files (x86)\Steam\Steam.exe" -no-cef-sandbox - Hit Apply and then Ok.
- Now, launch Steam normally.
Use the Big Picture Mode
Steam has two different modes. I.e., normal mode and the big picture mode. If Steam is unable to load the store page while in normal mode, then you should check the store page in big-picture mode.
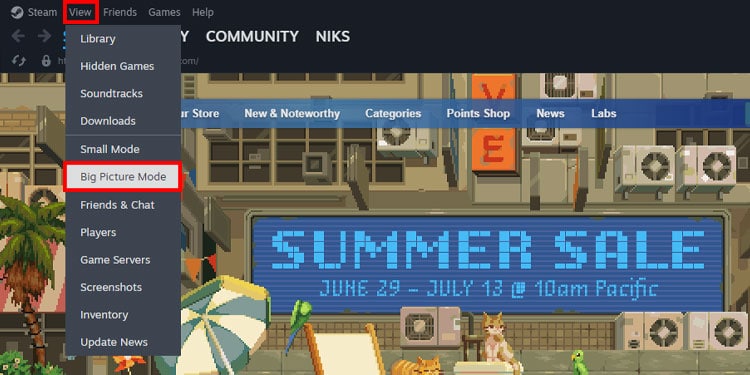
- Launch Steam and click View on the menu bar.
- Select Big Picture Mode.
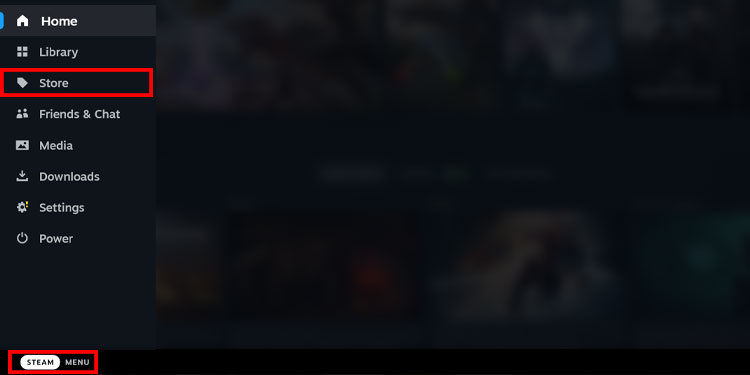
- Click on Steam Menu.
- Choose Store.
Test Your Internet Connection
As Steam is an online video game distribution service, it is quite crucial to have a proper internet connection.
If your connection suffers from hiccups and fluctuations pretty often, then the client application won’t be able to fetch the store page information from the server properly. This can often lead to broken UI elements on the store page.
So, test your internet connection and make sure it’s free from issues. You can use sites like speedtest or fast to analyze your connection.
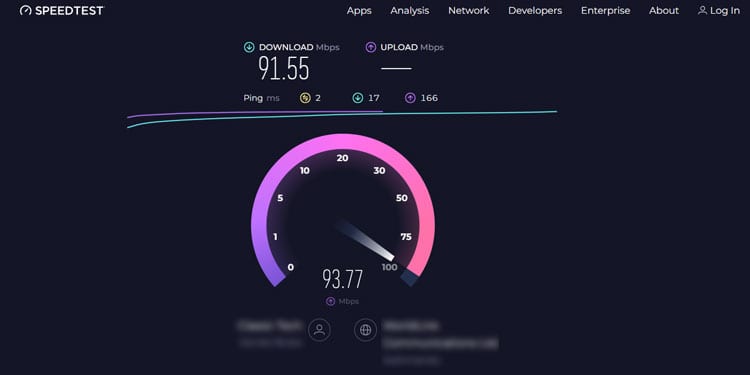
Note: If you are suffering from connectivity issues, then you can try restarting the router.
Authorize Steam Through the Firewall
The Steam client application shows the contents of the store page by sending requests and fetching information from the servers.
The Firewall system can occasionally falsely block this connection, resulting in Steam Store displaying a blank page.
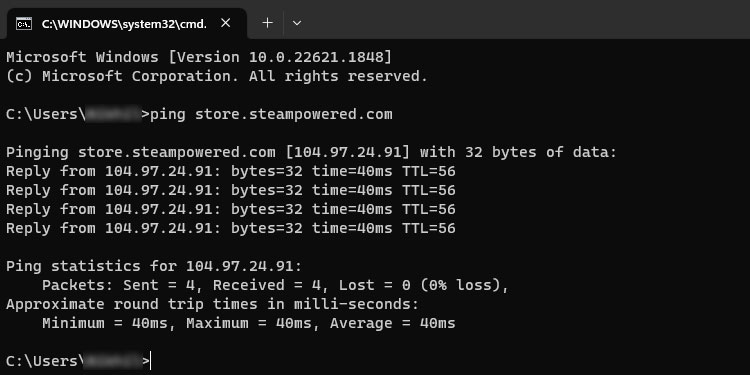
You can check the connection between your computer and the Steam servers using the ping command.
To get started,
- Press the Windows + R shortcut keys to open the Run command.
- Type in
cmdand press Enter. - Now, type in ping store.steampowered.com and press Enter.
If you’re getting replies from the server, then everything is fine. However, if you’re getting “Request Timed Out” instead, it means that your Steam Client cannot contact Steam servers.
So, check your Firewall and make sure that Steam is allowed to communicate through the Windows Defender Firewall.
To do so,
- Press the Windows + R shortcut keys to open the Run command prompt.
- Type in
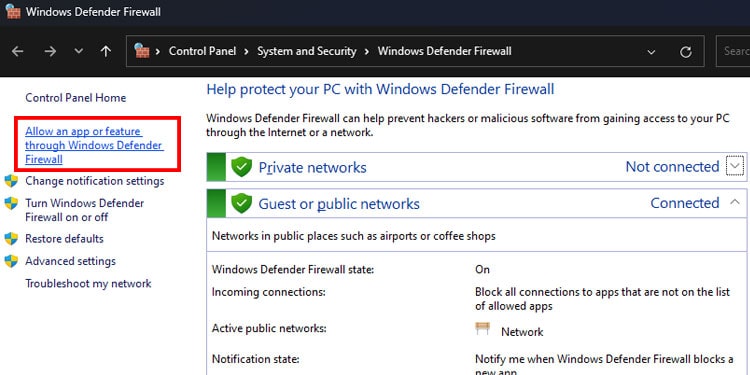
firewall.cpland press the Enter key. - Click on Allow an app or feature through Windows Defender Firewall option on the left-hand panel.
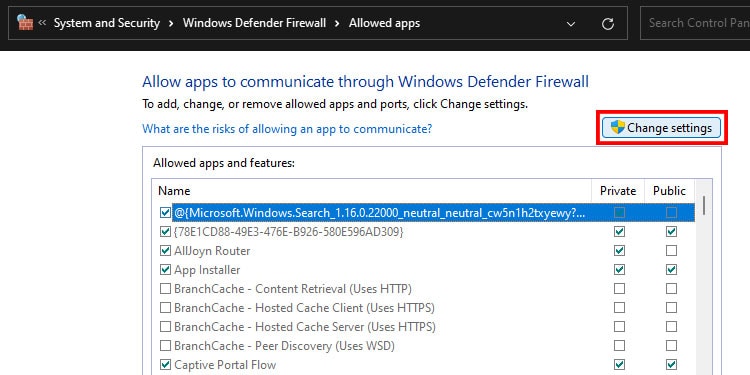
- Click the Change Settings button to get editing access.
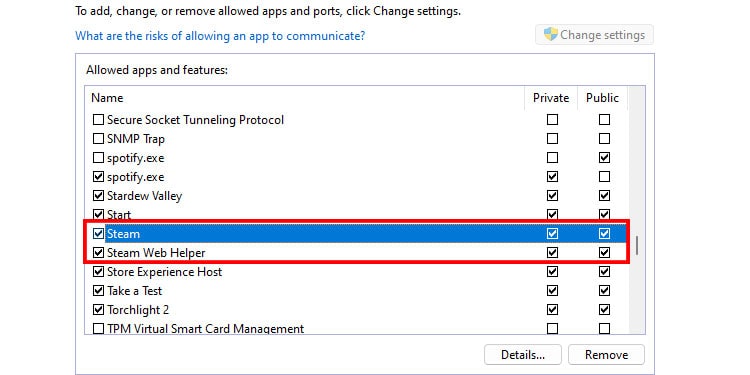
- Next, scroll down and locate Steam. Ensure to tick both the Private and Public checkboxes next to it.
- Repeat the above step for Steam Web Helper as well.
- Click on OK.
After allowing Steam through the firewall, perform the Ping test again to check the connection between the client and the servers.
Change the DNS Servers
Oftentimes, Steam being unable to connect properly to their servers can come down to having problematic DNS servers. So, the best course of action for this type of situation is to flush your previous DNS cache and change your DNS servers.
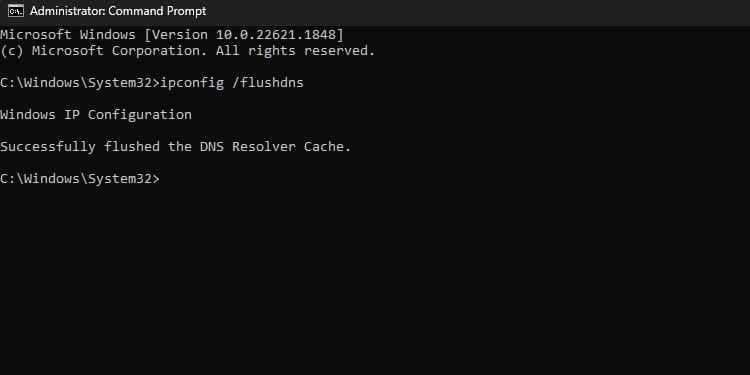
To flush the DNS cache, follow the steps below.
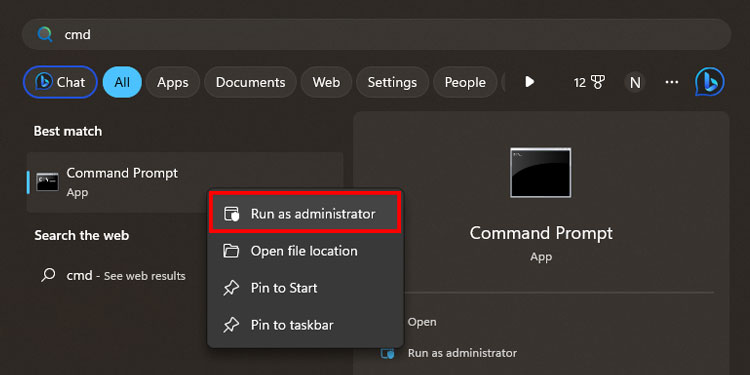
- Open the Search menu by pressing the Windows key on your keyboard.
- Type in
cmd - Right on the Command Prompt and select Run as administrator.
- Type in
ipconfig /flushdnsand press Enter.
Now that we’ve flushed the DNS cache, it’s time to assign new DNS servers to your system.
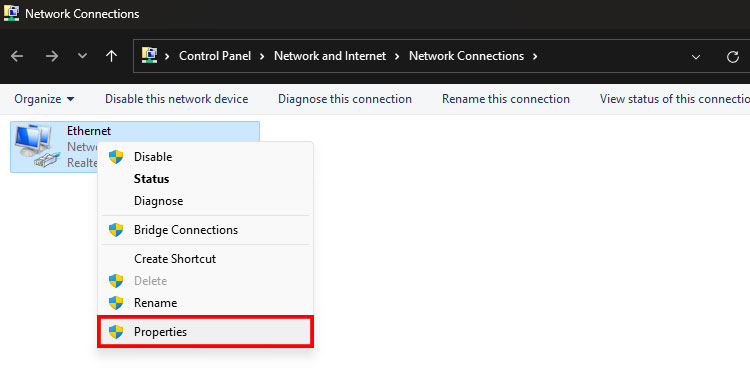
- Press the Windows + R shortcut keys to open the Run command.
- Type
ncpa.cpland press Enter. - Right-click on the type of connection that you’re currently using. (I.e., Ethernet or Wireless connection.) and select Properties.
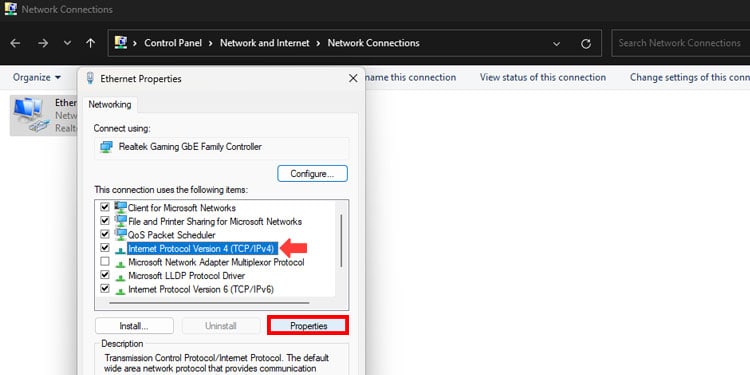
- Select Internet Protocol Version 4 (TCP/IPV4) and press the Properties tab.
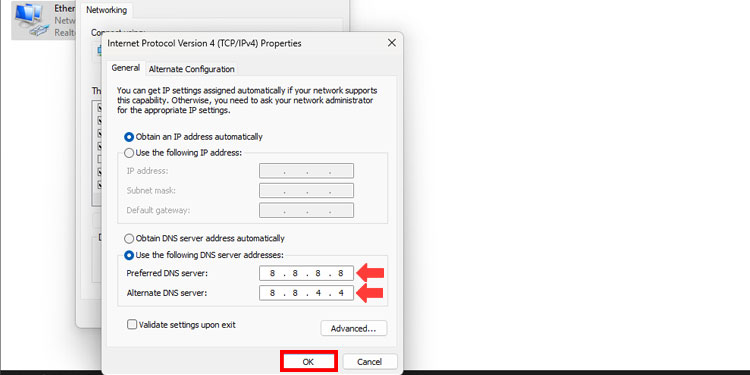
- Select Use the following DNS server addresses option.
- Type the following address in the given fields.
- Preferred DNS server
8.8.8.8 - Alternate DNS server
8.8.4.4
- Preferred DNS server
- Hit Ok and close the window.
After changing the DNS server, restart Steam and check the store page.
Update Steam
Like any other online-based application, Steam is also bound to have a few bugs and errors. A faulty update or installation files can lead to numerous issues, including a broken Steam store page.
To iron out such problems, the team over at Valve deploys hotfixes and updates frequently. So, update your Steam client application to keep up with all the fixes.
Although Steam updates itself automatically, you can also update it manually following the steps below,
- Launch Steam and click on the Steam option on the menu bar.
- Select the Check for Steam Client Updates… option. If there are any pending updates, Steam will download and install it automatically.
Re-install Steam
Steam can rarely bug out during the installation process and skip installing some crucial files needed to run the application smoothly. This can lead to broken features, blank pages, and frequent crashes.
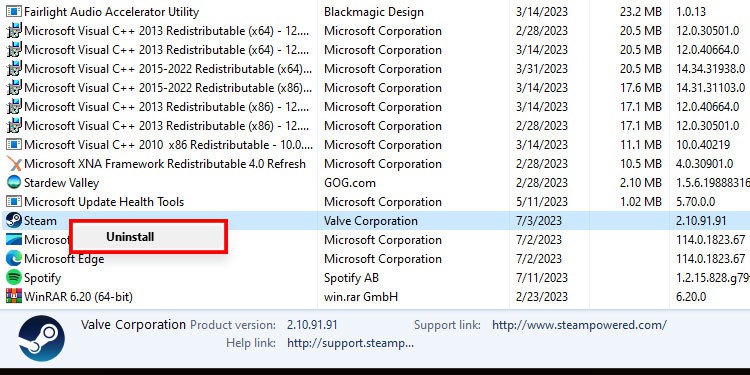
Your best bet for such situations is to remove your current Steam client application and install a fresh one instead. You can remove an application with the steps below:
- Open the Run command by pressing the Windows + R shortcut keys.
- Type in
appwiz.cpland press Enter. - Right-click on Steam and select Uninstall.
You can then download and install the latest version of Steam from their website.
Check The Status of Steam’s Servers
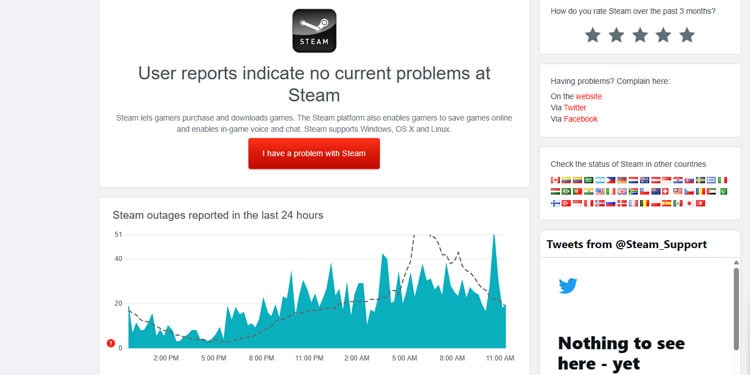
Occasionally, the issue of Steam not loading the store could be related to their servers, as it may have been taken down for its timely maintenance or troubleshooting.
The best thing you can do in this situation is to wait. Try checking back after a couple of hours or so.
You can also use sites like Downdetector or steamstat.us regarding the status of the servers.
Visit Steam on Browser
Although this is not a direct fix for the Steam store page issue, you can also try opening Steam on your web browser if you’re unable to access the Store page on the Steam client application.
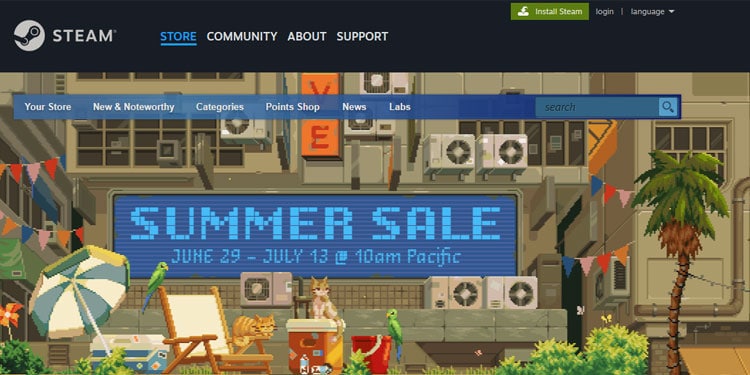
You won’t be able to play games from your library, but you will at least be able to browse and purchase games from the Steam store page.
Visit Steam and log in to your account.
