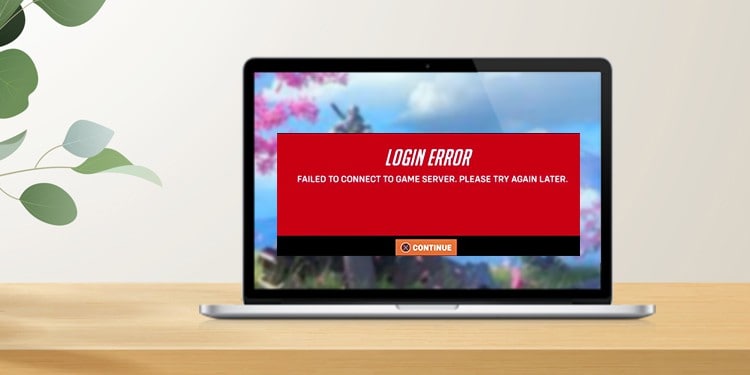
Many players around the globe are getting a “login error” message, or “failing to connect to the game server, please try again later” error in Overwatch. The problem is generally caused by a poor internet service provider or a server that might be under maintenance.
Nevertheless, if you are still getting this error in spite of waiting several hours or even days then we will help you solve it. Here, we will try out every possible fix in order to connect with the Overwatch login server.
What Causes Overwatch Failed to Connect Error ?
This can happen for several reasons. Your internet might be unstable, your Battle.net application is not up to date or you have not selected the correct Region on your account. Other possible causes include:
- Server Unavailability
- Firewall Settings
- Corrupt Game Files
- Network Settings
- Use of Proxy Servers
How to Fix Overwatch Failed to Connect?
First, start with checking the availability of the Game Servers. If there is no issue with the servers, try out all the fixes listed below.
Check Your Internet Connection
Sometimes you may face this issue due to low connection signals. You can choose to plug in an ethernet connection since wired connection transfers data way faster than wifi. But if your internet speed performance is fast but the error still prevails then you can try resetting the router and your pc.
Try disconnecting your wifi and connecting back again. You can switch off your router for a minute or two in order to function back properly. All these methods are quick fixes to iron out any signal blockage. If these do not work then move on to the next fix.
Allow Application Through the Firewall
Allowing your game through the firewall will let the game have access to the necessary network port resulting in effective communication from your computer to the network server.
Windows might sometimes automatically block third-party apps and games to maximize security. We can allow access to Overwatch with the steps below.
- Press Windows+R and a “Run” box will appear. Type
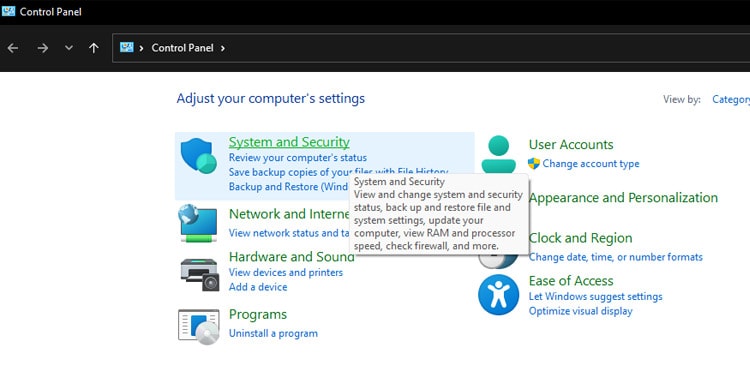
Controland press Enter. - Control Panel windows will open. Here, Click on System and Security.
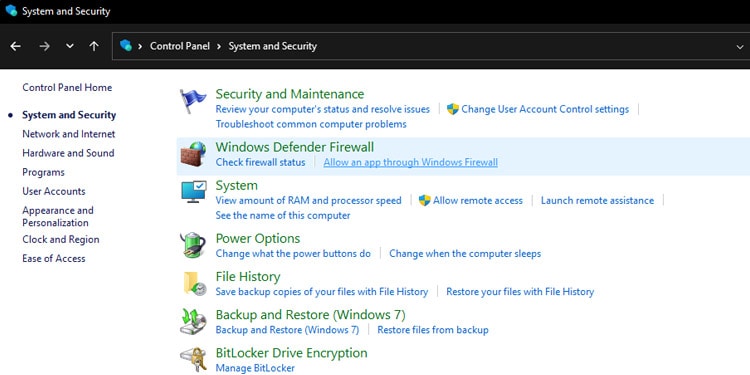
- Click on “Allow an app through Windows Firewall” which is located under Windows Defender Firewall.
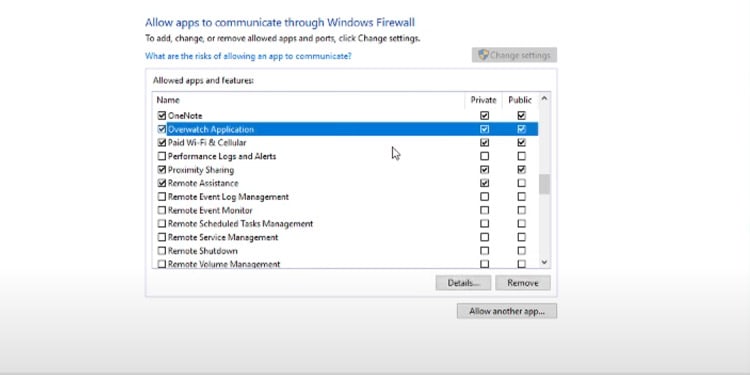
- Scroll down until you locate the Overwatch Application. There are two checkboxes on the right side of the list. Make sure to check both the private and public boxes. And click OK.
Now you need to add your game on exclusion. Follow these steps
- Press the Windows button and search Settings.
- Under Privacy & security, click on Windows Security.
- Click on Virus & threat protection. A separate window will pop up.
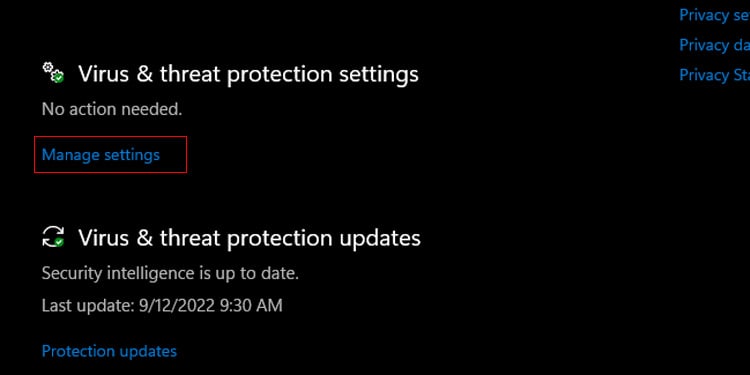
- Click on Manage settings under Virus & threat protection settings.
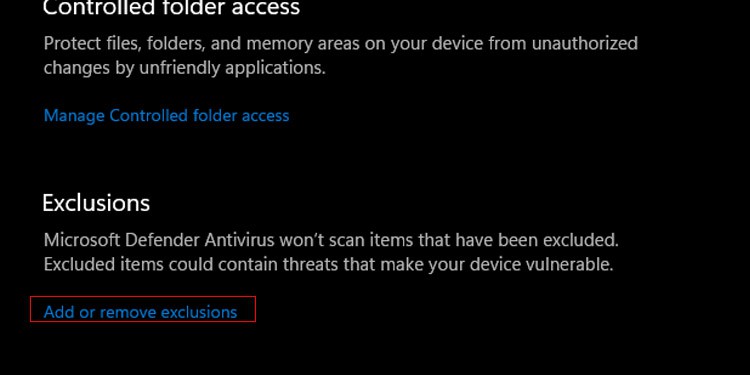
- Scroll down where you will find the Exclusion option. Click on Add or remove exclusions.
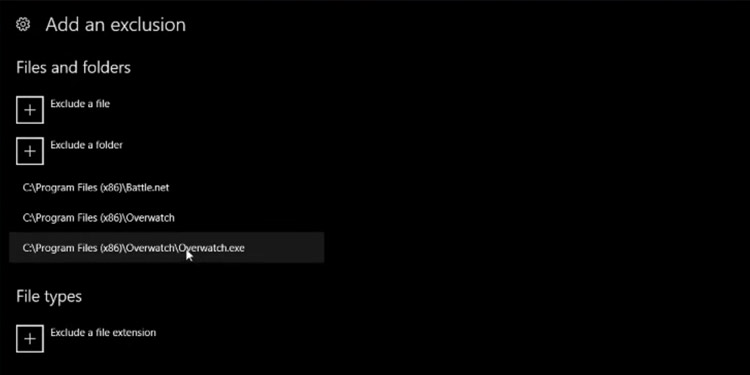
- Exclude the Battle.net folder and overwatch file as well as the folder and you are good to go.
Scan and Repair
This option will help clear files that might be the cause of connection issues. With every update, the game downloads additional files for optimizing the smooth connection but often those additional files get corrupted causing server errors. We will be clearing out those unwanted files by scanning and repairing the game.
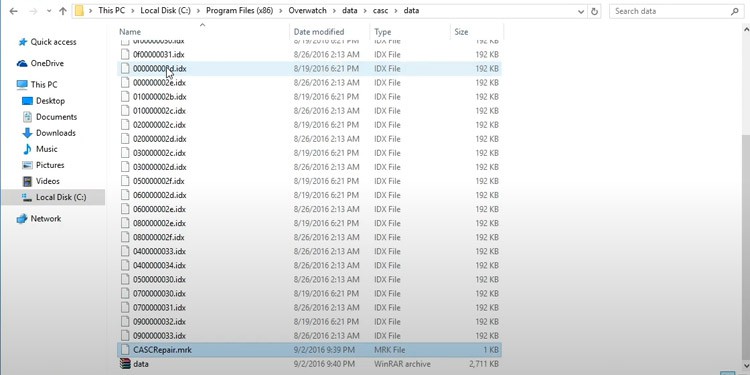
- Go to
Local Disk C > Program files > Overwatch > data > Casc > data. This is the default location of Overwatch. You need to delete theCASCRepair.Mrkfile inside the data folder. - Close the window and open the Battle.net application.
- Among the list of games, select Overwatch.
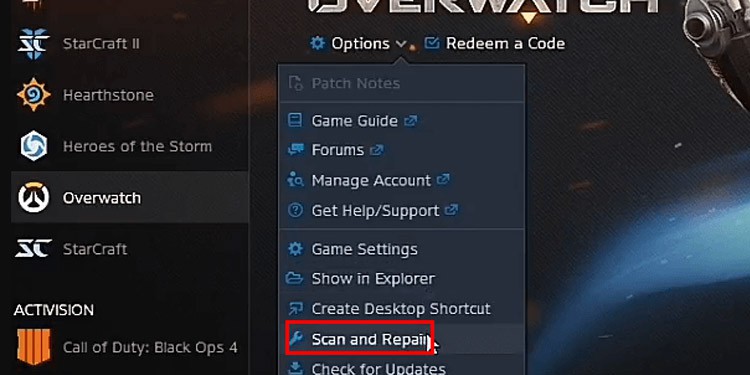
- Inside the Overwatch page, expand the Options menu and click on Scan and Repair.
- Click Okay and the system will begin scan and repair operation.
Resetting Winsock Data
Resetting Winsock Data will reset your network configuration back to default mode. Any changes made to the network will be reset. Basically, it’s clearing an unnecessary cluster of files and a fresh start at connecting to TCP/IP traffic. Here’s how you reset Winsock data.
- Press the windows button and type cmd.
- Right-click on CMD to run the command prompt as an administrator.
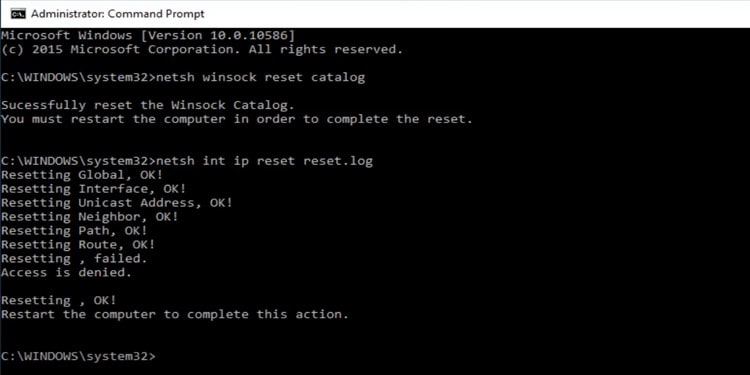
- Type “
netsh winsock reset catalog” and press enter. You now need to restart your computer and the network system will be reset. - You can also check the reset by typing “
netsh int ip reset reset.log”
Disable Proxy Server
The proxy server is a middle server that dictates the accessibility of certain internet connections. The work of a proxy server is to block malicious software or apps from entering your PC.
This basically provides security against hackers but in many cases, proxy servers can be the reason for blocking server connections that are necessary to run the game connection. Below are the steps for disabling the Proxy server.
- Press Windows button +R to open the Run box.
- Type
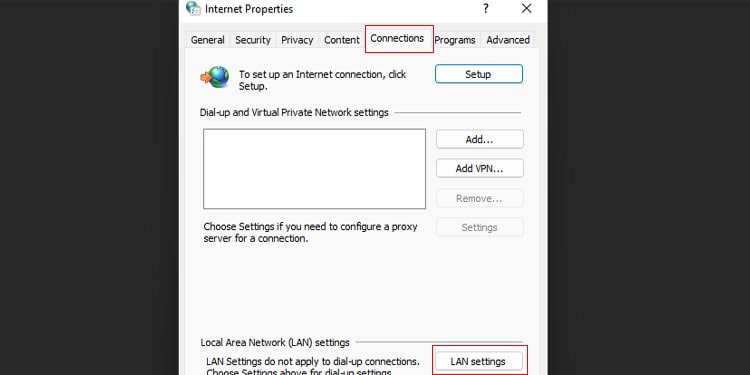
inetcpl.cpland the internet Properties box will pop up. - Click on the Connections tab and under Local Area Network(LAN) Settings, click on LAN settings.
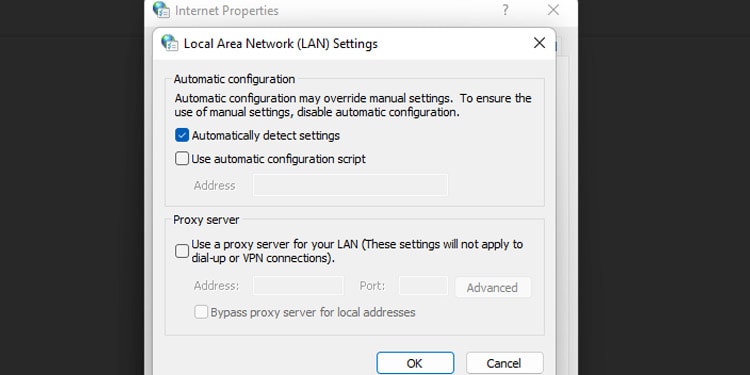
- Inside the LAN setting box, uncheck the description under Proxy server. Click on OK and the current setting will be saved.
You can also use Blizzard’s Battle.net Looking glass to diagnose Overwatch and troubleshoot disconnecting server errors. Make sure the Overwatch game and your windows version are up to date. If nothing else works, you can always contact Overwatch support.
