The massive block builder is full of features but not free of errors. Today, we’re teaching you how to fix the black screen issue on Minecraft.
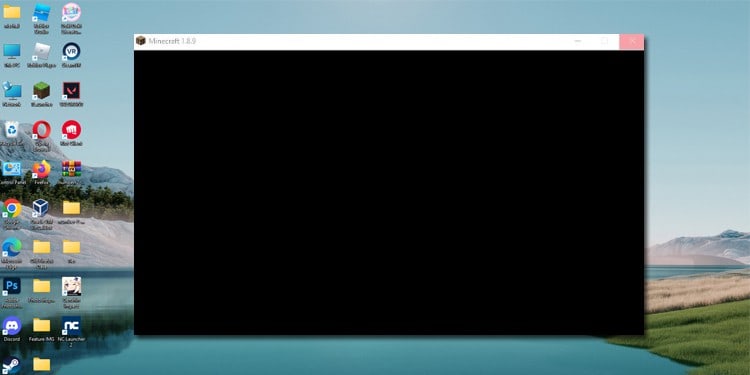
The error presents itself on Windows 10 and 11. When updating or launching the game, you’d see it as a black screen. You won’t see any other notifications or error codes, though.
So, the lack of information could make Minecraft’s black screen error challenging to solve. We aim to give you the causes and solutions to understand and fix the issue.
Black Screen Issue on Minecraft Causes
Many players have found the black screen error on Minecraft, and we’ve compiled a list of reasons to explain it.
If you pinpoint the culprit, you can fix the issue faster. So, here’s the list:
- Your Windows system is out of date.
- Your graphic drivers are out of date or corrupted.
- The antivirus is interfering with Minecraft.
- The Firewall is blocking Minecraft.
- Minecraft requires compatibility mode and administrator rights to run.
- The Minecraft folder is corrupted.
- The Minecraft shortcut is corrupted or needs administrator rights.
- Minecraft’s anti-aliasing settings are preventing your game from running.
- Third-party apps are causing issues.
As you see, these causes don’t present any significant issues. Instead, we can fix it quickly with a few steps.
How to Fix Black Screen Issue on Minecraft?
The troubleshooting ranges from updating your PC to deleting Minecraft folders on your PC. We advise you to test Minecraft after each step or go straight to the solution you think will help you.
Update Windows
Let’s start by updating Windows. Otherwise, it may present compatibility issues with Minecraft.
- Click the Windows icon on the taskbar.
- On the search bar, type “windows update.”
- Open “Windows Update settings.”
- Click “Check for Updates.” If you see a “Download and install” button, click it. Alternatively, checking for updates may deliver a new “Download and install” button, which you’d need to click.
- Windows will do it in the background if you start an update download process. When it finishes, it will let you know and prompt a restart to install it.
Update GPU Drivers
Similarly, you must update the graphic card drivers to avoid different compatibility issues.
There’re two ways to perform this task. We can do it via the Device Manager or the driver’s proprietary software. Let’s complete the process with Windows’ built-in tool first.
- Right-click the Windows icon on the taskbar.
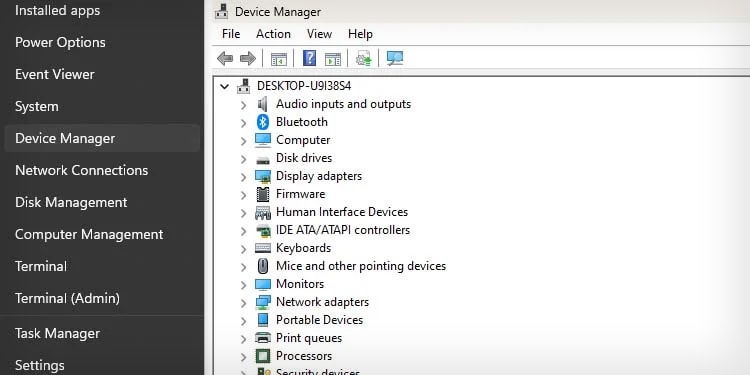
- Click the Device Manager on the cascade menu.
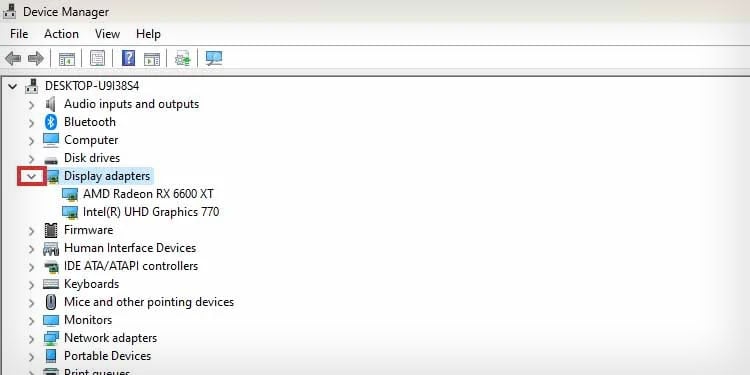
- Click the arrow next to “Display adapters” to expand the GPU driver category.
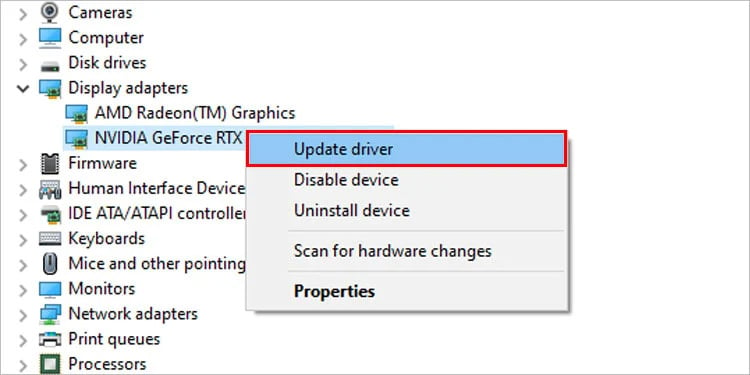
- Right-click every time on the “Display adapters” category.
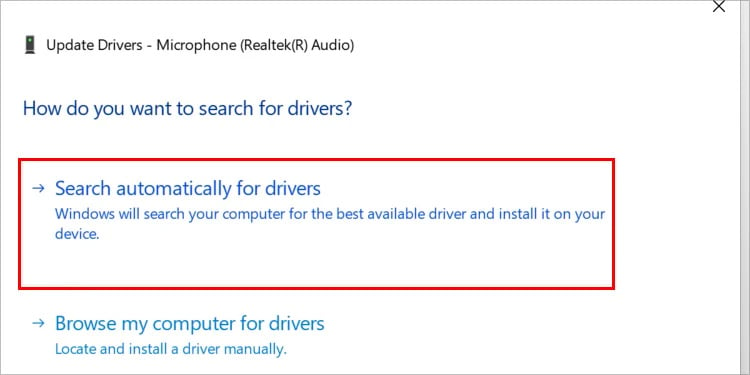
- Select “Update driver.”
- Select “Search automatically for drivers.” If there’s a driver available, Windows will let you know.
- If there’s a driver available, Windows will download it and let you know.
The second way to update the GPUs is by downloading and installing the driver’s software. Depending on the units you saw in the “Display adapter” category, download one of these proprietary apps:
- NVIDIA Control for NVIDIA GPU.
- AMD Adrenalin for AMD GPUs
- Intel software for Intel iGPUs.
- Intel Arc drivers for Intel Arc cards.
Once you install these programs, they will quickly let you know when and how to download a driver update.
Run Minecraft with Administrator Rights and Compatibility Mode
Older games like Minecraft may have problems running on Windows 10 and 11. You must enable compatibility mode for Windows 8 and administrator rights to fix it.
You must set this up on the Minecraft .exe file and then send the file to the desktop. Here’re the steps:
- Go to Minecraft’s installation folder.
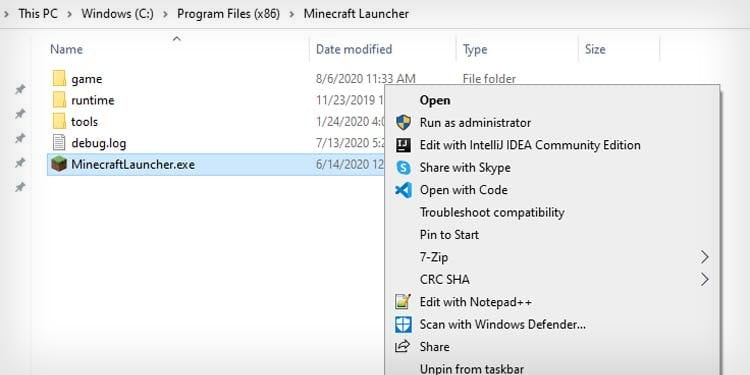
- Search for the
Minecraft.exefile (“Minecraftlauncher.exe“). Alternatively, follow the process with Minecraft’s shortcut on your desktop. - Right-click the file and select Properties.
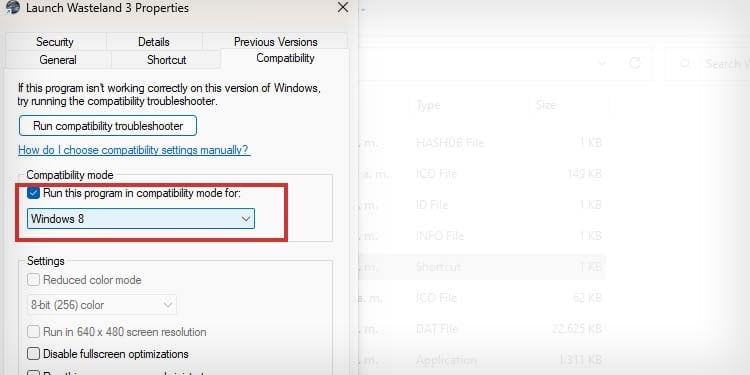
- Go to the Compatibility tab.
- Check Run this program in compatibility mode and select Windows 8.
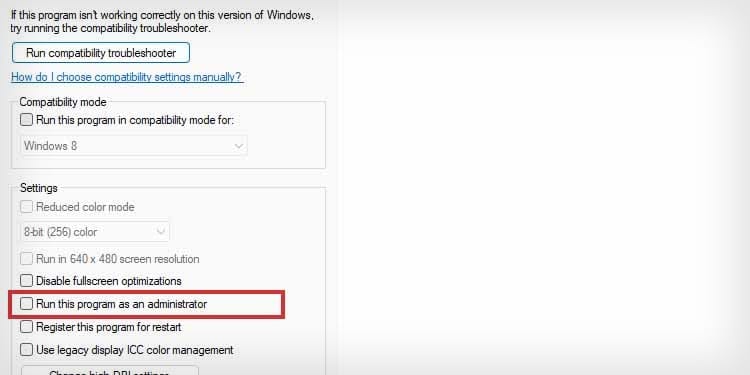
- Check “Run this program as administrator.”
- Click on Apply and then Ok to make the changes.
If you performed these changes on the .exe file within Minecraft’s installation folder, you’d have to send it to the desktop as your new Minecraft shortcut. To do so, right-click it and select Send to – desktop.
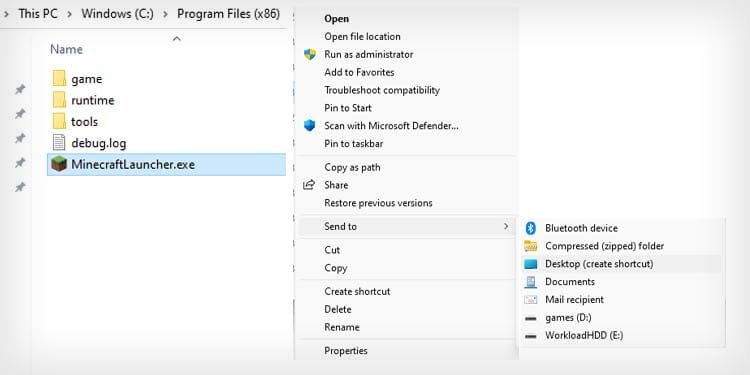
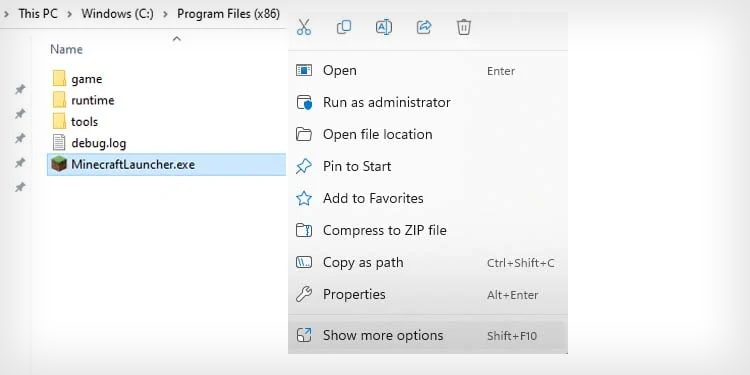
Lastly, if you’re on Windows 11, you’d have to right-click the .exe file and select “Show more options” to find the shortcut option.
Allow Minecraft Through Your PC’s Security Systems
Your antivirus, as well as Windows’ built-in Firewall, may be blocking Minecraft. This is especially common as Minecraft is an online game.
Let’s start by adding Minecraft as an exception to the antivirus.
Add Minecraft as An Exception to Your Antivirus
I use Windows’ default security program. If you’re using another program, you’d probably find a similar option.
So, take these steps as an example or a guide:
- Click the Windows button on the keyboard.
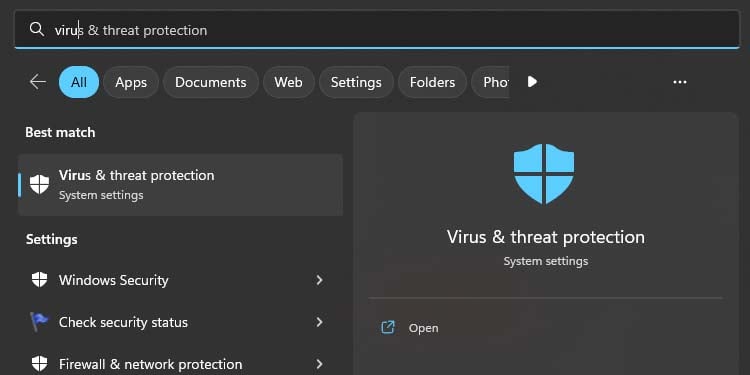
- Type “Virus” on the search bar.
- Open “Virus & threat protection.”
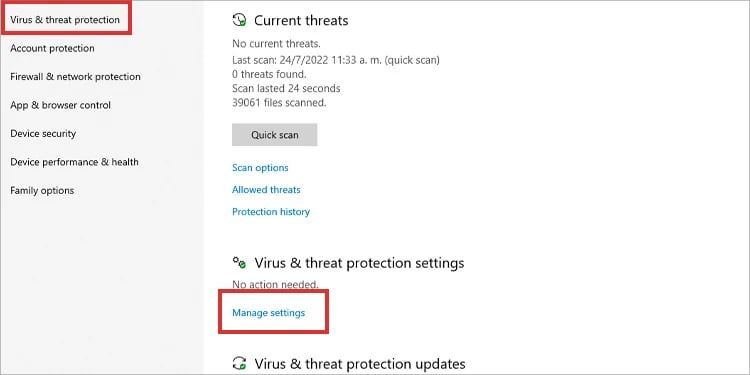
- Click on “Manage settings” under “Virus & threat protection.”
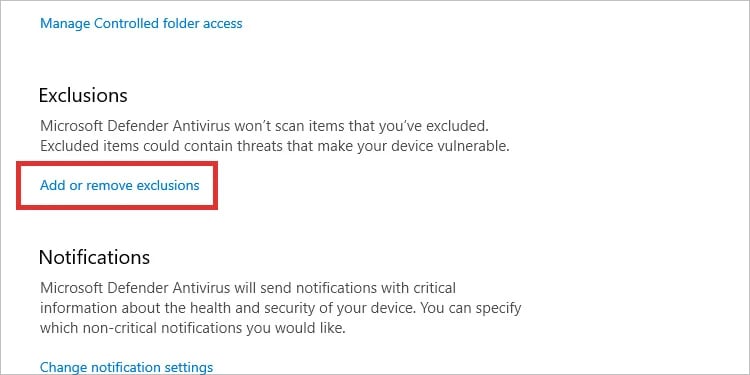
- Click “Add or remove exclusions” in the “Exclusions” area.
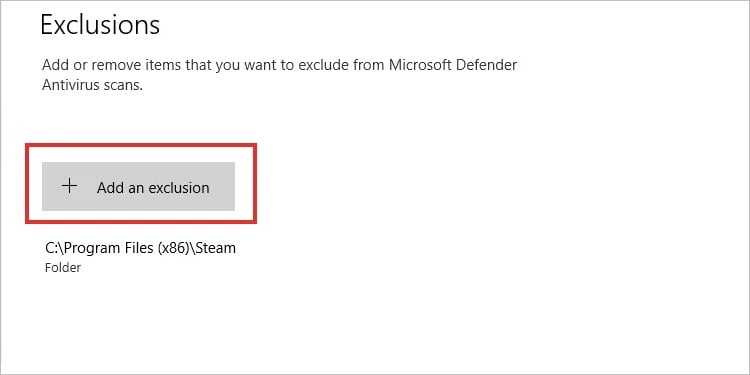
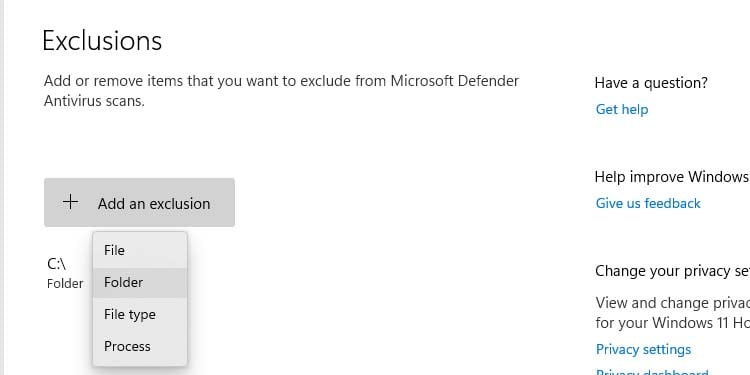
- Click the “Add an exclusion” button.
- Select Folder.
- Select Minecraft’s entire folder and add it as an exclusion. This will prevent the antivirus from blocking anything within this folder.
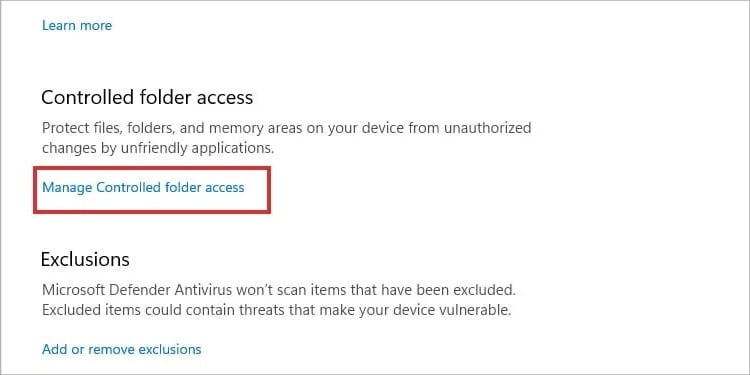
- Go back to “Virus & threat protection.”
- Click on “Manage controller folder access.”
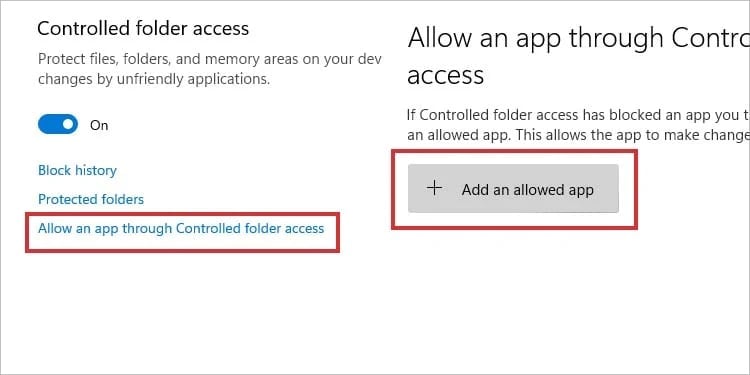
- Click “Allow an app through controlled folder access.”
- Click on “Add an allowed app.”
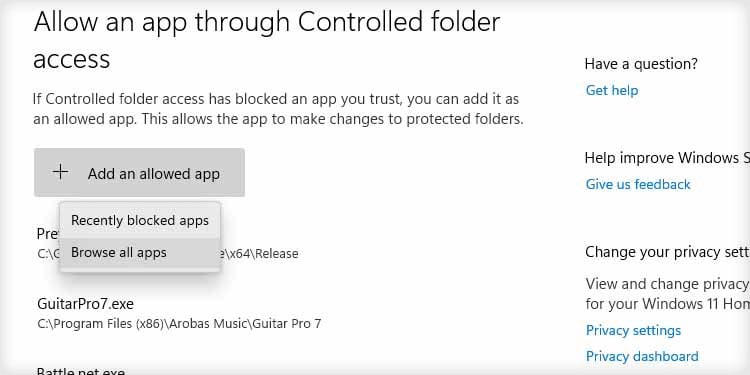
- Click on “Browse all apps.“
- Select Minecraft’s “.exe” file and add it as an exclusion.
Allow Minecraft Through the Firewall
Windows built-in Firewall may be blocking Minecraft entirely, so you should try adding it as an exception on the security software.
- Click the Windows button on the keyboard.
- Type“firewall” on the search bar.
- Click on “Firewall & network protection.”
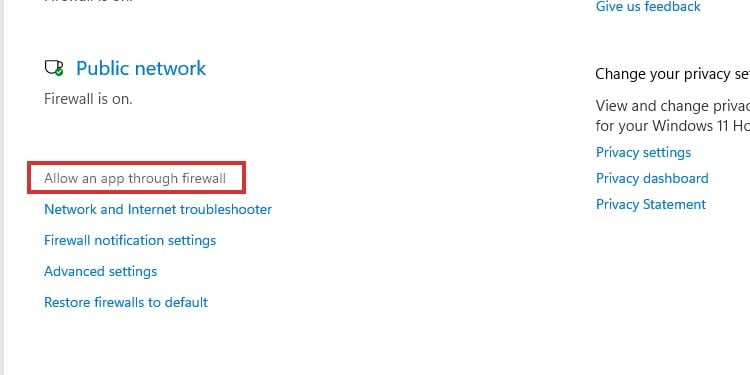
- Select “Allow an app through the Firewall.”
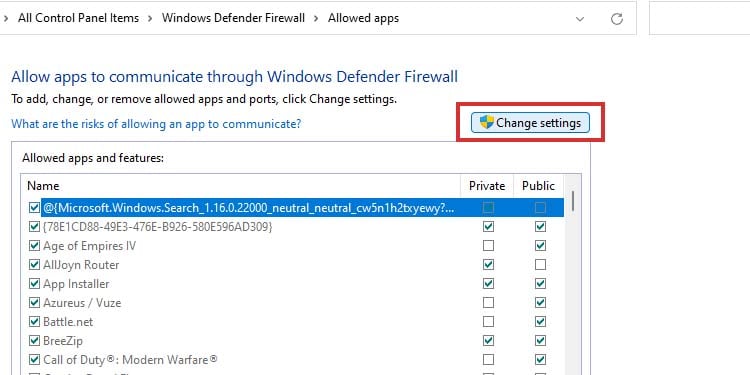
- Click “Change settings.”
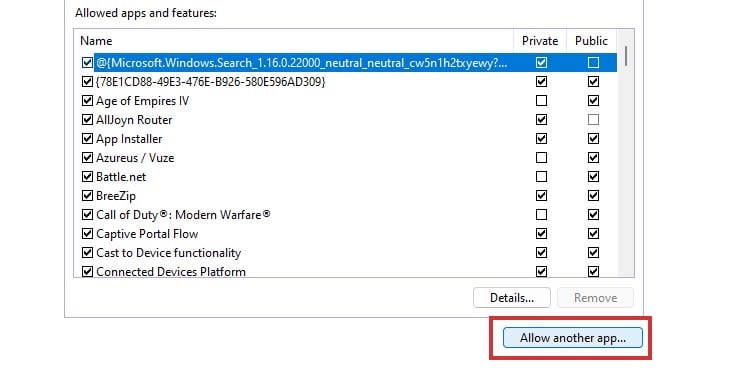
- Select “Allow another app.”
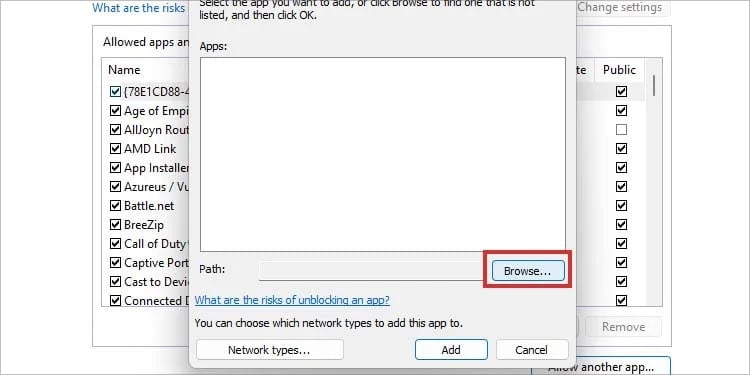
- Click on Browse.
- Find Minecraft’s “.exe” file and select it.
- Then, select Add.
- Select Ok to confirm.
Delete Minecraft’s Folder
You may fix the issue by deleting a particular Minecraft folder, the “.Minecraft” folder. You may erase the corruption and let the game’s launcher deal with it.
In particular, the process will delete all words you have created in Minecraft, which will help the game refresh.
Here’re the steps:
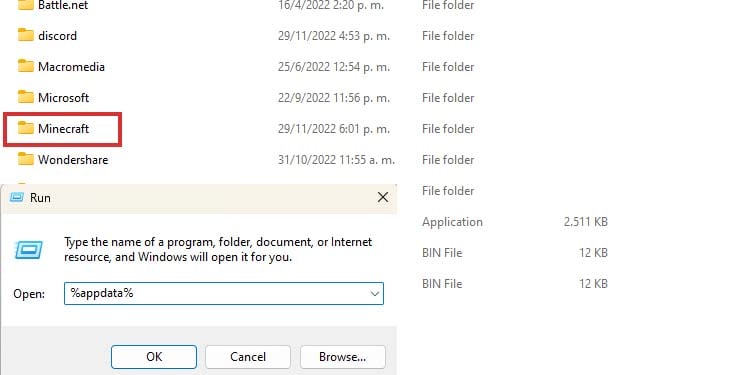
- Click the Windows button plus R.
- Type
%appdata%on the dialogue box and hit Enter. - You should now be in the Roaming folder. Here, find “.minecraft” and delete it.
- Open Minecraft’s launcher and test the game.
Disable Minecraft’s Anti-Aliasing Settings
Minecraft anti-aliasing settings can cause issues with some CPUs and GPUs. As a result, you may see a black screen when you try to launch it.
For example, if you recently updated your operative system or drivers or changed any piece of your PC, this may be the error. Also, if you recently changed Minecraft’s anti-aliasing settings, this may be the error.
So, here’re the steps:
- Make sure the game and the launcher are closed.
- Click the Windows key + E on the keyboard to open File Explorer.
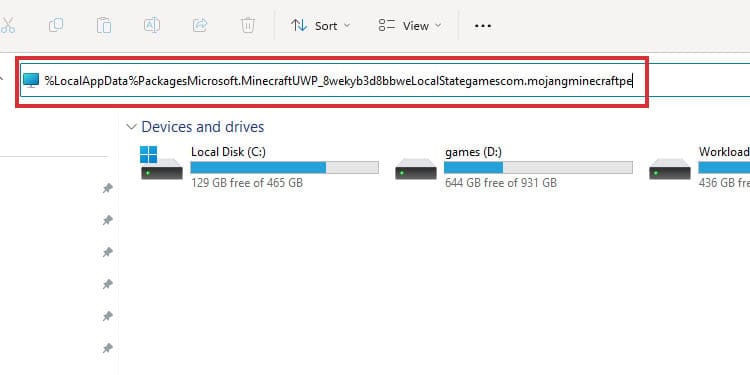
- Copy-paste the following address of the File Explorer’s search bar and hit Enter:
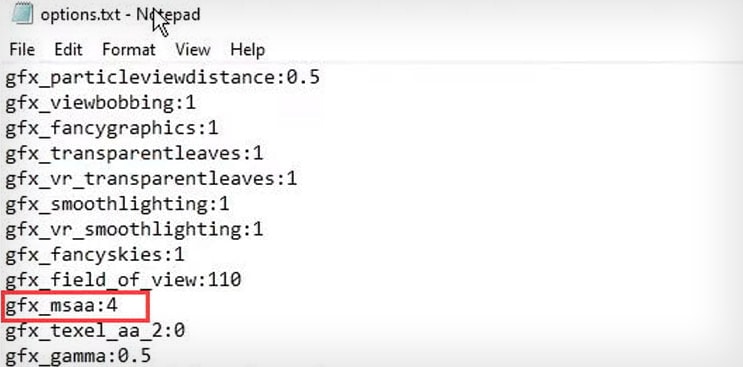
%LocalAppData%PackagesMicrosoft.MinecraftUWP_8wekyb3d8bbweLocalStategamescom.mojangminecraftpe - Open “options.txt” and find the following entry: “gfx_msaa: (numeric value).”
- Change the gfx value to 4. It should look like this: “gfx_msaa:4.”
- Save the
.txtFile. - Launch Minecraft.
You can also delete the “options.txt” file and then relaunch Minecraft. The game will generate a new file and set default values.
Uninstall or Disable Third-Party Apps
Additionally, third-party apps may be causing issues with Minecraft. Some of the programs presenting troubles include:
- Lighting or RGB software
- Razer synapse
- Other game launchers like Steam
- Hacking software
- Third-party programs related to Minecraft
The solution is uninstalling or closing these programs as you use Minecraft. So, you can try closing these apps, restarting the PC to close these apps, or uninstalling these apps from your PC.
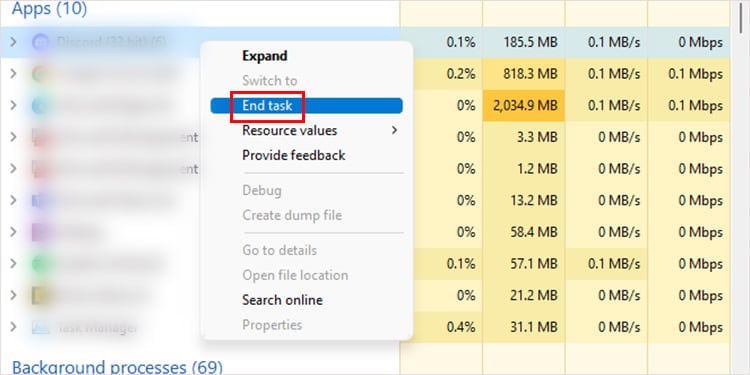
First, let’s use the Task Manager to force quit the apps.
- Click CTRL + ALT + DEL on the keyboard.
- Select Task Manager.
- Find the third-party software you want to close.
Right-click the software and select End task.
You can also uninstall all third-party apps. You don’t need to run Minecraft without issues. Here’re the steps:
- On the keyboard, press the Windows button + X.
- Select Apps and features on the cascade menu.
- Search for the software you want to uninstall.
- Click “…” (or “Advanced options” on Windows 10) and select Uninstall.
Reinstall Minecraft
If all else fails, uninstall Minecraft (like in the steps above), and then download and install it again. It will reset the game to default.
Once you install it, though, make sure to:
- Enable compatibility mode.
- Enable administrator rights.
- Add it as an exception on the antivirus.
- Allow it through the Firewall.
- Disable or uninstall all unnecessary third-party apps.
